Replacement Parts: Standard Motor Products Part #US 84 Ignition Switch Commutateur/Interruptor). Standard Motor Products Lock Cylinder #US24. Originally used in ’68 GM’s.
Key Cylinder core must be removed before the ignition cylinder will release. Turn key CCW to accessory detent. Insert a paper clip into the hole to the right of the key slot. Feel for the peg to “give” as spring is compressed. While pressing the clip, turn-key slightly CCW and pull out core. You may want to peer into a tiny hole to be sure peg is aligned before pushing a paper clip.
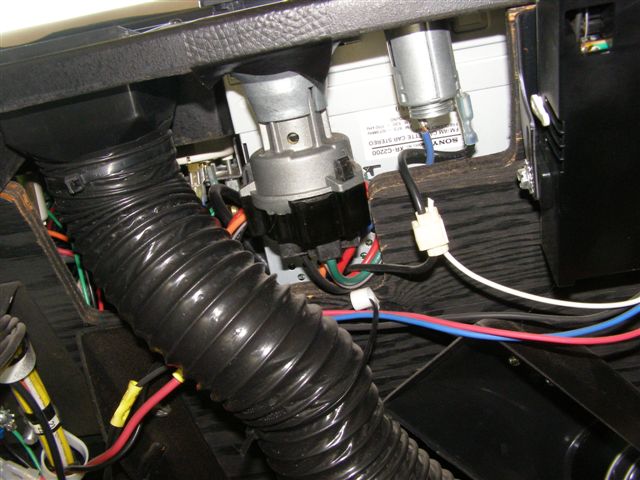
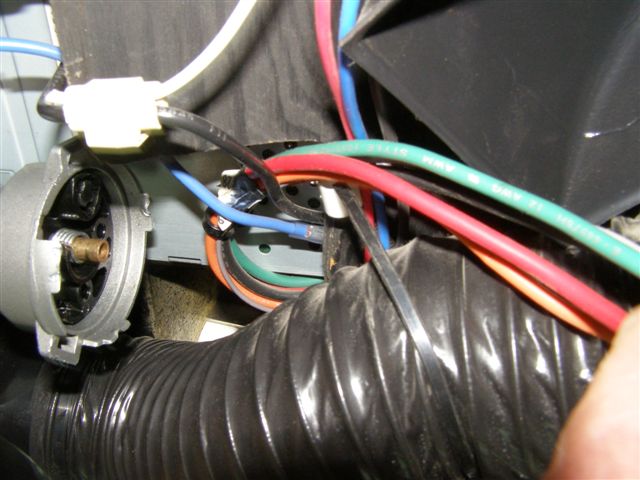
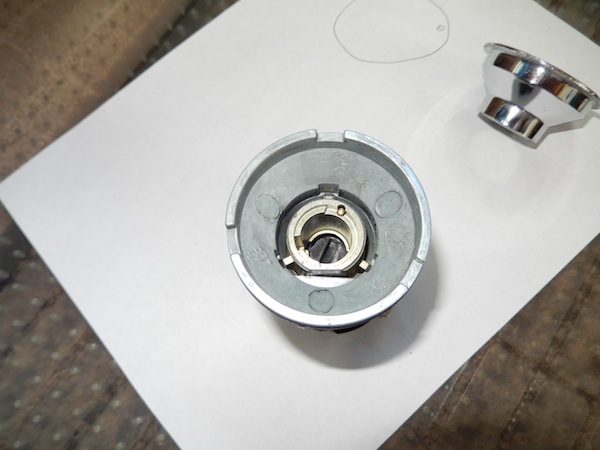
Find wires under the dash; while pushing tabs, pull just outermost (light gray) disc, which contains female slots. Pull female disc away from the black plastic cylinder that is connected to the pot (cast) metal ignition cylinder.
Once wires are disconnected, turn ignition cylinder CCW while holding a chrome ring with fine needle-nosed pliers.
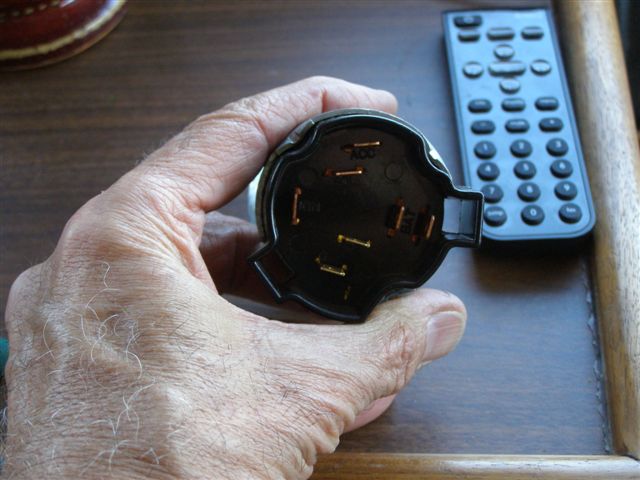
To install a new switch, screw new cast metal into chrome dash ring fairly tight; then insert new key core, aligning peg with a tiny hole in key core face. After the core is in, plug wires into the back of the ignition cylinder.
Insert key and try to start the engine. Dash lights and the engine should come on.
If successful, finish tightening the chrome ring.
To check fuses, lift dash cover; get tester; connect ground; then take point and touch to a bare spot on the back of fuse. If the light comes on that side of fuse is good; go to the other side and repeat.
It took less than 10 minutes to install the new ignition.
By: Don Hay 7/31/2009
I would hook up a voltmeter to the SIGNAL WIRE (small positive wire) on the ignition solenoid.
Next time it fails you can easily determine the cause:
No 12 VDC with the key turned on = ignition switch problem.
Yes, 12 VDC with the key turned on but dash not functioning = ignition solenoid.
Note: some ignition solenoids have one small wire– it will be the positive signal wire.
Some have two small wires– the second will be the ground wire. if only one small wire, the unit grounds through its body/connection to metal ground on chassis. Brett Wolfe
I replaced the Switch from Ryder Fleet Products for about 20.00 including a new key and cylinder. You can just get the switch alone and use your cylinder. To remove the cylinder, turn the key to accessory and insert a paper clip into the small hole which will allow the cylinder to come out. The switch can be unplugged and the trim ring (recessed) can be removed by wiggling the back of the switch in a rotating manner till it allows a little slack to remove the trim ring, or a pair of pliers can be used to grip the trim ring. I recommend getting the complete set with two new keys as it is just about the same price. Any NAPA or CARQUEST will have the assembly in stock if you take yours in they can match it. I don’t have the number for the switch, but I believe it was an AC Delco Packard style. As long as the back pins are the same number and location, the switch will work.
I would get a switch ASAP as mine went from the dash not working to not starting in about 3 days, Contact cleaner is not going to fix the problem, as the switch is sealed and most assuredly the contacts are burned or broken
YouTube Video on replacing Ignition Switch by Greg Jones 1995 280 Se 8/4/2009
We replaced our ignition switch because of an intermittent problem when turning key to start – nothing happened. Even though the switch is original, we are not sure it had a problem, but we replaced it anyway.
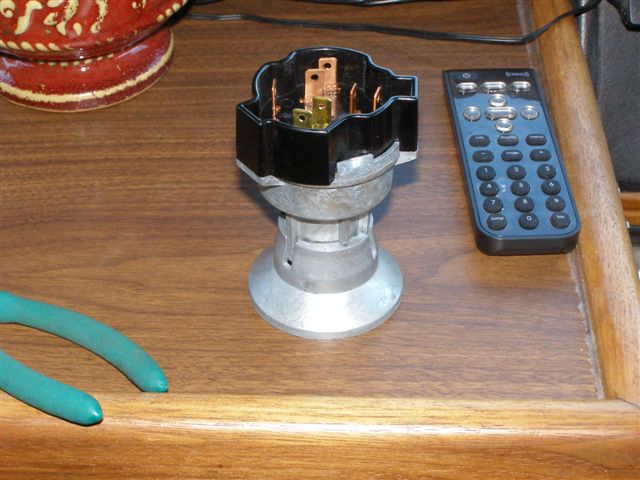
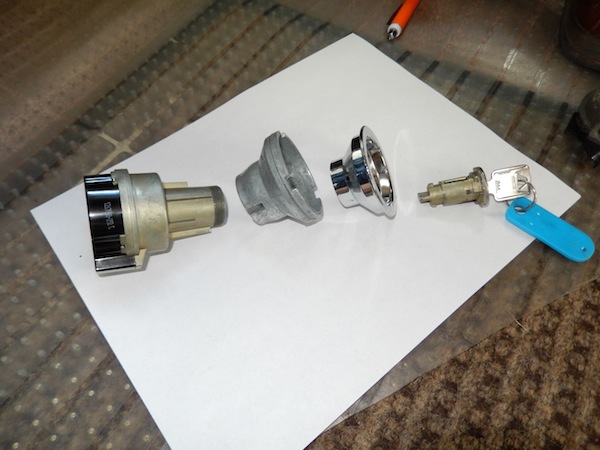
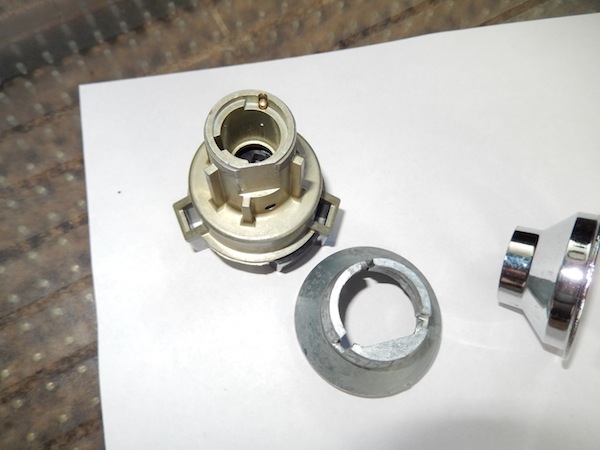
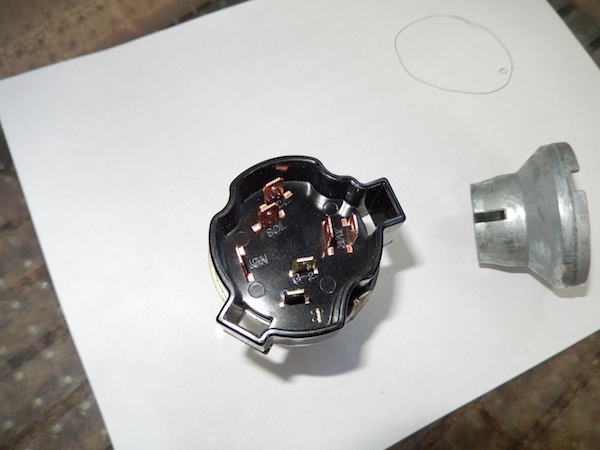
The ignition switch has 5 parts: key cylinder Napa KS6491, chrome ring OER 3918893 Bezel Nut, rear wide cast adapter, switch Napa KS6603, wiring plug. All parts are reused, except switch. New switches come with or without a new key cylinder. We reused our original key cylinder after applying a little graphite.
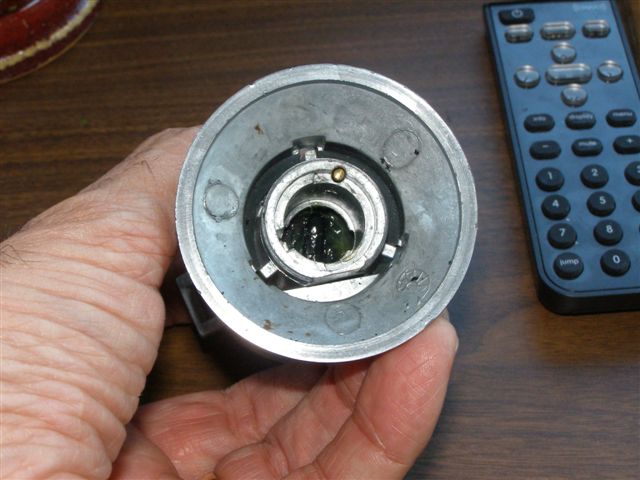
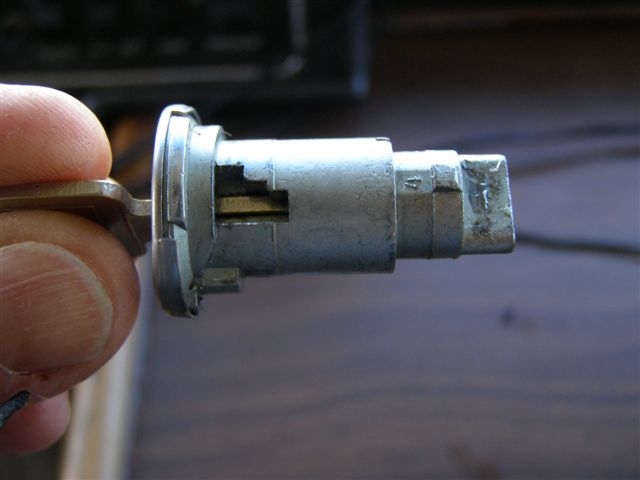
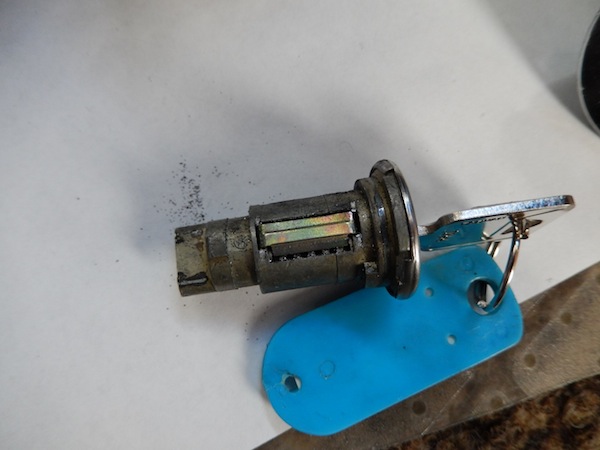
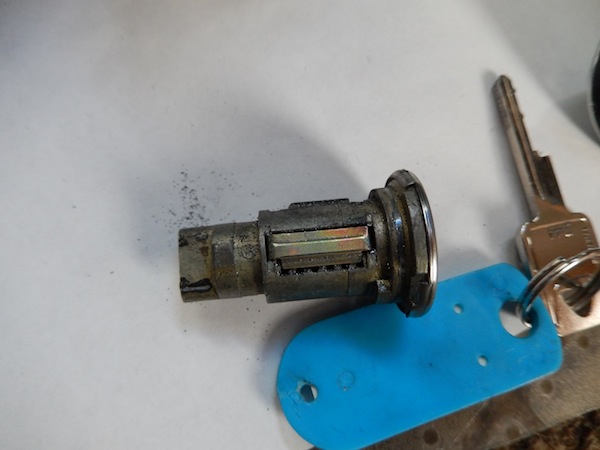
The key cylinder has a collar that prevents the chrome ring from being removed. Note the position of keyway & small hole so cylinder can be re-installed in the same position. Rotate key cylinder CCW to the accessory position, insert a paper clip in the small hole to press spring-loaded pin while turning key CCW, pull the cylinder out of the switch. The rear of the cylinder has two ears that fit into switch groves that only release when fully turned CCW. The paper clip is not needed to reinstall the cylinder.
The key cylinder has a sidebar that sticks out when the key is not in the lock. This bar fits into a long grove in the ignition switch, preventing turning on ignition switch without a key. When the correct key is inserted in the cylinder the bar collapses into switch allowing the cylinder to rotate.
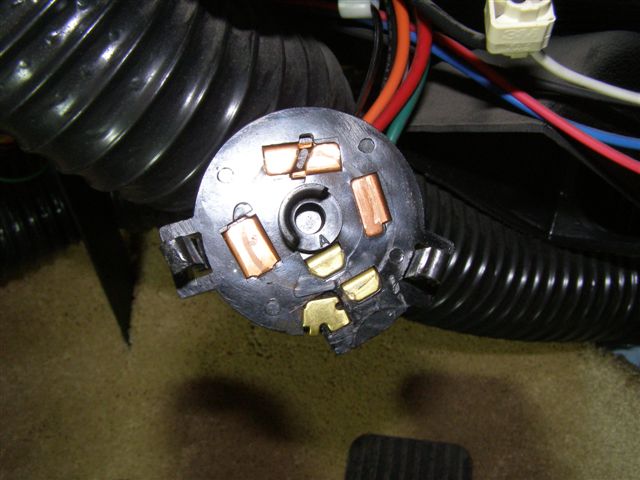
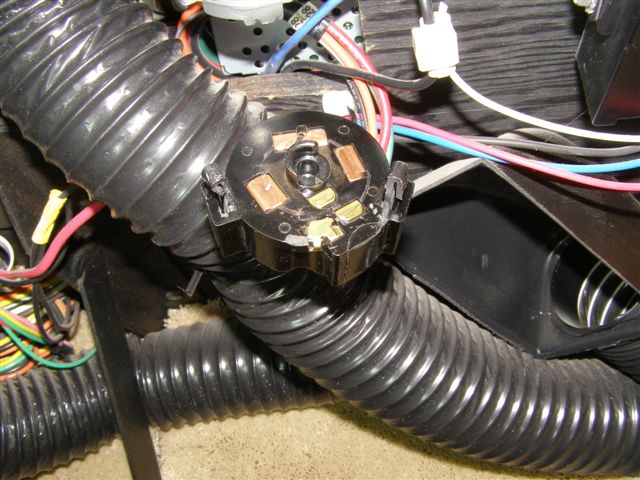
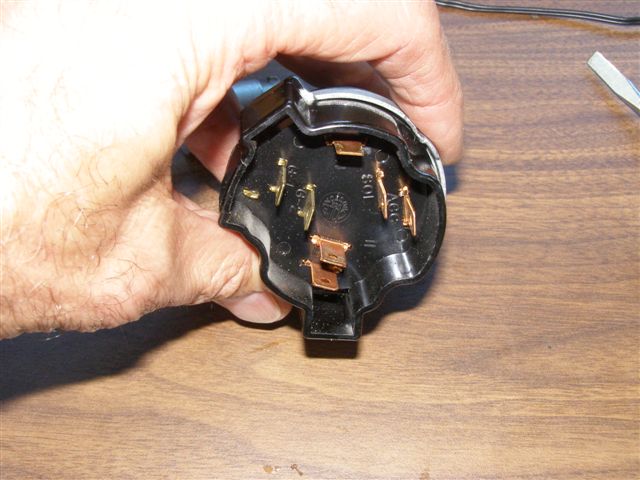
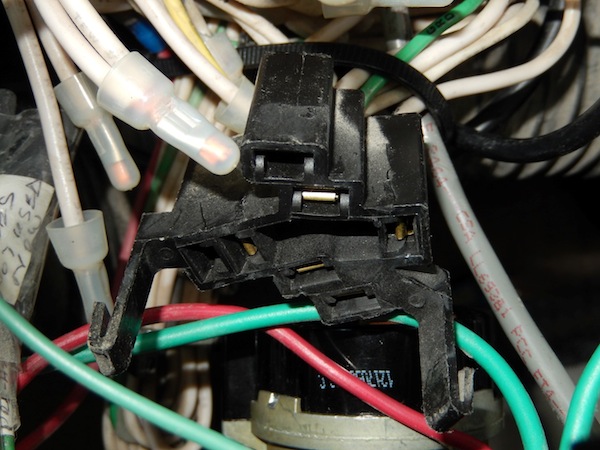
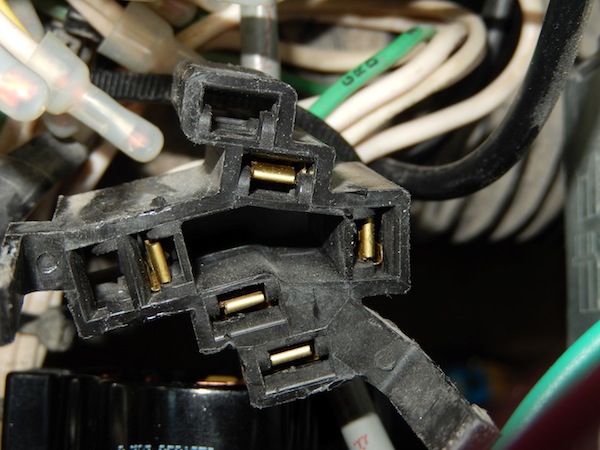
Wiring plug behind dash has two large forward-facing black plastic hooks/tabs that must be released to pull wiring plug off the ignition switch. Of the 4 connectors on the ignition switch, our coach did not have a wire to the ignition switch accessory connection and did not have a wire to the outer battery 2nd connection.
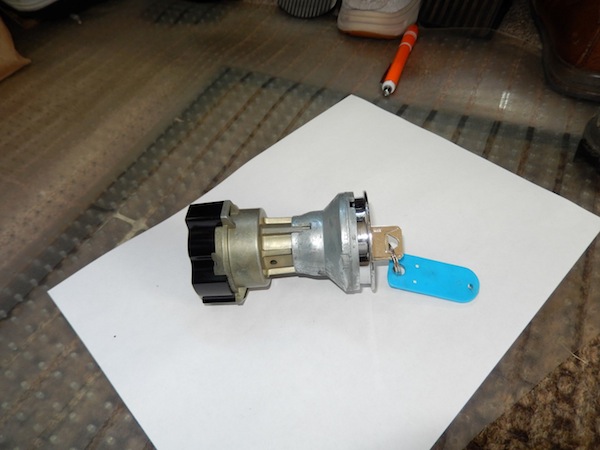
While using a flat screwdriver in a grove to hold the outer chrome ring from rotating, grab switch by hand or tool, rotate switch CCW to unscrew the switch from chrome ring.
Rear cast adapter slips off the ignition switch and can only be installed in one position. We had to file away some metal on the adapter so it would easily slip onto a new switch.
By Barry and Cindy 1997 U270 36′ 5/11/13
The switch in our 97 U270 is from a 67 to 72 chevy C1500 pickup. Bill Willett 97 U270