The doors are compression molded and there is no way to get behind the inside surface. You will need to grind out the fiberglass where the rivet pulled out.
There are numerous fiberglass repair products that can be used but, an easy product is kitty hair. It a fiberglass resin containing glass fibers.
Fill the hole you ground out, file the filler level when cured, drill and install another rivet.
When I did a similar repair I embedded studs in the repair so the bracket could be re-attached with nylock nut. Good luck, the smell is great… Ron Bowden – ’97 U-320
I was able to accomplish the repair without removing the door. I just removed the two struts. They are held on to the ball joint by a spring clip that circles the attaching rod about 3/4 of the way around. In the closed position, it is what holds the rod to the ball socket. Disconnect them by prying the clip partially out from the back until it releases from the socket; then slide the rod off. Strongly suggest holding a finger over the clip so it does not come all the way off.
I wound up using regular JB Weld. I will explain and illustrate what I did and how I did it. In the process, I came up with some more questions/comments about the original installation of the latch assembly in this bay door.
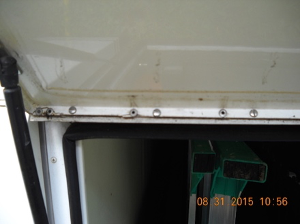
Picture 1 shows the latch area on the door. I had already removed the gasket/rubbery material from the fiberglass surface. Note that the fiberglass around the holes had popped out. Some of this came off with the “gasket”, but I suspect most of the damage occurred in the process of the latch and its rivets being pulled from their mooring.
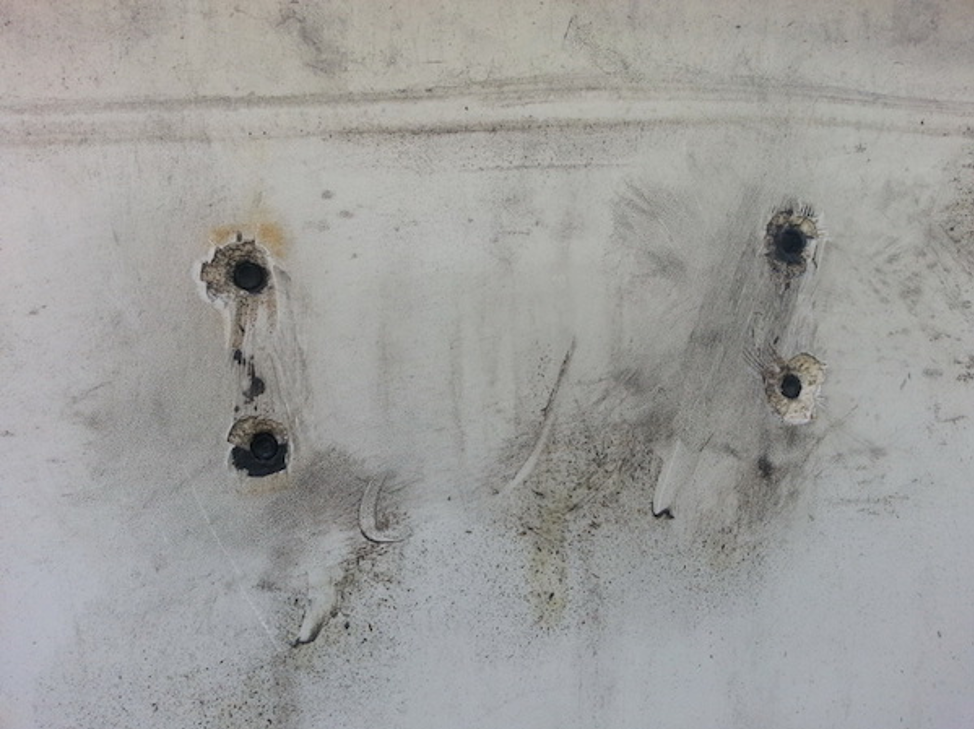
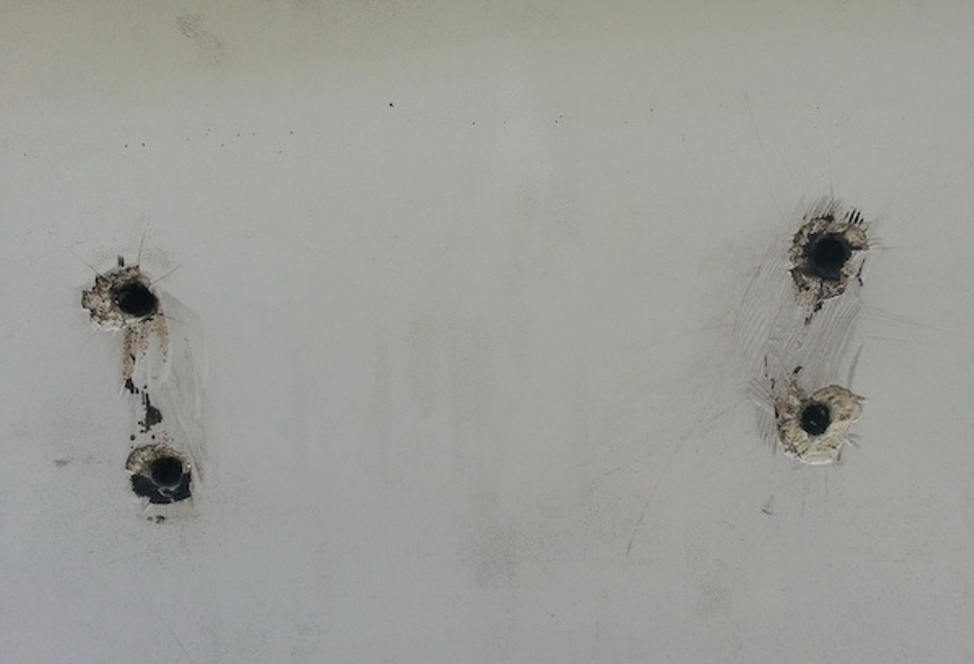
Picture 2 shows the latch area after cleaning the area with Wash Wax All Degreaser. The holes still have a rubbery substance that seemed to be a layer between the outside and inside door panels. This was extremely hard to remove. I wound up using drill bits held and turned by hand because I was afraid an electric drill may get away from me. I also used a pointed pick (part of a set of four) that had something of a twist shape. This let me get it in and under the rubber to try to pull it out. It could be that this was not a layer, per se, but something that was injected into the holes during the assembly process. The rubber pieces appeared to be a round cylinder, probably inside the rivets at one time.
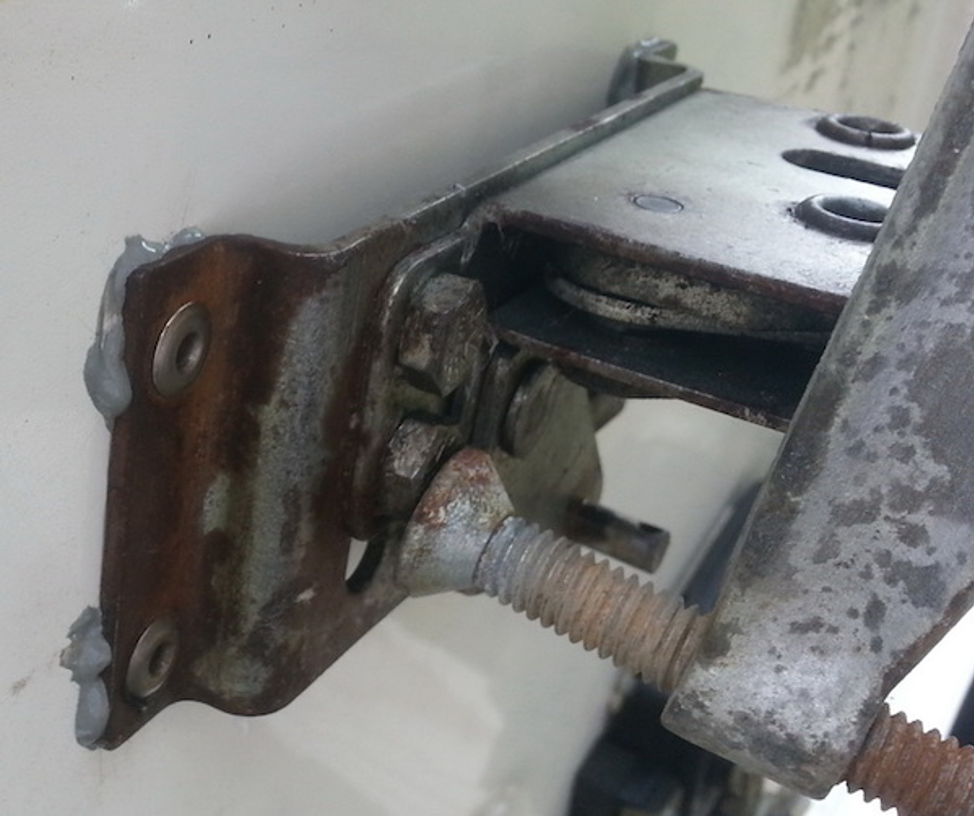
Picture 3 shows the latch assembly with the rivet heads still attached (green circles). I do not know how they were still attached but seemed to be very secure.
Picture 4 shows the back of the latch assembly with the four rivet bodies (red circles). A close look at these reveals almost NO shoulder. IMHO this latch was ready to come loose from the day it was installed! If the rest of the latches are attached the same way, we can all expect to have them come loose on us; it is just a matter of time.
After cleaning out the rubbery substance from the holes, I had expected to have to drill the holes larger. This was not necessary as the lack of a substantial shoulder allowed the rivets to fit into the holes after they were cleaned out.
Picture 5 shows the latch attached in the proper location, with JB Weld. I applied it generously to the areas around the holes and between the holes to strengthen the damaged fiberglass. I then attached a couple of clamps to keep the latch secured in its proper position.
Picture 6 shows the door and clamps ready to spend the night curing. Since this repair is important to our future happiness (I am almost out of duct tape), I intend to let it cure at least 24 hours. I expect to be able to reattach the latching lever (post with a cotter pin) and the rod from the remote locking mechanism. We hope to be able to enjoy our Foretravel travels without worrying about a bay door flying open.
The rivets are the original (failed) rivets. They appeared to be firmly attached to the latch bracket; I don’t know-how. As you can see from the pictures, they had not expanded very much at all.
The JB Weld is all that is holding the latch assembly in place now. Based on my experience, that should be enough. I put enough JB Weld into the holes to reinforce the remaining fiberglass and to grip the old rivets. If I am right, I hope that I never have to replace the latch. (Actually, I think the latch mechanism attaches to the bracket base with three bolts, which is how it is adjusted if needed.) Trent Eyler 2000 U295 40′
I re-seated my rivets also on 2 bay doors. Here is my solution.
I used white 2 part stick type epoxy from either Walmart or an auto parts store (I don’t remember) but the epoxy is a marine-grade white stick epoxy about 5 inches long and 1-inch diameter. For emergencies, I carry one stick of white and one grey two-part epoxy packs. They will fix anything from water to oil leaks to broken parts.
On two of the latches, I just filled the existing hole with epoxy and re-seated the loose rivet into the epoxy.
On another, I filled the hole with epoxy then re-riveted the fitting while the epoxy was still hardening.
Both have been fine for over 2 years now with no sign of loosening. The nice thing about using the while epoxy is that the repair is completely invisible with no painting needed. Much quicker and easier than re-fiber glassing and painting to match.
As stated above, you could epoxy in bolts to use nuts instead of the rivets. Greg Jones 1995 280 SE
An easy repair solution for both the door lock mounts and anything else that is attached to the bay doors is to get some aluminum plates cut at your local metal shop or HVAC place and then drill two sets of holes in them.
One set for whatever you want to secure to the bay door, and the other set to secure the plate to the bay door.
The aluminum plate will be of a size that will cover up the nasty holes from the previous mounting, and provide a firm, rustproof mounting for whatever hardware you are wanting to remount.
Rivet the attachments to the plate and then rivet the plate to the door. It works great for me. YMMV John Twork – 1996 U270-36
I repaired one some years back, opened the door, pulled the panel back in position, clamped with a vice grip, drilled holes for 10/32×1/2 inch stainless steel button head screws with washer, lock washer, and nut, no problem so far.
Bill Willett 97 U270 36′