When my coach was about a year old, the green polarity testing bulbs had grown so dim it was really hard to see them. Foretravel replaced my whole monitor on warranty, but admonished that “they all do that”.
To prevent a recurrence, I replaced the bulbs’ series resistors with ones 10 times the original resistance. This made the bulbs somewhat dimmer, but still very useable. Now about 8 years later, they still work fine.
Also, the voltage readings were close, but not very accurate. I found trimpots on each half of the monitor that adjusted the voltage readings. I set them as closely as I could to a reading from a good DVM.
If your readings have changed a lot, there probably is a reason, however, there is a good chance you can readjust the meters back to the correct readings using these trimpots. It’s worth a try. If the readings still keep changing, then you could look for a new unit, or possibly just adjusting them would make the unit workable until you can find a replacement.
If you decide to do this adjusting, just plug in one side of the meter at a time, and be very careful, as there are 120 volts all around where you are working.
As I recall, the pots are on the circuit board that is exposed when you remove the electrical box from the rear of the monitor.
And no, I did mean increase the resistors to dim the bulbs. The original bulbs wore out in less than two years due to being overdriven (my theory anyway). When I received a brand new unit I decreased the current significantly to allow a longer bulb life. It seems to have worked, as they are still about as bright 8 years later as they were when new.
These are not LED’s, they are a neon bulb that apparently has a phosphor in it to glow green. I am sure they would be replaceable if you can find them. I suspect that you could, if nothing else, get bulbs from a power line tester and put them in.
I have no idea where you would ever find a replacement board.
I have done a lot of searching on the Internet looking for a suitable replacement bulb for the line monitors. It appears that what we want for an exact replacement is an ne-2g bulb.
I found these offered by several Chinese distributors with a minimum order of 10,000 pieces – a little too many for me! It may be that an appliance repair outfit would have some, as they are used as pilot lights for a number of small appliances.
One source said that the Radio Shack Green Neon Lamp Cartridge pn 272-708 contains a similar bulb, but I cannot verify that. If you are satisfied with an orange color lamp, the ne-2 or ne-2h bulbs are much more available. These are what are in all the inexpensive line testers I have found.
The basic problem with all these bulbs is that they typically list an average life of 25,000 hours. This sounds like a lot, but if you keep your coach plugged in all the time, it is less than 3 years! Because of this, I suggest making the series resistor as large as possible while giving an acceptable brightness of the bulb. The larger the resistor, the longer the life. I replaced mine with 10 times the resistance and they still look good after 8 years.
If mine ever goes out again, I think I will replace them with green LEDs, which would require adding as a minimum a series diode and changing the series resistor.
I finally found a source for the ne-2g bulbs for our power line monitors! It is All Spectrum Electronics in Van Nuys, CA (www.allspectrum.com). Under the topic of NEON LAMPS, they list about 10 different sizes and lead length combinations of the green bulbs. I would have to open my monitor and measure the existing bulbs to verify the correct one. Prices run around $0.50 each, varying a little by the exact bulb.
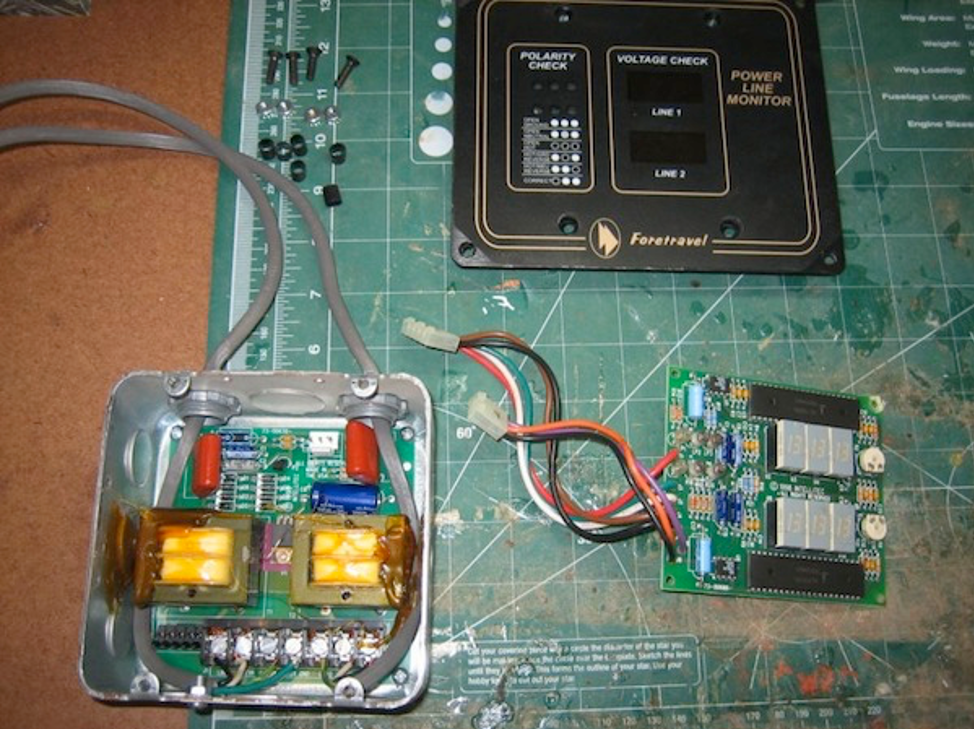
OK, I went out and pulled my monitor out and opened it up.
The steps to open it are:
1 Remove the front panel from the electrical box – 4 screws
2 Unplug 2 cables from the front panel to power supplies
3 Remove 4 hex nuts and remove the board from the front panel
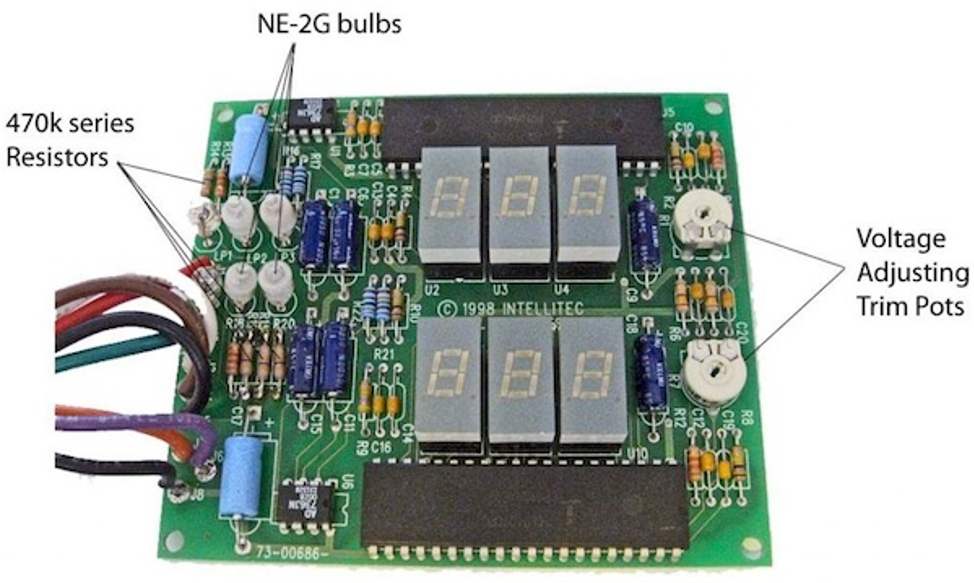
The 4 NE-2G green bulbs are 6 x 12 mm. There are also 2 plain NE-2 (amber) 6 x 12 mm bulbs for the open ground indication. I didn’t touch the circuit of these 2 bulbs as they are almost never (hopefully!) lit, and should last forever.
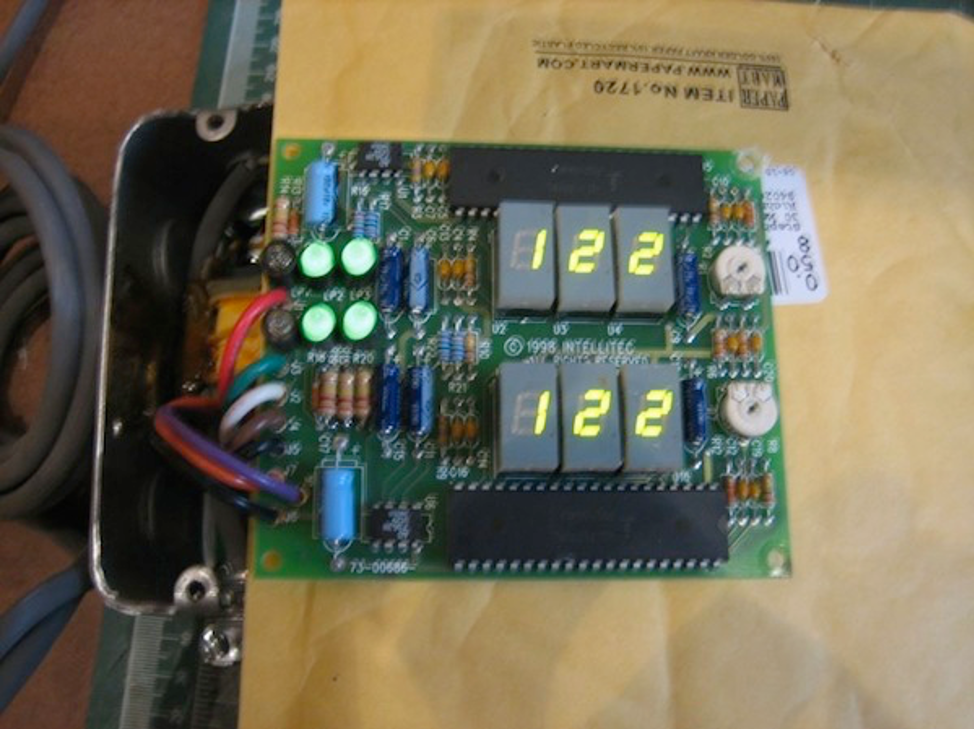
I replaced the original series resistors with 470k for long life and not too dim a bulb for the 4 green bulbs. Before you change these resistors, you should follow the traces and verify that your board layout is the same as mine (2000 U-270).
The attached photo shows these as well as the adjusting pots to calibrate your voltmeters. Just be careful of the high voltage, both as for shorting anything while it is hot, and coming into personal contact with any high voltages!
They are soldered into the PC board. It is fairly delicate work. If you do not have experience working on delicate electronics, you should find someone who has. Dick Mason 2000 U270
I would like to give a huge round of applause to Mr. Dick Mason for all of the correct information needed for the repair of the power monitor board. I have never worked on a circuit board, but, with this information, I now have nice green lights in all of the correct places.
Approx. 90 minutes of working time. Cost less than $10. Again THANK YOU. Gary Karnes 1999 U295
Count me as another satisfied customer… I just finished updating my line monitor in our 2003 U320. The circuit board looks to be identical to the one you showed, it was also dated 1998. The only changes on my part were the use of 220K resistors and since I did not want to go back to radio shack I used .5 watt ones instead of the small .25 watt ones. Steve and Michelle Cook 2003 U320
Taking the old line monitor apart is very easy.
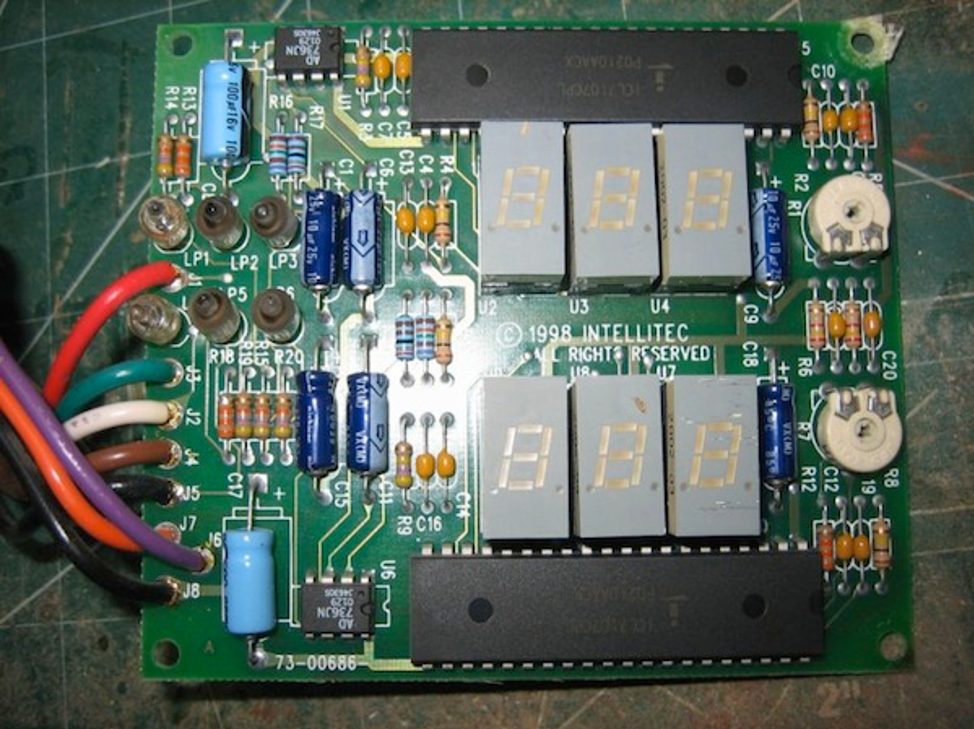
The main circuit board before I got my soldering iron out and removed the 4 ‘dead’ lamps and 4 47k resistors
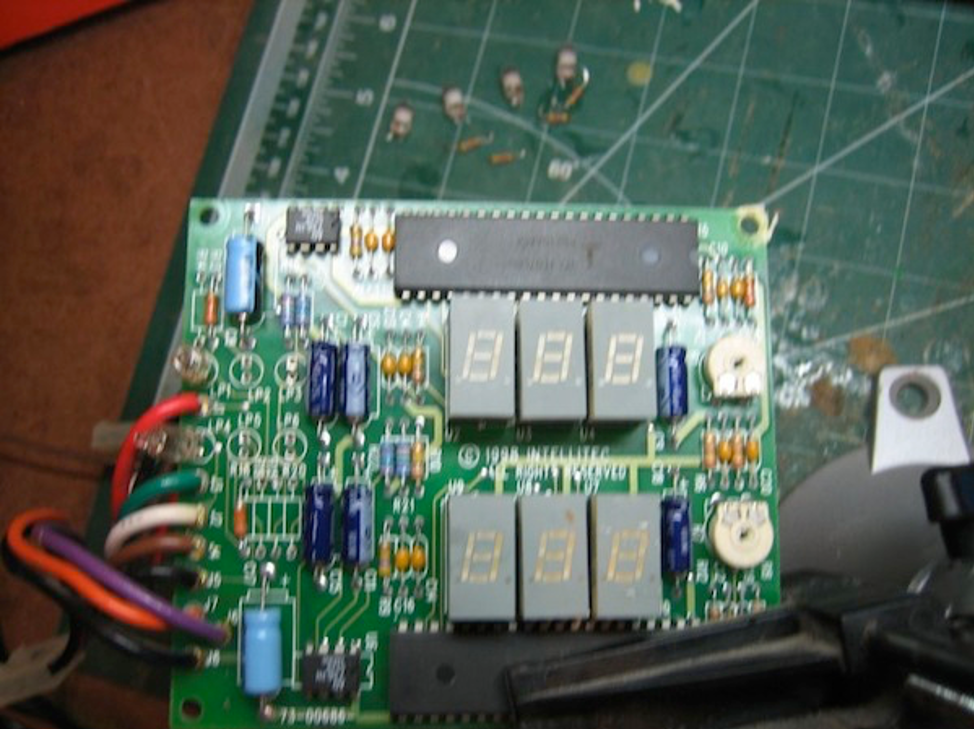
Not a great picture but here I have removed the old components. This was the most difficult part of the entire process.

All the new components have been installed. Yes I used .5 watt resistors where they should have been the smaller .25 watt ones but they fit just fine. Also, I used 220K resistors in place of the original 47K ones, Dick used 470K, ones to get this level of light, choose what you like.
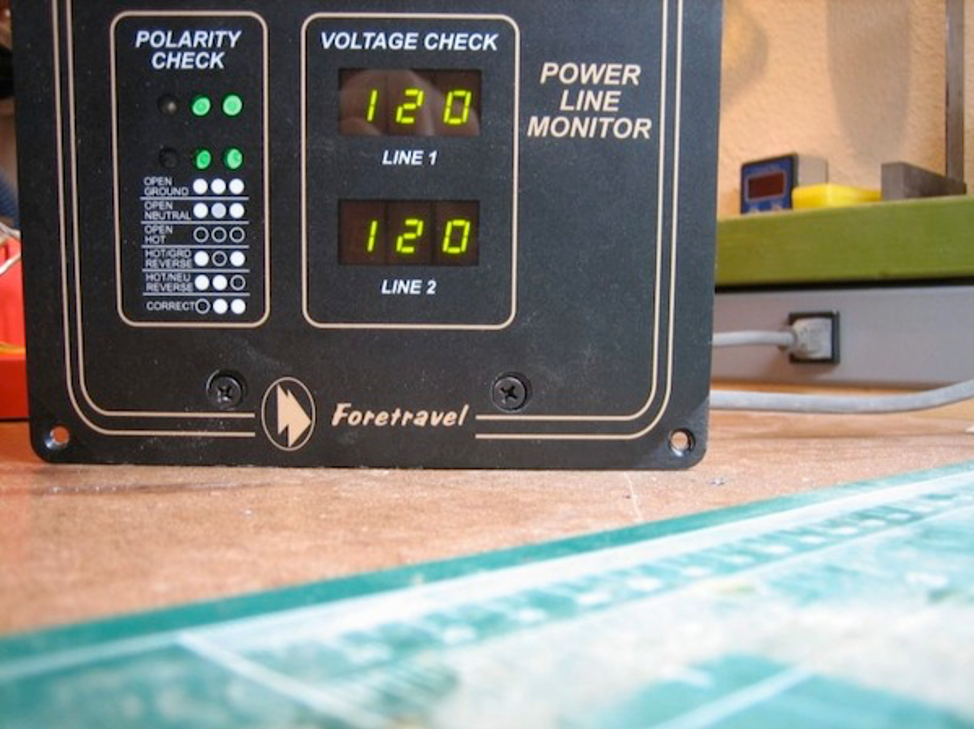
Quick check to make sure there were no mistakes, also a chance to see what the monitor said vs my DVM. DVM said 120 so I tweaked the pots so the monitor also read 120
All put back together and ready to go. If your 7 digit LEDs are also going (assuming its not the power supply) those are very easy to replace as they are in sockets. I just reopened my case to get the PN of the LEDs and they are Kingbright SA03-11GWA. Found them on digikey.com for $1.24ea (you will need 6 of them)