by Barry Beam 2003 U320 40′
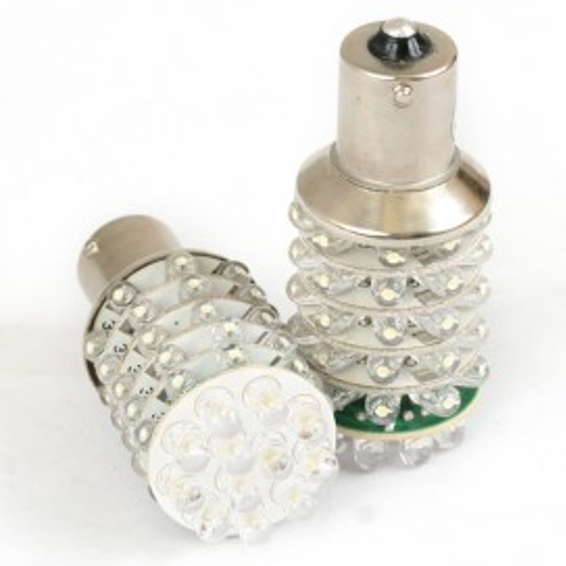
I replaced my interior lights with LEDs. Replacing all of the round halogen lights with LED lighting reduced the power usage to about 1 replaced halogen bulb. I removed the interior reflector of the round ceiling light as it was not needed and gave it more room. They just pop out with tabs.
Purchased from http://www.rvspecialthings.com/LEDlights.html
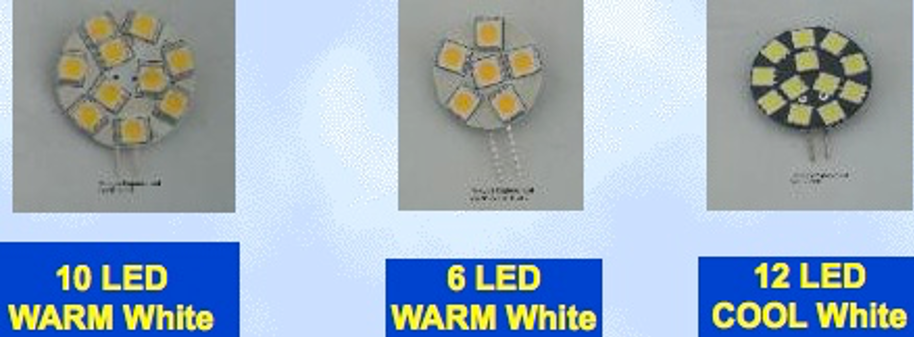

For those looking into LED replacement interior bulbs, you’ll want ones with constant current driver technology to ensure long life and consistent brightness when operated on the coach’s 12V house system
Why Drive White LEDs with Constant Current? – Application Note – Maxim
Unless stated (and/or the specs show a voltage range, say 8-20 Vdc), assume LEDs don’t have constant current circuitry.)

75 LED F15 T8 Replacement
Wiring the LED tubes to the Flourescent fixture. You need to remove the ballast.
Here is how I wired mine
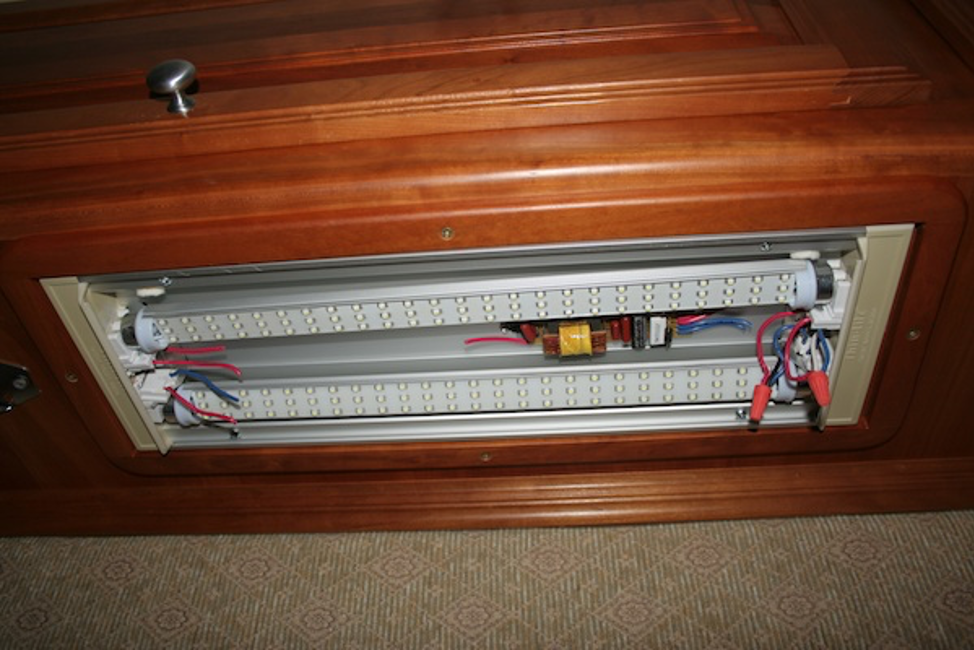
Cut all the wires to the Ballast out.
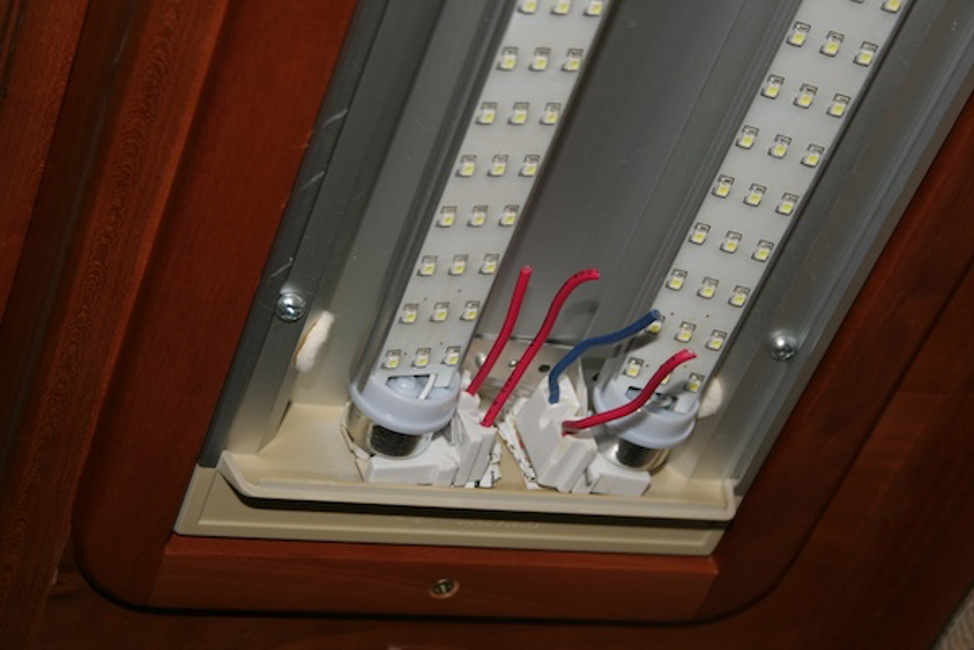
One side of the bulb will no longer be connected. It is not needed.
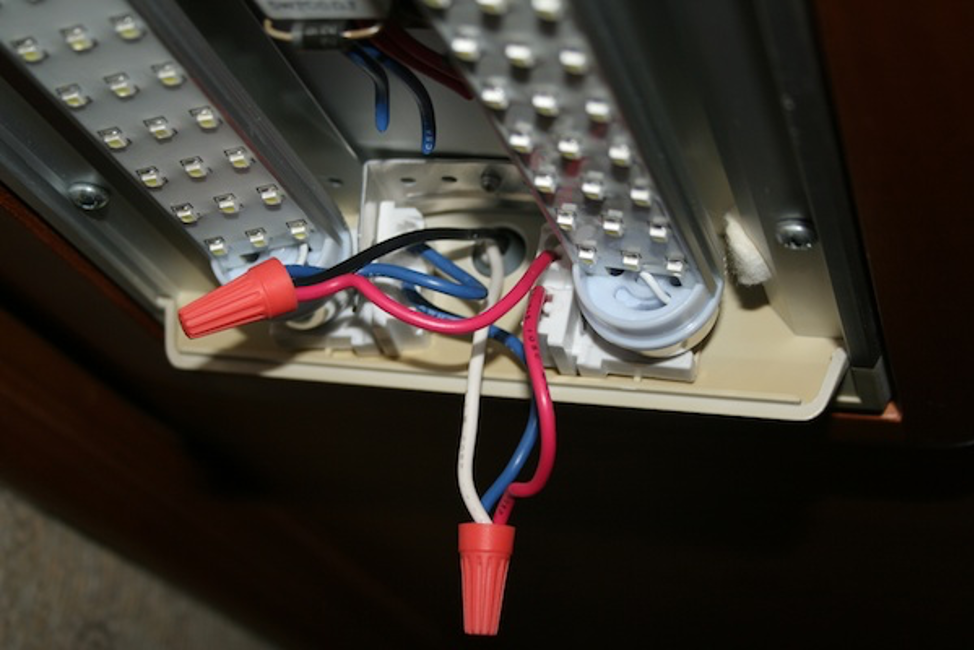
Now you have your incoming 12vdc wires (Black & White) 2 red wires from one bulb & 2 blue wires from the other bulb.
Connect 1 wire from each bulb (Red & Blue) together with the Black wire.
Connect 1 wire from each bulb (Red & Blue) together with the White wire
LED Light Conversion by Pierce & Gaylie 93 U300/36
I just finished the LED conversion of most of the interior lighting on our U300. I am including several addresses where I bought the materials and photos on this post as well as others on our Picasa site.
I tried to research what I would need and educate myself as best as I could before starting. Thanks to good advice (can’t remember your name, sorry), I ordered warm white at approx. 3000K. This really saved the day!
I ordered two 5-meter (16.4 feet) rolls of 600 LEDs in warm white 8 mm wide. They use 48 watts for the 5 meters or about 3 watts afoot. The price was $27.96 for each roll delivered (about two weeks). I was going to go with 300 LEDs per 5 meters (60 LEDs/meter) but thought they were optimistic about how bright they were. These strips only use 1.5 watts/foot. I also ordered a push on electrical connectors but decided to go with soldering instead. Note: these come with double-sided sticky back tape. For more info on the LEDs, go to: eBay
The first thing I did was to remove the fluorescent light assembly and then using the right angle drill in the photo, drill out all the pop rivets and remove the starters, tubes, etc. Cleaning with Mr. Clean works well on the painted lights. A couple of lights were anodized aluminum and needed cleaning plus sanding to get the LED strips to stick well.
Using the blue box cutter, I separated the Euro connectors so two could be installed with a screw from the backside. I cut and tinned light gauge red and black wires to go from the LED solder joint to the connector. The LED strips are good to three seconds with a 30-watt soldering iron but I found after tinning the leads, I could get a good solder joint in about half a second. I used the wire stripper in the photo as it does an exacting job without pulling on all of the wire.
All of the work should be done with the light fixture in front of you so when you have to work upside down to reinstall it, the only things you have to do is find the old screw holes and feed the supply wires into the Euro connectors.
Several light fixtures are in two sections. After cleaning, I found I could reinstall the clear plastic lens and slide it down so half was on each side of the joint. This makes it EZ to attach the LED strips and stabilizes the two-piece assembly. Place the entire light on a flat surface to do the work.
The clear lens will not go the entire length because the solid piece above the starter has been removed. A couple of lenses will have to be ordered. The source is in Flagstaff at The Thin-lite part number is in the 170 series printed on the back of each light. They also have a clear lens to replace the amber one on the outside entry light. Trim to length with a very fine-bladed saw.
The LED strips can be cut on each line with a sharp pair of scissors. I bought a roll of heavier red/black wire to go from the passenger’s side to the under cabinet light on the driver’s side. Both now turn on from the switch above the entry.
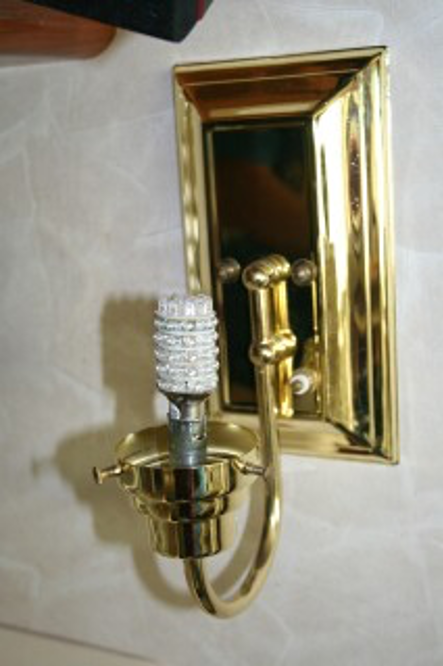
The entry light fixture was replaced with a 120V fixture and modified to 12V MR16 base and MR16 warm 4-watt spot. The same was done for a reading light on the other side controlled by the old switch for the under cabinet light.
Note: MR16 bulbs may vibrate and fall out after driving for a few weeks. Could lock-in with a dab of silicone or an expanding wire retainer placed in front of the bulb.
Reading lights replaced by flex LED lights in the stateroom and for driver and passenger. USA seller on eBay. Only available in 6500K temp. See: [New LED flexable 12 volt reading light 18 inch items in justmikes1955 store] The short lights are good except passenger may be better with the 18” with the 90-degree head at $18.99.
Larger, 10mm (1cm) LED strips are available.
The next project is to convert the ceiling fluorescent lights. I want them all to operate off one switch but will be difficult as center light wiring goes to the driver’s side above the sink.
Overall, this conversion works great! Once you get the hang of it, each light takes about fifteen minutes. They are brighter than stock and use a little over 20 watts for both sides in the salon. With 60 LEDs/meter, that would be about 10 watts.
Use color-coded wires. I cut off a small section and connected it backward. They don’t work after that.
Order the clamp on connectors rather than the push-on type. I could not get a consistently good connection with the push-on style.
In case the LED stips don’t stick to the unfinished aluminum or start to pull off, use super glue applied with a toothpick. That did the trick.
The blue coach wire is (or should be) the positive. Check with a digital meter if in doubt.
Leave switches off while connecting the final wiring for each light. Check and double-check wiring before switching on a light. Use electrical (Radio Shack) solder, NOT acid core.
If in doubt, order both 300 and 600 LED strips and try them on one light. They could both be installed and switched for high and low.
Dimmer will not work but the on/off function will work on the remote control.
Multi-colored stripes and spots are available with a remote control that will give many different colors.
I can’t see any disadvantages with this conversion. A win-win! Less juice used, instant-on without waiting that split second for the florescent bulbs, excellent color, no heat, 50,000-hour lifespan and it is fun to make the conversion.
The LED strips take advantage of the entire length of the fixture. The shorter the fixture is, the greater the percentage of the length the starter takes. The twin fluorescent lights above the sink used 8 watts each, 16 watts total. I just ran two strips in one fixture and tossed the other so the LED total was about 8 to 9 watts for about a 50% savings for more light than stock. If I had used the 60 LED/meter strips, the draw would have gone down to about 4 – 4.5 watts or about 25% of the fluorescent tubes.
The biggest difference is in the reading lights for the sofa and the reclining chair. The original large bulb light with the shade was impossible to read with (at least for me). The new spot/flood is very bright with excellent color to avoid reader fatigue. At 4 watts each, the energy savings are impressive.
I did forget to say that I mounted all the strips on the “away” side inside the fixture. The idea was to direct a little more light toward the inside of the coach.
I still have the overheads to do. I think that day to day use will determine what works best. It already seems a little more than we need at night but the early evening with fading sunlight may be perfect the way it is now.
Should have added that they are available in waterproof specs for only slightly more and also in a flexible tube for exposed use like under-counter or engine compartment lighting.
After the overheads, my next LED project will be side to side under dash top lighting so with the dash top open, everything will be visible and easy to work on.
Lots more to think about, vanity mirror lights, compartment lights, etc.