by Don and Tys 1999 U270 36′ 6/11/14
I finally finished with the installation of the marine style Danfoss compressor-based refrigerator. I got the new fridge from a local San Diego based Internet retailer (Bay Marine Supply) who had the best prices I could find on a number of items, including a new Magnum inverter. I got excellent service throughout and he was happy to contact the manufacturers when there was a question not readily answered by the literature or his own experience. Even though he doesn’t have a showroom per se, I was able to talk to him face to face and save the cost of shipping by picking up the items including the fridge. His name is Alan and he is (or was) a full-timer with a sailboat.
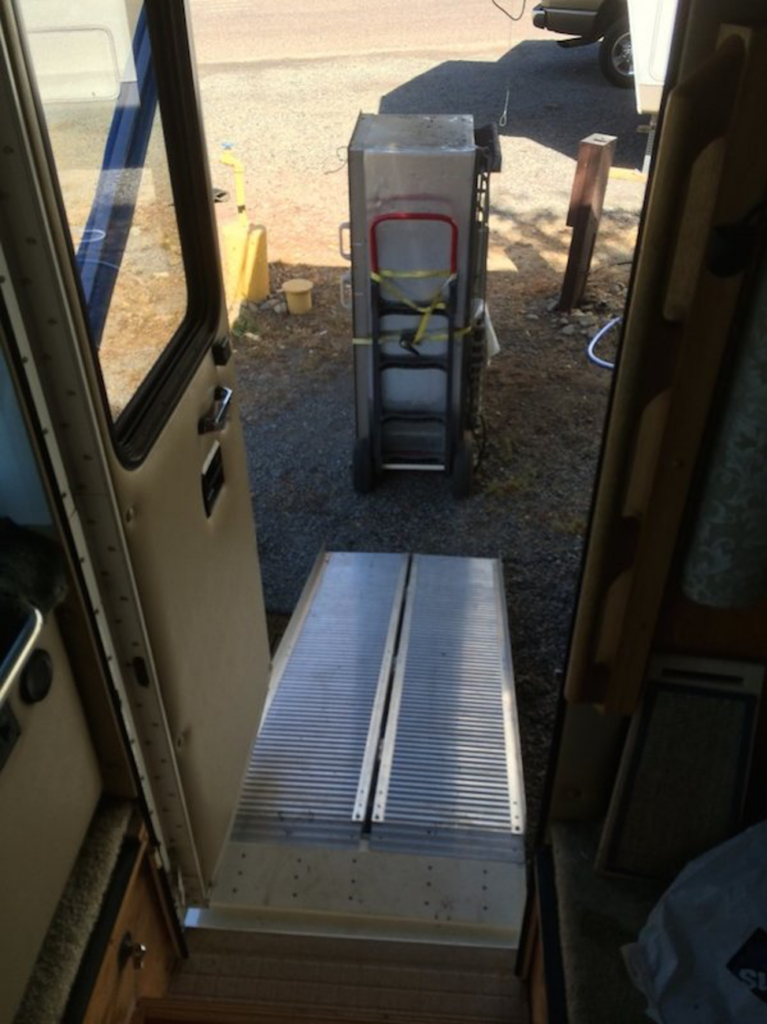
My inability to leave well enough alone resulted in more than a little extra work… The old fridge went out the door on our 99′ coach with just the removal of the screen door and the copilot chair. The new one came in the same way, but with a different method. I managed to do the moving myself as no one was around when I was ready to do it. Not easy by any means, and getting the old one out was by far the most difficult. I didn’t take the doors off, but it probably would have been a little easier. My first idea to get it out was to strap it to a dolly and use a ramp.
The difficulty was to get the fridge positioned in the doorway around the center dash protrusion. Anyway, I ended up placing the fridge and dolly combo upright on the extended step cover (blocking the doorway of course!) and then shimmying out the window to address the situation from below. The ramp was positioned on the bottom of the coach’s stepwell leaving a vertical gap of about 20″ or so above the ramp. The old fridge just cleared the top of the doorway, but couldn’t be tilted back because of the dash protrusion. I ended up putting a sturdy plastic crate at the top of the ramp and working the fridge (still attached to the dolly!) on top of it. This actually worked pretty well and I was able to slide the fridge down the ramp on top of the crate. A F I K, there are no videos this operation posted on YouTube for that I am grateful…
Anyway, the bottom line was I got it to outwit out damaging anything. I put the fridge out in front of the coach with a free sign on it, and within 15 minutes, someone claimed it. I plugged it into A/C and gave it 12VDC to be sure it survived the extraction (think tooth extraction…) and was pretty cold within an hour. The new owner is a happy camper and I was glad to be rid of it.
The new one was much easier to move in than the old one was out for two reasons. One because it was almost 8 inches shorter, and two because I used a harbor freight lift table to transfer it horizontally onto the step cover. From there I just walked it corner to corner on a piece of cardboard until I was clear of the dash protrusion. I used a furniture dolly and an old milk crate and a few pieces of 2 x 4 create a platform about the same height as the fridge shelf in the opening. The main issue with the install was that I miscalculated the height of the opening believing that the dimensions given for the refrigerator were the rough opening size. Even though I took some measurements and adjusted the height, I neglected to allow for the bumps of a couple of screws on the top flange. Since the refrigerator sits on some rubber feet as well as being screwed in along the flange, it was difficult to get a precise measurement of the actual height of the fridge and the clearance needed unless the refrigerator is sitting on the floor (which it wasn’t while in the coach).
So I ended up having to chew off about an eighth of an inch on the top piece of trim to make it easier to get in and out. I could’ve forced in but I was afraid it might distort the case making the doors seal less well, so it seemed better to enlarge the opening slightly. This proved to be difficult because of the toughness of the oak trim piece.
The end result wasn’t as clean and tidy as I would like, but it doesn’t show underneath the flange of the new refrigerator anyway. I did some fairly extensive mods on the inside of the fridge cubby including adding a drawer box for storage underneath the fridge, adding insulation, and lining the cubby with .032″ aluminum sheet metal. I will detail these modifications in further posts in this thread with pictures etc. This is really not a “how-to” thread, but more of a how I did it.
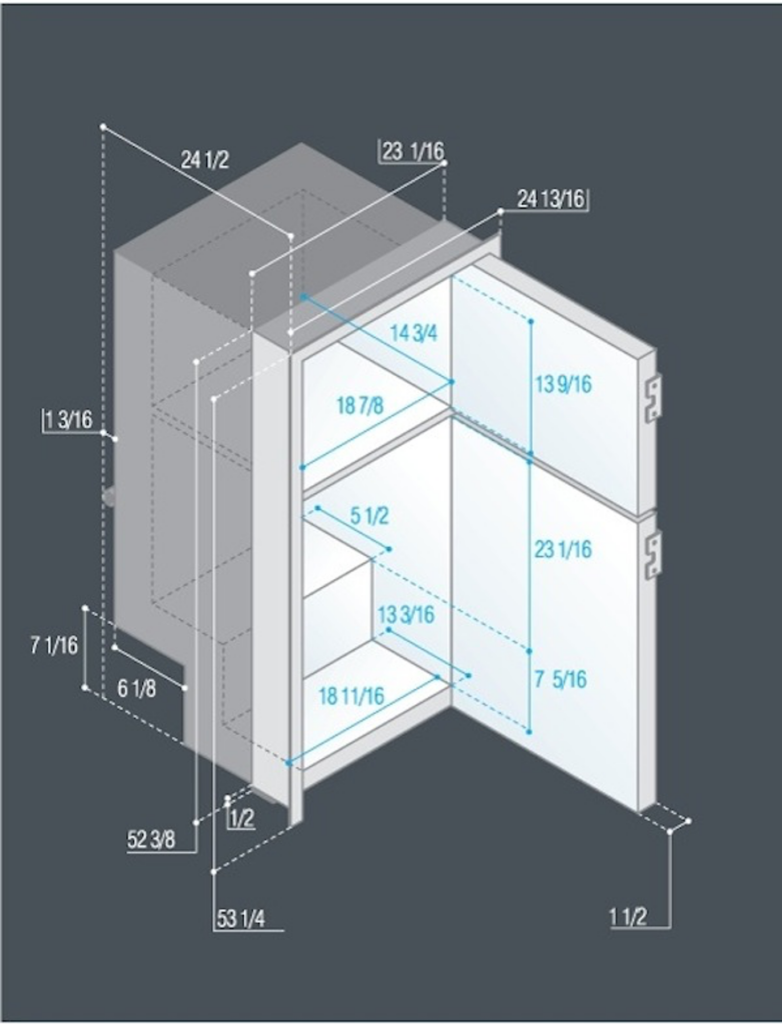
DP2600iXAC Dimensions
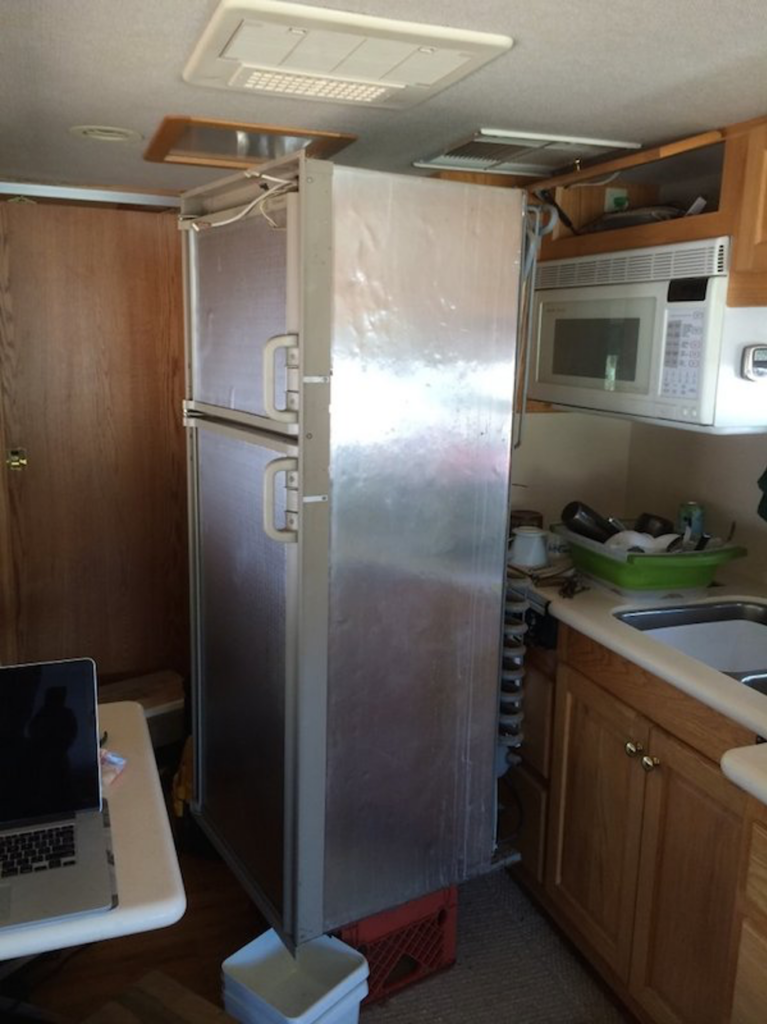
Old fridge out
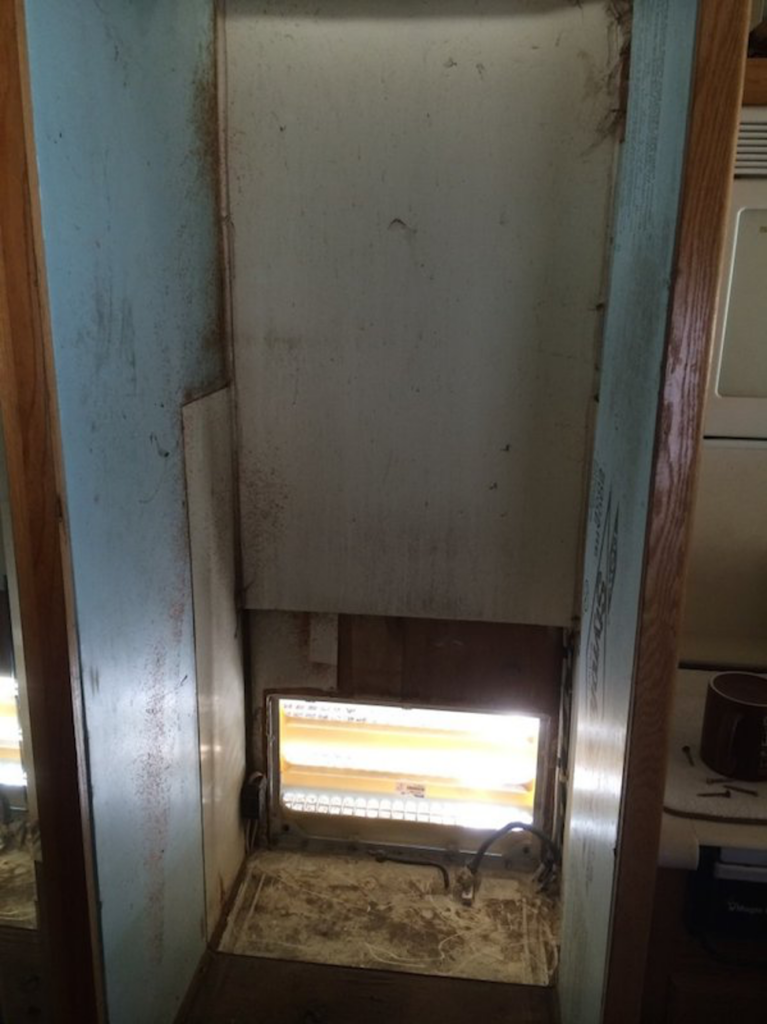
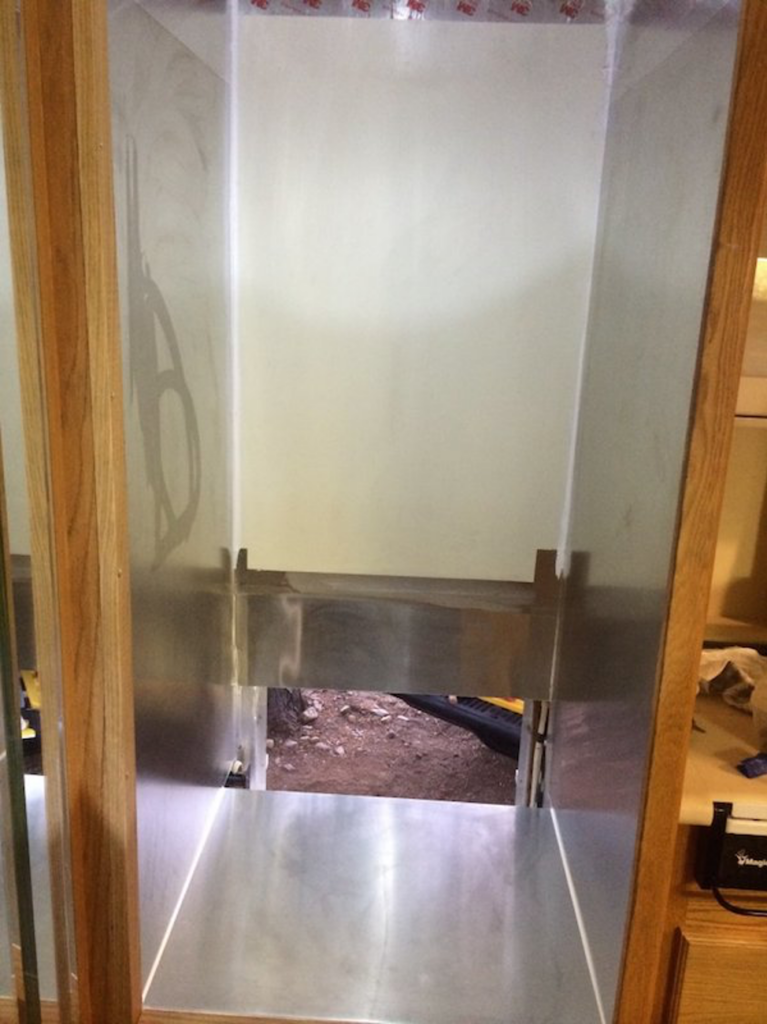
The refrigerator cubby

Ready to go out the door
Gone, gone, gone!
New fridge ready to go in
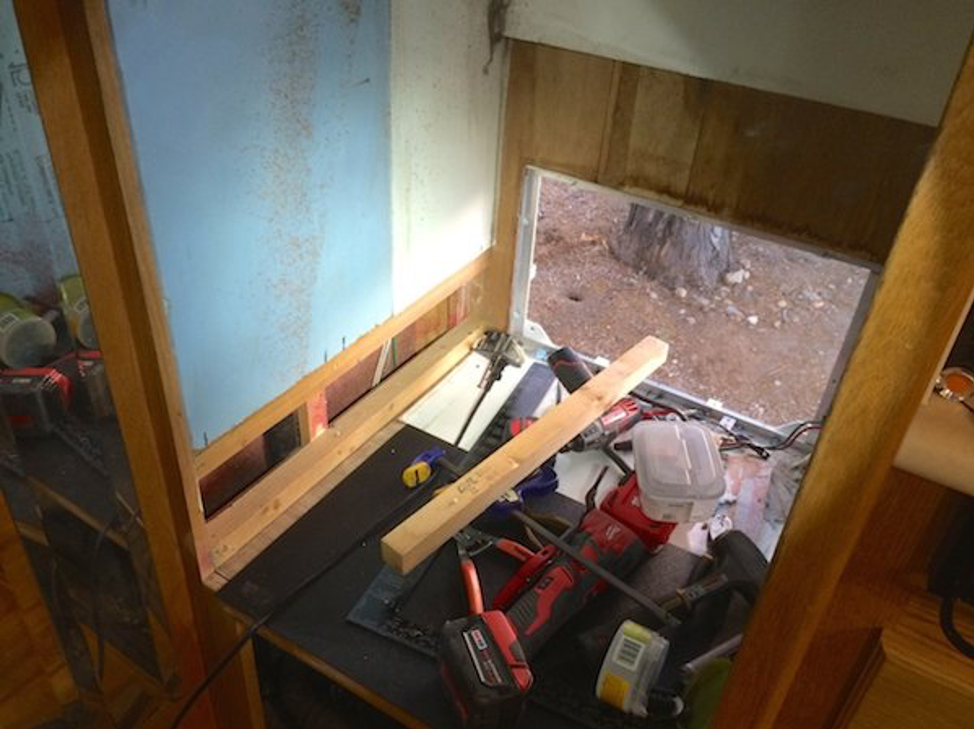
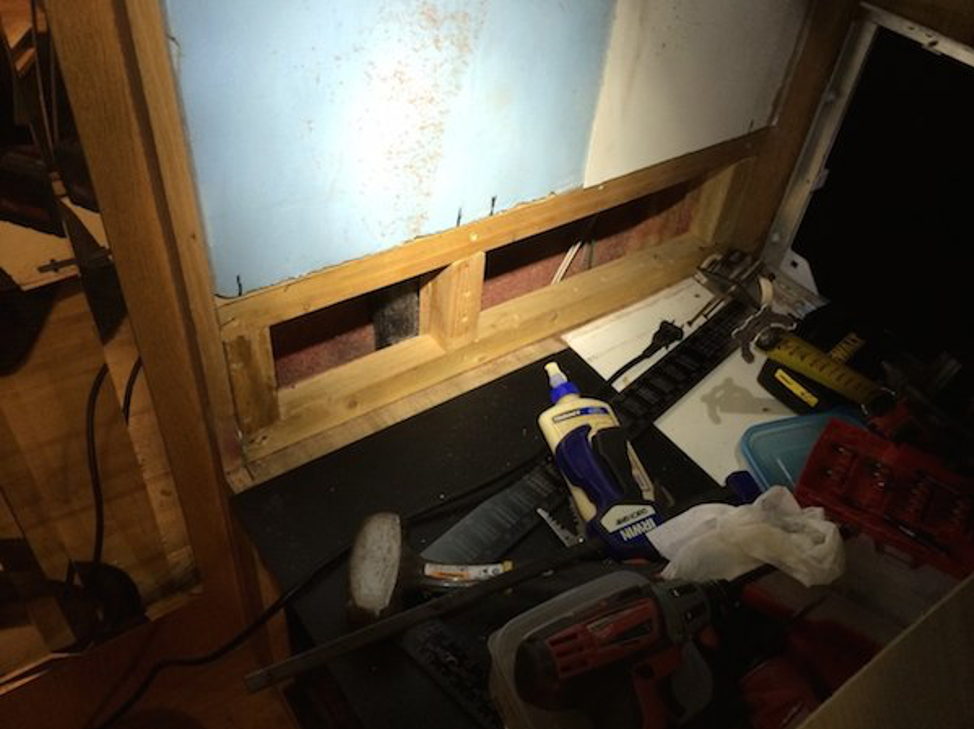
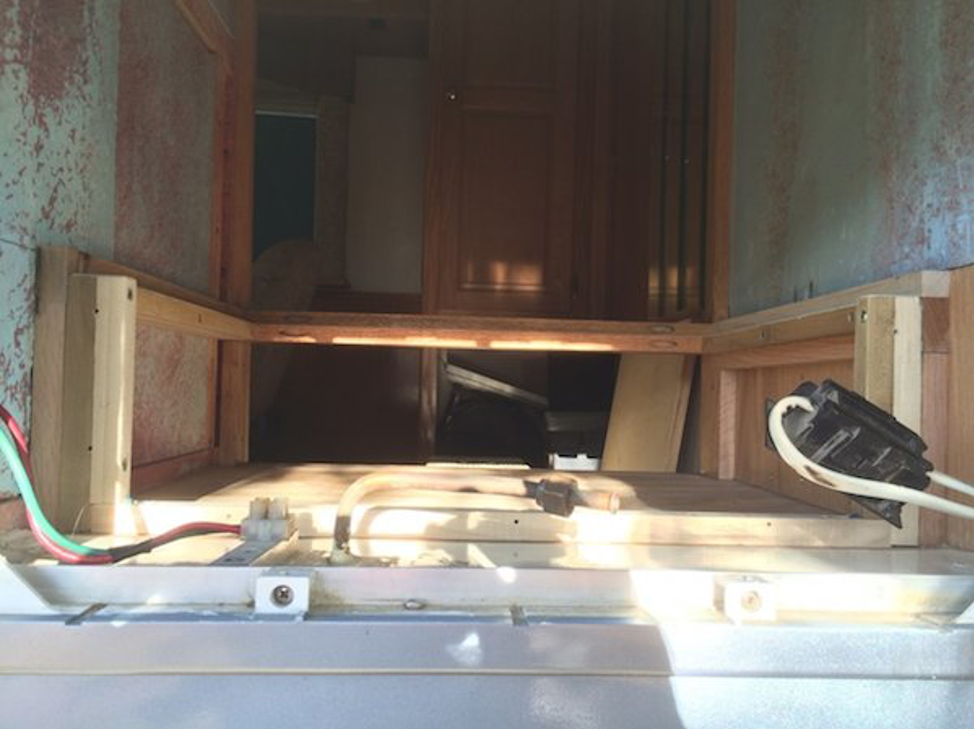
After the removal of the old fridge, I was able to see the inside of the fridge cabinet. Since the new fridge is ¾” or so narrower than the Dometic it replaced, I could see that I would have to add some trim to the side of the cabinet for the flange screws to have something to grip. The first step was to determine where the shelf under the fridge needed to be to give the maximum space for a drawer box underneath and tight enough on top to have enough meat for the screws at the top of the flange. As I wrote in the post above, I cut that a little too close… Once I determined where the shelf needed to be, I cut the blue styrofoam at the bottom to reveal what structure there was to attach shelf supports. As it happens, the two sides are framed differently. Hmm… I started on the easiest side which was the left, or the area behind the bathroom cabinet. This wall is hollow and provides the space for one of the two roof vents that serve the wastewater plumbing. I used 2X2 furring stock (1.5” X 1.5”) to bring the left side of the drawer box/fridge shelf support flush with something to attach to.
Since the back of the refrigerator compartment is exposed the outside, I consider this area as indoor/outdoor and thus all of the raw wood will need to be protected from the elements. In addition, all avenues to the inside of the coach need to be sealed with caulking. Since the refrigerator is sitting up on a shelf to create space for a drawer, that means the drawer box needs to be sealed at the back and the area behind it will need to provide enough airflow for the compressor coils.
This along with the depth of the refrigerator and the location of the back mounting feet is how I determine how deep to make the drawer box and shelf. The fact that I wanted to seal the area against the elements is what made me decide to use aluminum sheet metal to line the compartment, the shelf, and the ceiling area above the refrigerator. Therefore, I needed to make besides the compartment uniform. To do this, I took some of the blue Styrofoam I removed at the beginning of the process and patched it into gaps. For instance, the area behind the Kool-O-Matic fan thermostat was a void and the wires were proud of the framing. I notch the framing slightly and routed the wires through the notch using some gorilla tape to keep them there well I cut Styrofoam to fit around the wires. I cut pieces of the blue Styrofoam to it the rest of the gaps and glued it in.
Now I had some flat walls to which I could add some more insulation in the form of rigid polyurethane foam boards that are foil backed. To this I use some strong spray contact cement of the $17 a can variety and laminated the aluminum sheet metal to it. Sticking the sheet metal to the phone was tricky business at the campground on a very windy day… anyway, I managed to get that done.
Since I wanted to cover the shelf and the vertical partition at the back of the drawer box with the aluminum sheet, I was glad that I previously purchased a cheap harbor freight tools sheet-metal brake when I did my utility compartment. While it was barely able to bend the 22 gauge stainless steel are used on that project and then only with rounded edges, it was a cinch to bend the aluminum sheet into nice crisp shapes. To backtrack a little, I had used 1/8 inch oak veneer plywood to make the refrigerator door panel inserts, but they felt a little loose in the channels provided to hold the inserts. The channels were not wide enough for quarter-inch material, and I figured the eighth-inch material would be a little bit floppy floating around in the wider channel so I laminated.032 inch aluminum sheet to the back of these panels before I slid them in. It was a fairly snug fit to get them in, but the whole door feels much more solid now.
Are you still left over from that phase of the project to supplement the other sheet aluminum I had to seal up all the little looks and crannies in the fridge compartment and for which I also use the aluminum tape on seems. I still have one little section of wood worthier cabling runs down on the right rear corner of the refrigerator compartment. I will send a piece of flashing to fit that section after I run the solar wires down from the solar panels. Anyway, I bent the bottom shelf with a ½” lip at the front to tuck into the space between the oak frame and the three-quarter-inch Baltic Birch shelf material. I then measured carefully the depths of the shelf and put a 90° bend there as well. The measurements from there to the original refrigerator support was an eighth inch off from one side to the other, so I simply apply those measurements at the sheet-metal brake and put in another 90° lip. I was originally going to screw this to the original refrigerator shelf, but the shelf itself was rigid enough and fit tightly enough to make this unnecessary. I merely put three screws across the back and caulked all the way around. It laid nice and flat, And with the way to the refrigerator sitting on top of it, It wasn’t going anywhere.
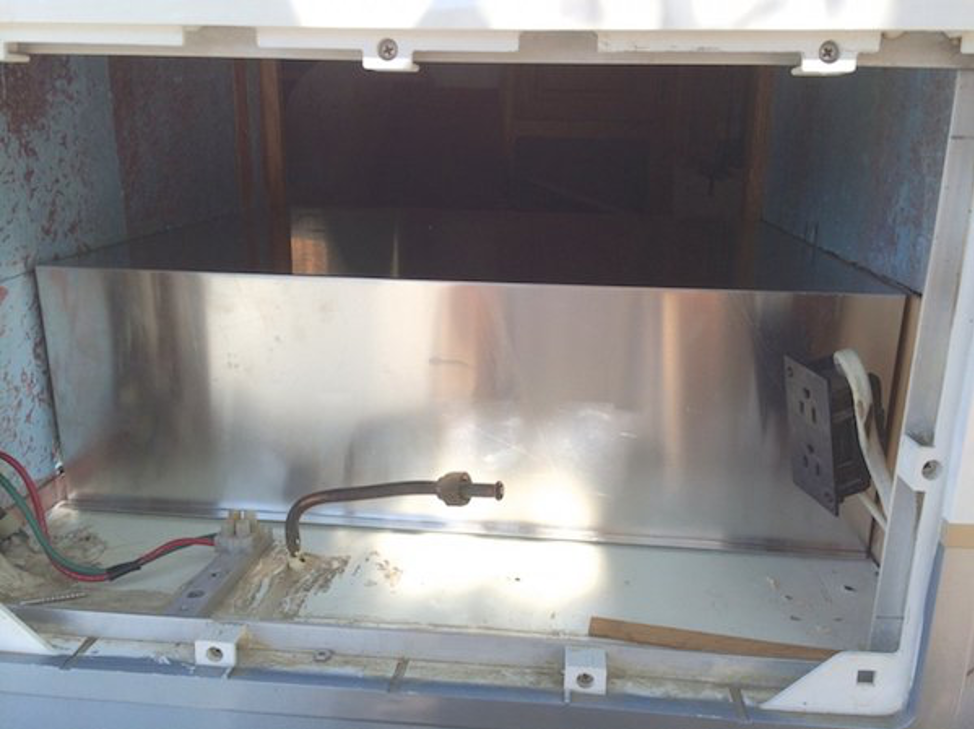
Next, I glued the aluminum laminated insulation panels to the insides of the compartment on both sides and then at the top. Most of the rear of the refrigerator compartment was already covered by an extra inch and a half of insulation back with a fiberglass sheet. To this, I added about 10 inches of the same installation below that and use some of the fiberglass sheet pieces that I removed from the sides to bring the surface out level and that I laminated some aluminum sheet metal to and taped with aluminum duct tape along seams. The .032″ aluminum sheet metal pieces that I got from IMS were 2’X4′ and so not quite tall enough to go all the way to the ceiling, so I added about an 8″ strip at the top and taped the seams with aluminum tape. I could have gotten a 4’X8′ sheet, but the 2’X4′ sections were much easier to transport and handle. Sheet metal is available at IMS in a variety of sizes and materials including 2′ x 4′ 4′ x 4’4 x 8′ in some cases other sizes as well. This is also where I got the stainless steel for my utility compartment project as well as all of the structural steel I used in the bulkhead repair and basement rebuild project. I LOVE THAT PLACE!
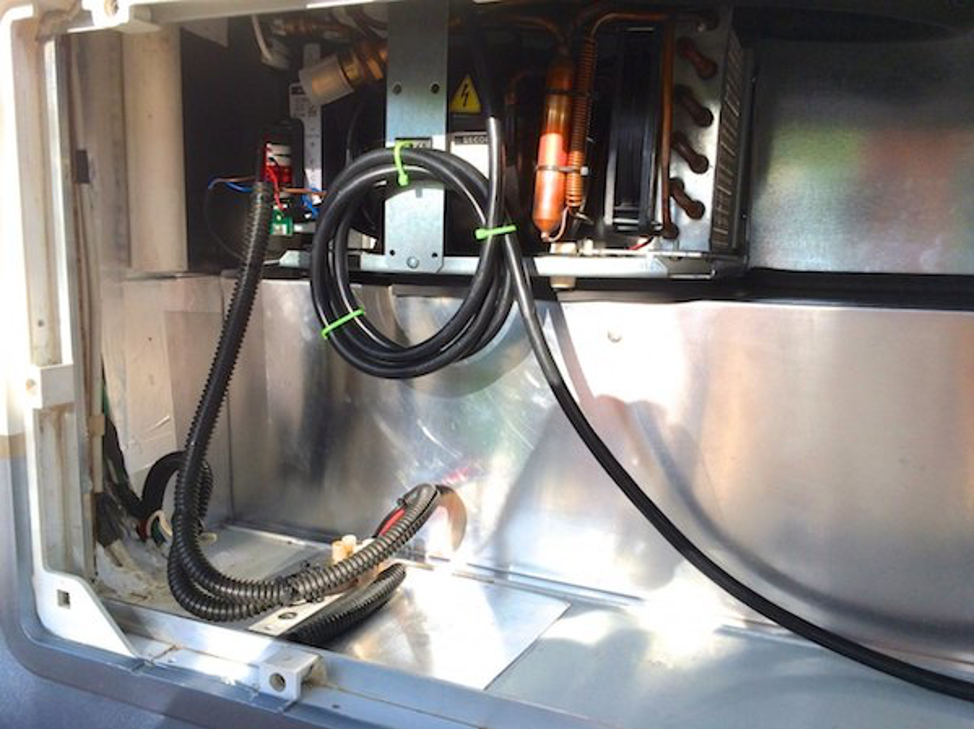
I was going to keep the refrigerator propane supply tube for possible future use, but in the end, I cut it off because it ended up getting kinked while I was moving it around to work back there. So I just sawed it off close to the deck and then pulled it down through the hole from below and left it loose in the furnace cubby. Currently, the propane tank main valve is off, and I just need to find out which one of the manifolds feeds is the one feeding the fridge line. I will then cap off and label the other ones for future needs. Looking towards the outside from the furnace cubby while the sun was setting on that side of the coach, I could see quite a bit of light coming around the wiring passing through the original fridge shelf into the propane furnace cubby. I cleaned up the caulking around the cabling with acetone and put some 3M 5200 Quick cure around the wires. I also put a piece of the aluminum sheet over where the propane tubing had penetrated the shelf using some 5200 on that as well. Previously I had installed a fire suppression system in that compartment which you’ll no longer be needed there. I had made an aluminum mounting block to fire suppression system on, and since I don’t need that there anymore, I just used the already threaded hole in the mounting block to secure the terminal strip that connects the old 12VDC wires to the new fridge.
Given the outdoor nature of the compartment, I decided to put some weather coverage over the AC outlet which I always felt was kind of exposed to moisture and the elements. Eventually, I will change out that duplex outlet with a GFCI fixture. Now all I have left to do is make the drawer which will be about 23″ wide by 6″ high and 18 inches deep.
Refrigerator Shelf Supports

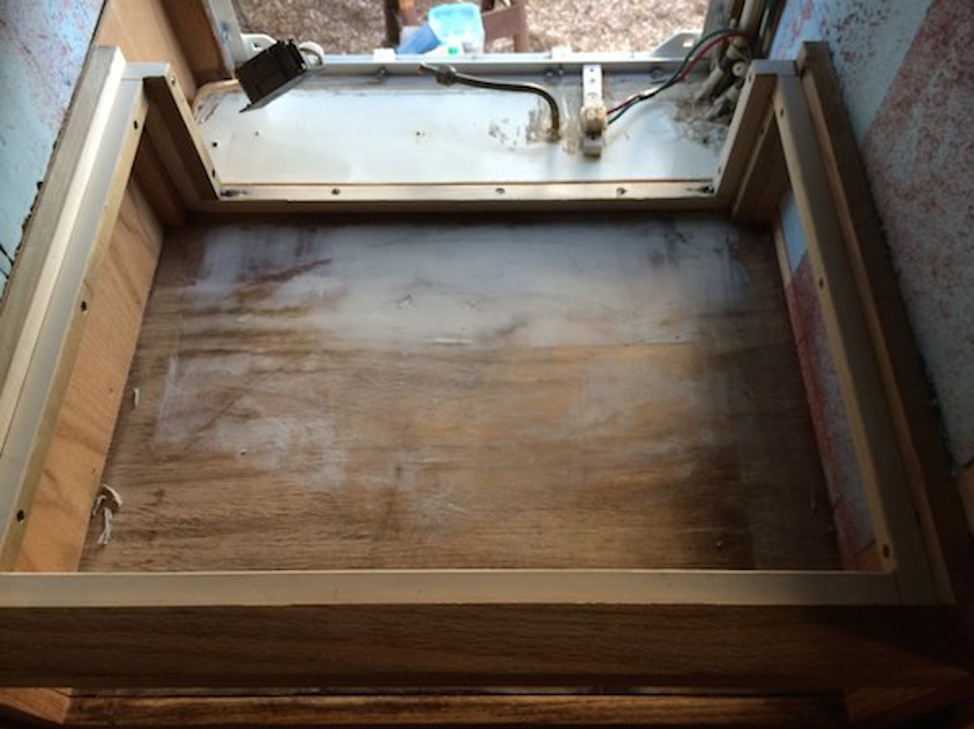
Frame viewed from the rear
Here are the final pictures of the installation with the Sheetmetal installed. I got the aluminum sheet metal (as well as all the stainless for the utility bay and steel tubing etc. for the basement/bulkhead repair from Industrial Metal Supply in San Diego. Prices much better than Home Depot etc., not to mention they have a huge selection in house and will even cut to yours specs + or – to 32nd”. www.industrialmetalsupply.com
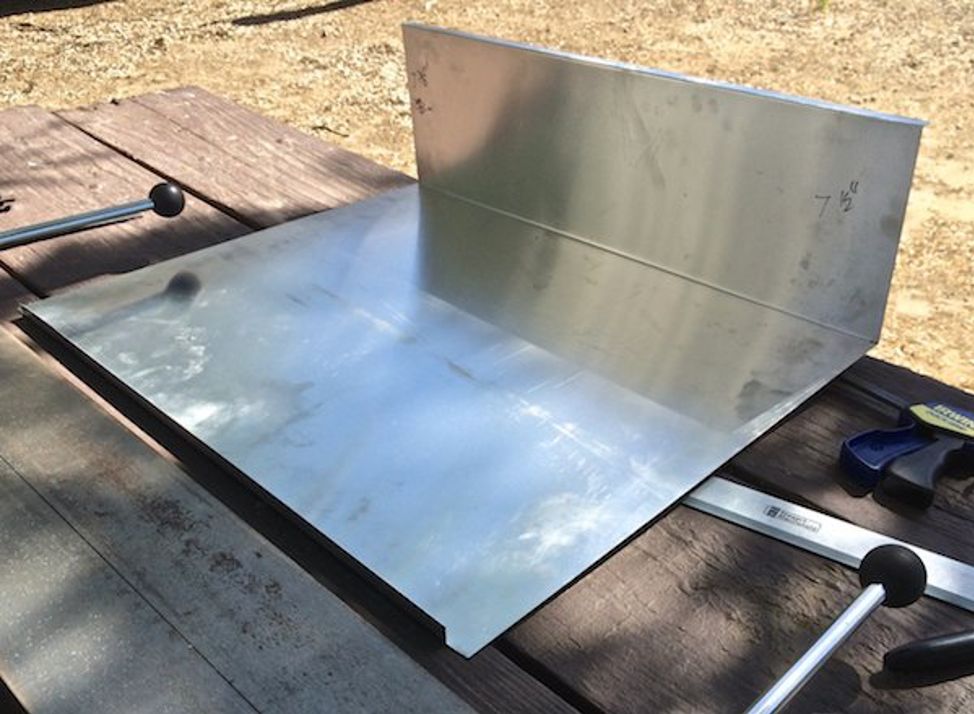
Bottom Shelf Cover
Shelf cover fitment
Ready for New Refrigerator
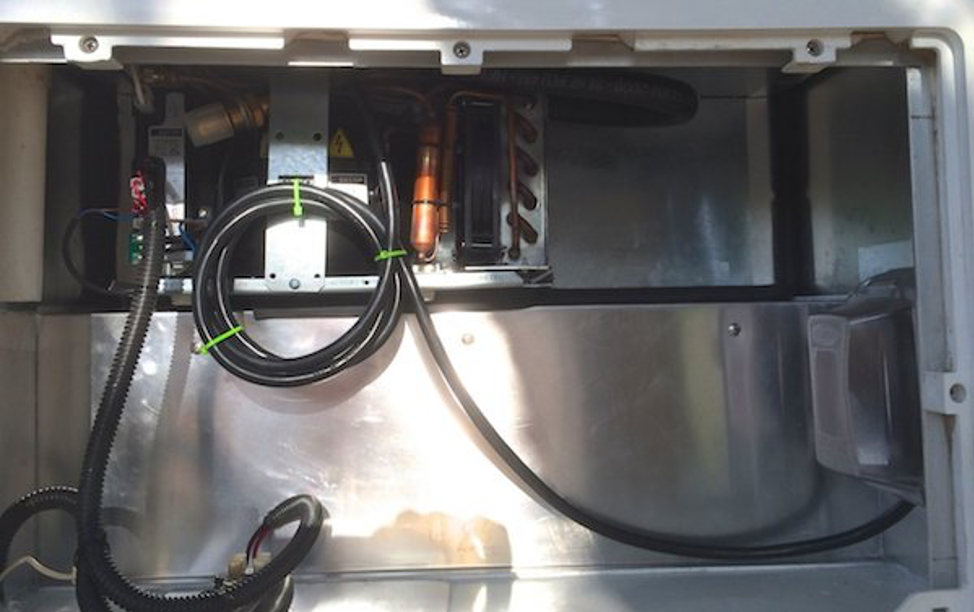
From Refrigerator Vent
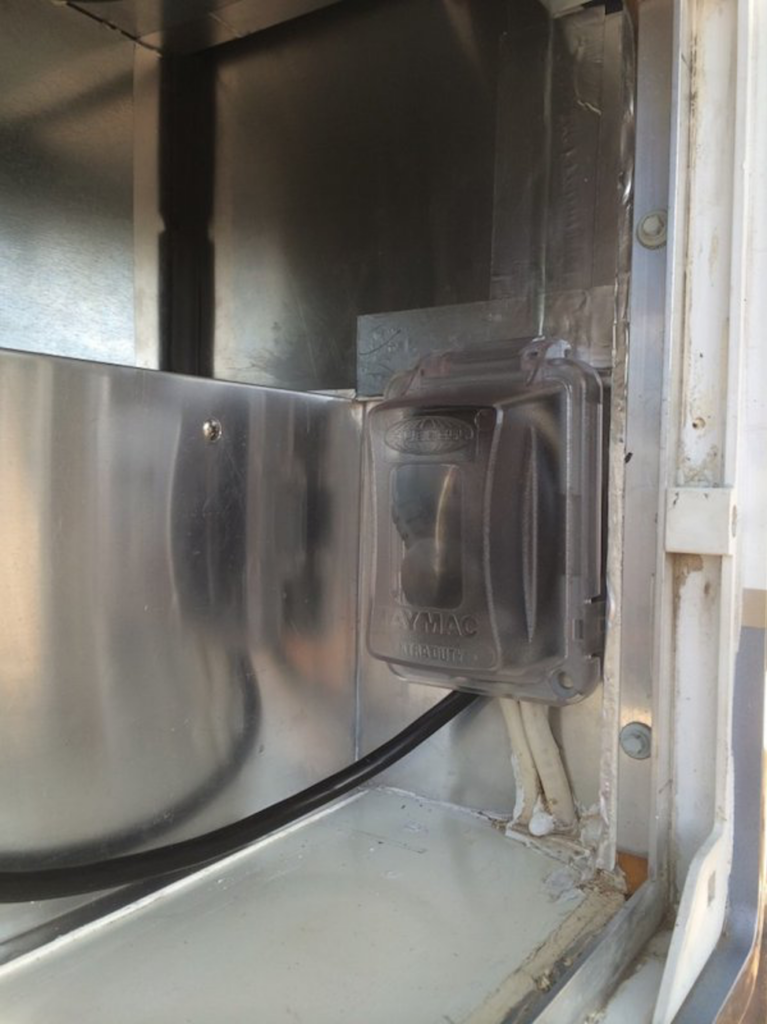
Weather Cover
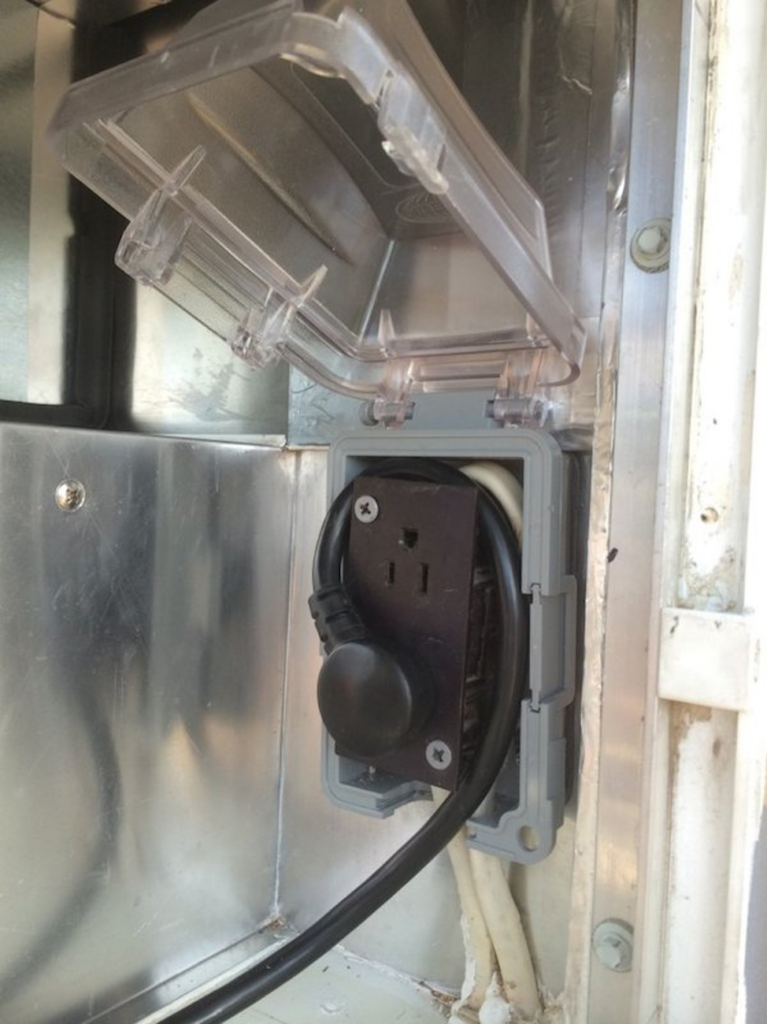
Weather Cover Open
Left Side
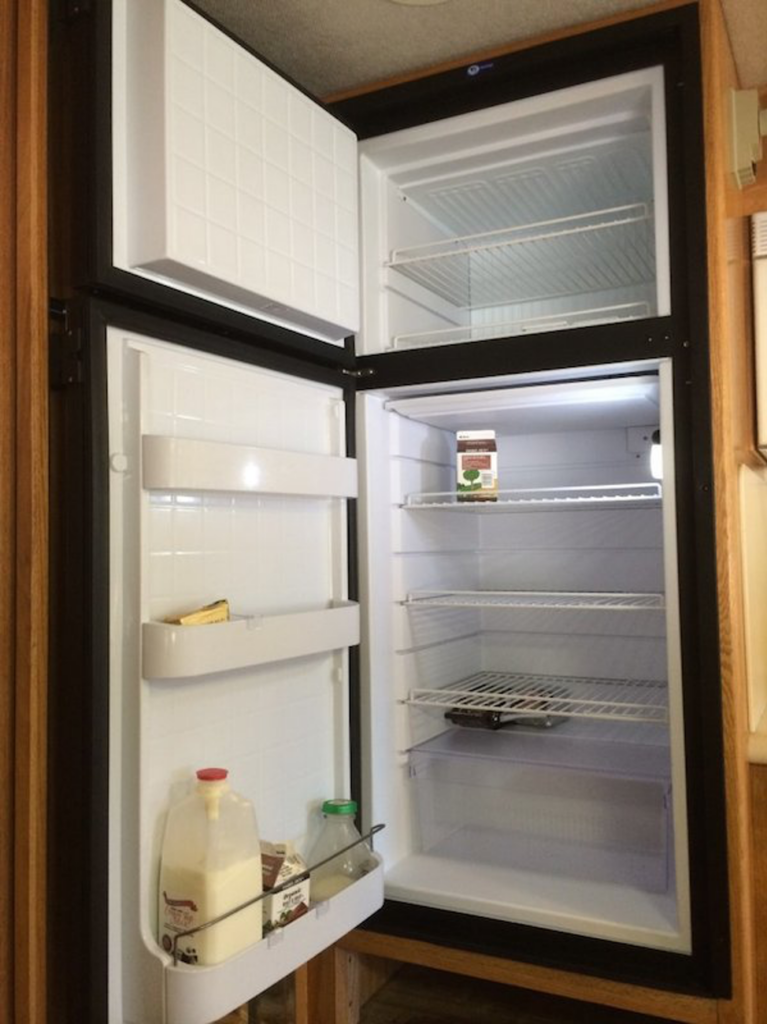
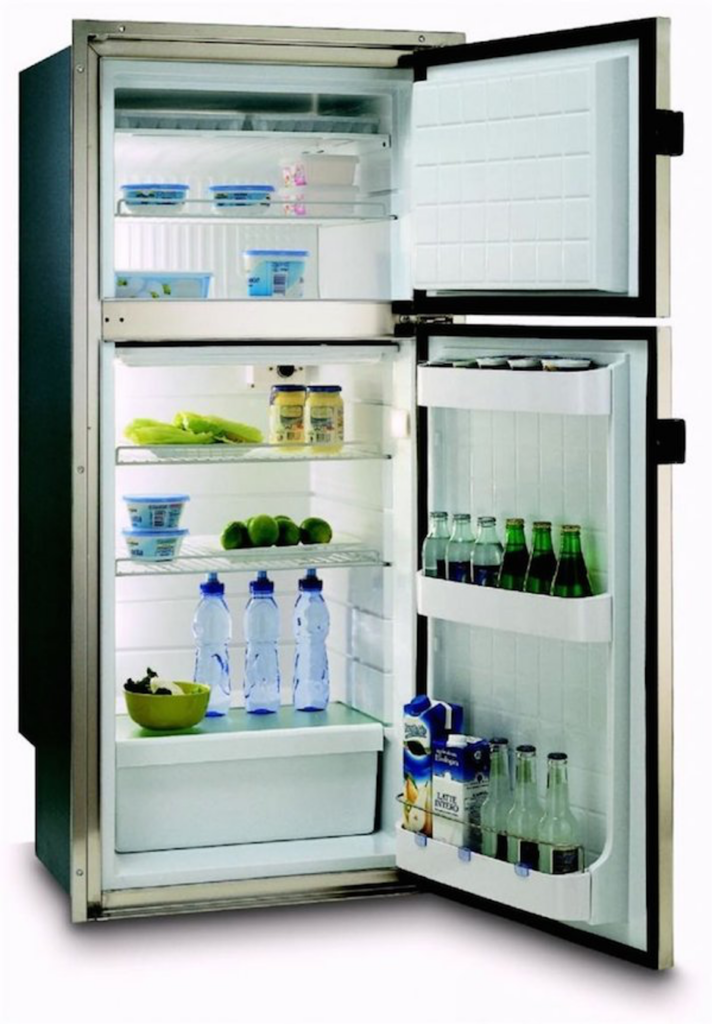
Open, Not Stocked Yet
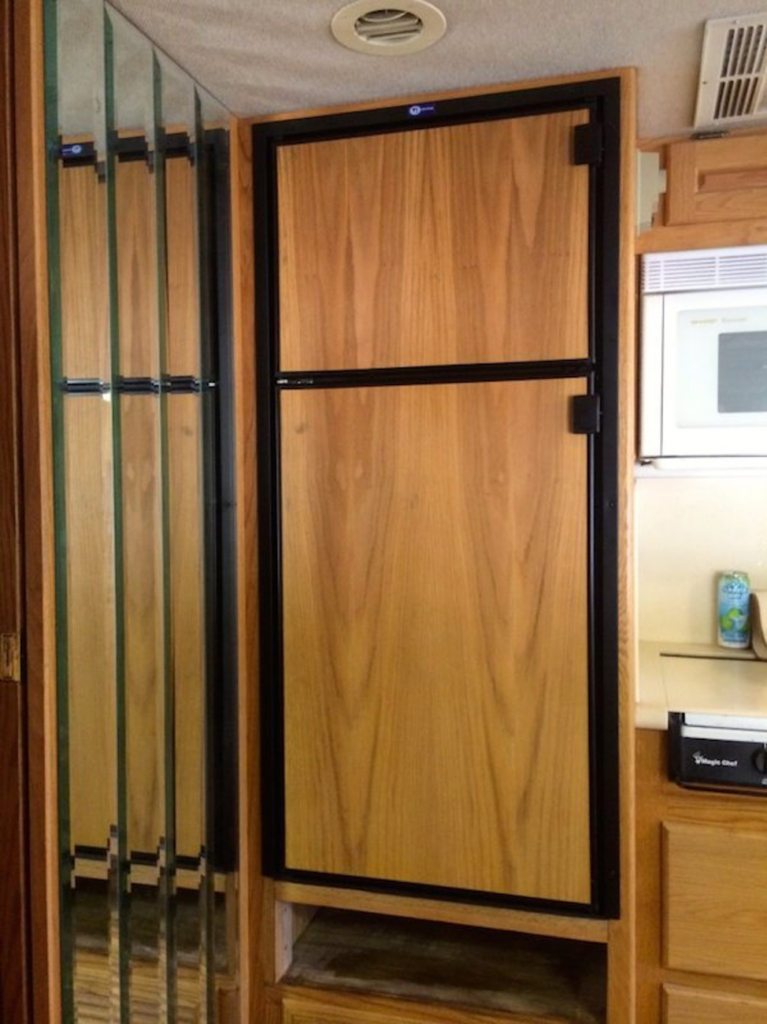
Side View of flush doors
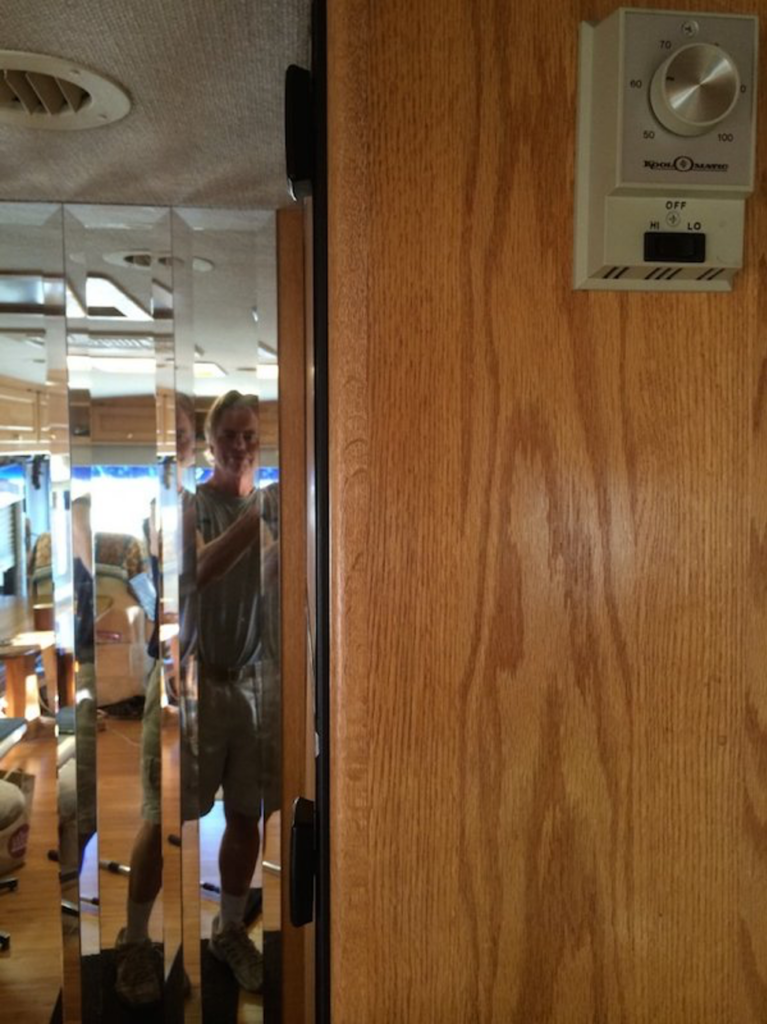
From Inside
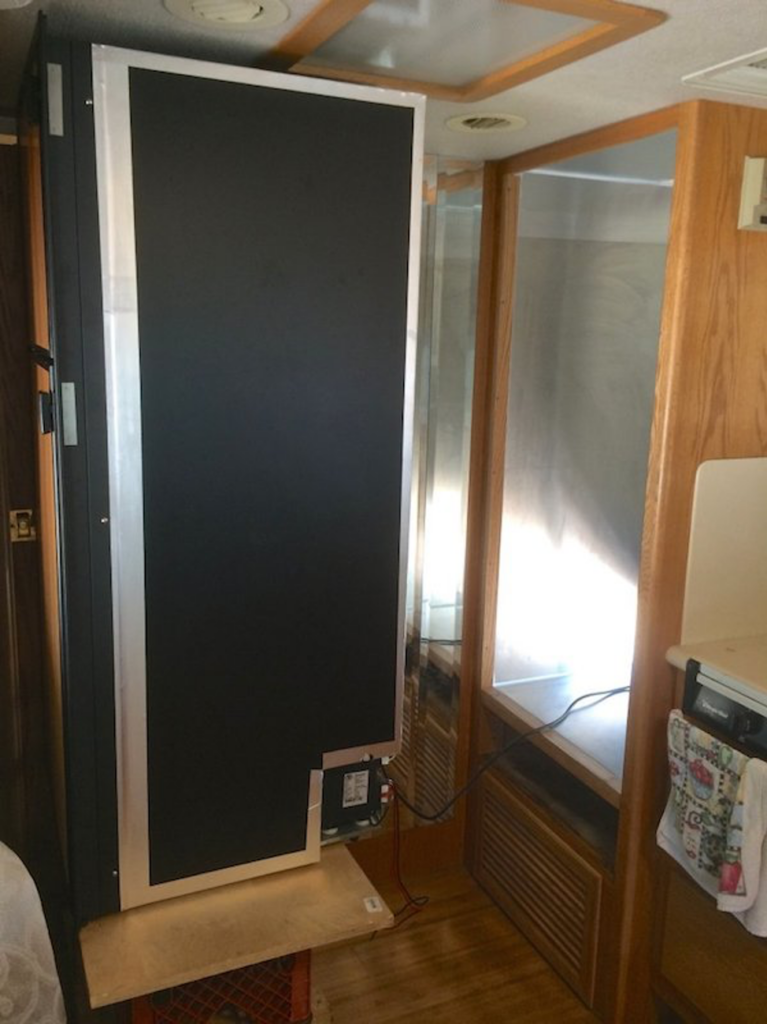
The old wires that were in place for the old fridge are 10 gauge and plenty capable of powering the fridge. My guess is that Foretravel sized these wires for three-way fridges… in any case, wires are plenty adequate to run the 5 1/2 amps or so max that the refrigerator will draw when running on 12vdc. I don’t want to give away the show for this thread, but here is one picture of the fridge installed… A bit unfinished looking at this point because I haven’t made the drawer as yet, but I think it looks pretty OEM. I removed the room raised panel oak inserts from the doors of the old fridge for future use…