byBarry and Cindy 1997 U270 36′
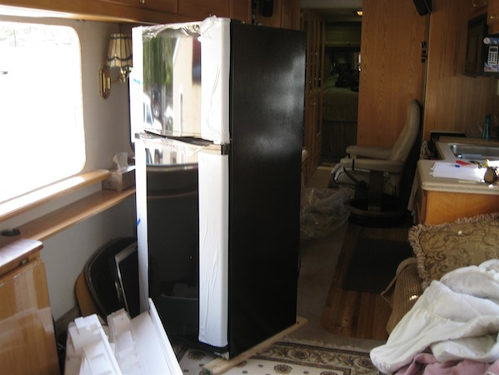
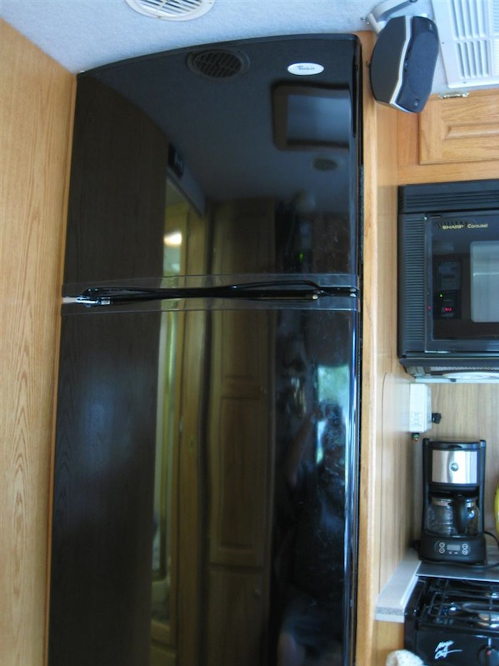
Our new electric refrigerator:
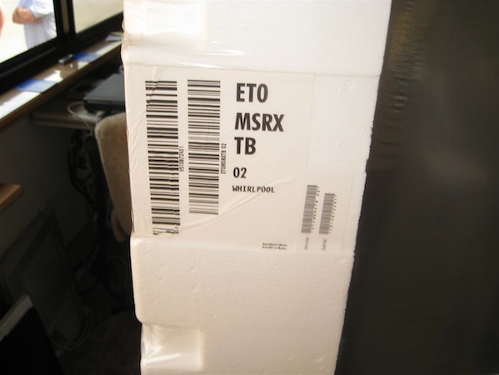
Lowe’s: Whirlpool 9.6 Cu. Ft. Top Freezer Refrigerator (Color: Black) Item #: 267489 | Model #:ET0MSRXTB
Lowe’s still has a 2′ x 5′ electric refrigerator with coils on the back. The brand is now Haier and the model is HA10TG20SB for the black model. Haier looks a bit sturdier than our Whirlpool but very similar in all respects with no surprises. Label: capacity 10.3 cu-ft, freezer 2.5 cu-ft, amps 2.6, defrost amps 3.5, R134a.
The freezer is 54% larger and the refrigerator is 22% larger for a total 29% more inside space. We are very pleased with this fridge.
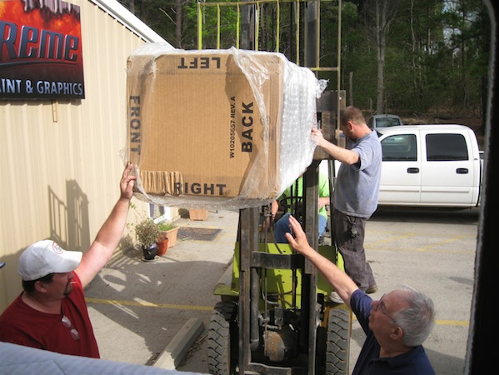
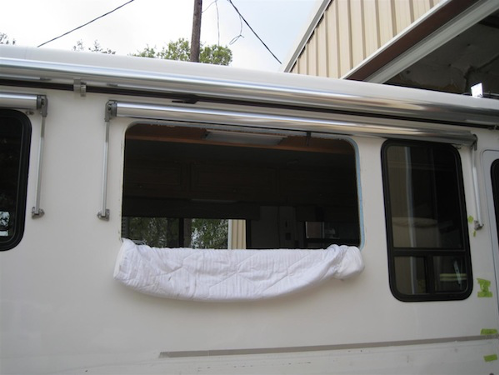
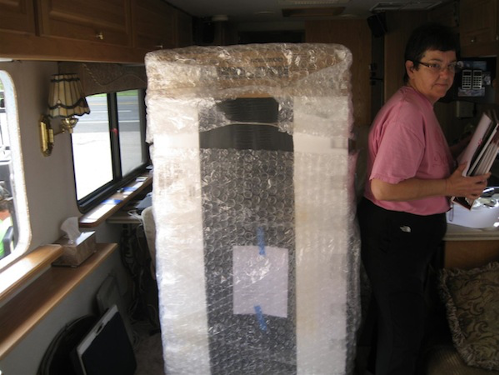
Delivery is free and the military gets a 10% discount. We hear Lowe’s may carry it in through the motorhome door and change the fridge door hinges to another side. We requested that original packing material be left on for protection while being moved. We removed the side window and used a forklift to place inside. The refrigerator is not heavy and two of us could lift it and place it in the cabinet. We did the installation ourselves.
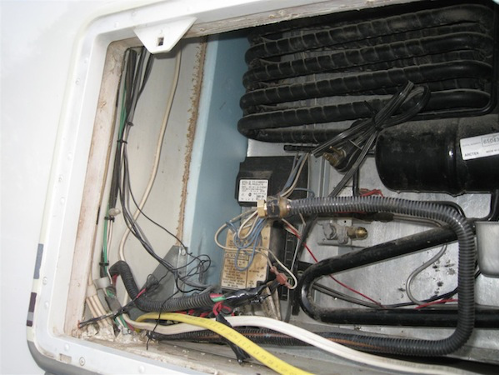
This model fridge uses desirable ‘old-fashioned’ rear condenser coils with gravity airflow for cooling which is much better for RV installations. Newer designs use a bottom amp-drawing fan-driven condenser coil that blows warm air back into living space. And some of these bottom designs use the side of the metal cabinet to dissipate heat. Outside side and roof vents are left in place to vent the rear condenser and for access to rear. I don’t think side air space is needed as the sides do not get warm. These standard instructions probably refer to bottom condenser coils.
Cost about $350 and comes in several colors including stainless. Size is about 24″ x 60″ and fits in the same space as our propane fridge with minor modification to the cabinet.
Creativity is needed to fashion door lock for traveling and to fasten the fridge in place to keep it from moving and to seal front edges to the cabinet. An inverter outlet is needed behind the fridge.

Our $350 Whirlpool refrigerator from Lowe’s does not have an ice maker option. Our ice maker is four covered ice cube trays that freeze in a half-day and we dump them into a plastic bag. Ice makers take up too much space for a small fridge in our opinion, not to mention maintenance and water line issues. We now make ice cubes twice a day instead of every other day. Cools down much faster and stays cold in very hot weather.
The Whirlpool fridge does not have a door gasket heater or dehumidifier.
It does have an auto-defrost heating element that comes on based upon how long the compressor has run. The heater also has a thermostat to prevent it from overheating.
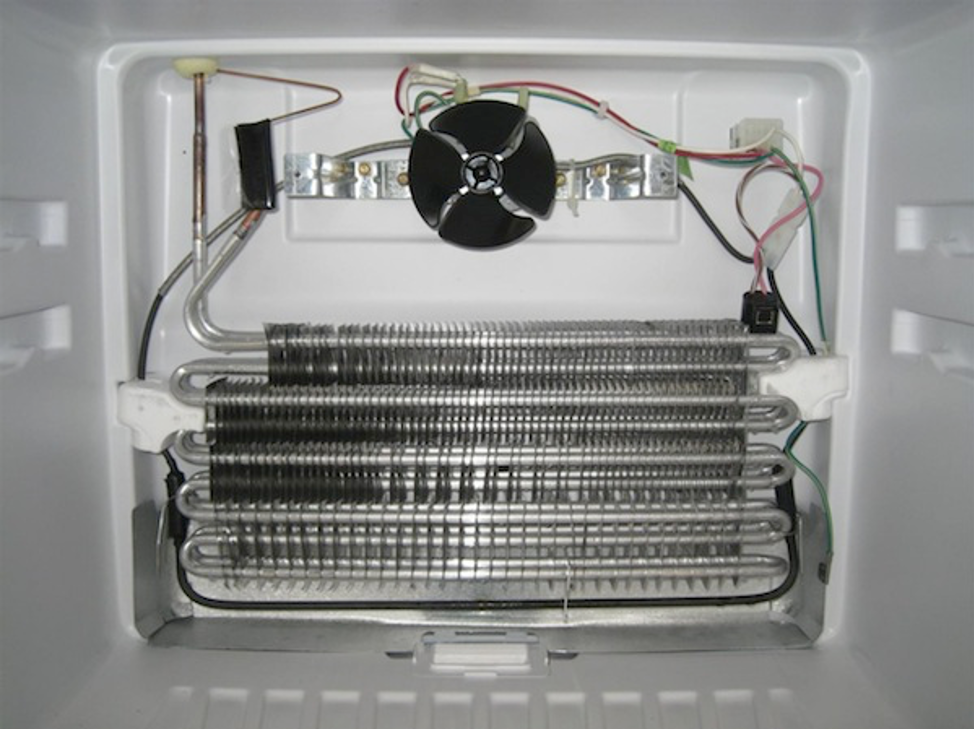
The condenser and defrost heater are behind the back wall of the freezer and the control timer is behind the back wall of the refrigerator and the heater can be more easily turned off in the refrigerator section. A fan moves air over the freezer condenser and flows air into the fridge compartment based upon an air-flow damper setting. The refrigerator section does not have any cooling condenser or fins but does have the variable temperature thermostat that turns on the compressor and freezer fan.
The fridge could be plugged into a timer, if necessary; to reduce the number of times it can run during the night. Although each compressor run will be longer.
Another modification we made was to shorten the two top plastic stand-offs that hold the rear condenser coil so it does not lean so far away from the back of the fridge. I shortened the mounting screws also.
We did this to keep the coils from touching the back wall of the cabinet, as we really were not sure how much room we had. And if the refrigerator settles down in the back a little we still had ample space between coil and wall.
The original design has the coils close to the fridge back at the bottom and further away at the top. We just made it the same distance at the top and bottom. Care has to be made as the coils are fragile at the bottom.
The Whirlpool fridge’s original bulb has a large clear plastic cover that’s purpose is to keep food away from the hot bulb. But we found the cover taking up too much space, so we tried different bulbs that did not work out for one reason or another. Replacement bulbs need to have a long slender neck or the bulb will not fully screw into the socket.
Fry’s Electronics has a great LED bulb ($15) that is very bright, uses 2 watts, not affected by cold and has the required normal slender neck that fits fine. Amazon has the same exact package (Miracle LED Cool Light) We threw out the clear plastic original bulb cover.
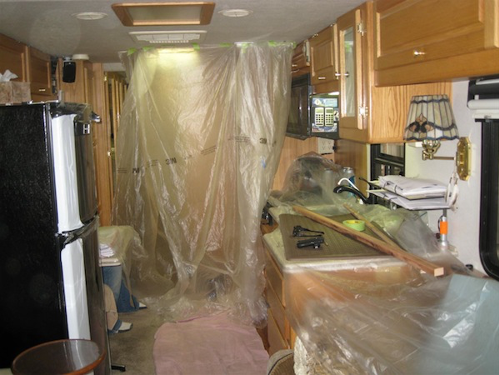
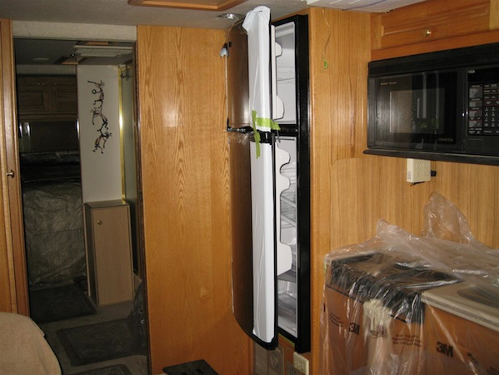
We kept the new Whirlpool fridge on our motorhome floor for a week or so we could take our time removing the propane fridge and preparing the opening. Also, Lowe’s will take it back within one week, so we wanted to know how it sounds and if it works. We later removed our propane fridge the same way the Whirlpool came in although the old fridge would fit through the door with rear absorption cooling unit removed.
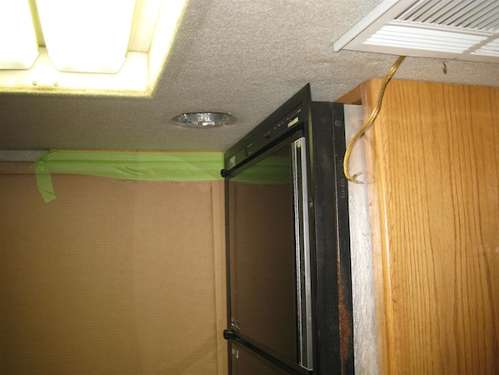
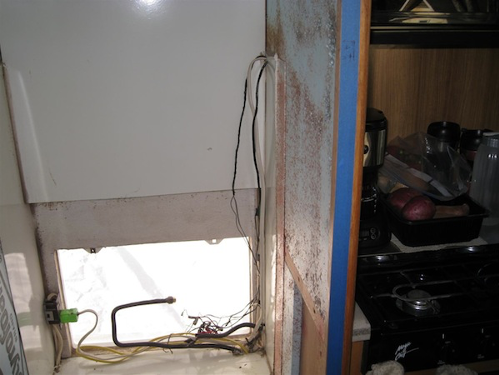
Removing old Refrigerator
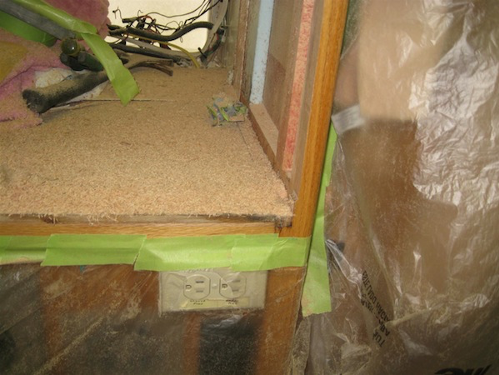
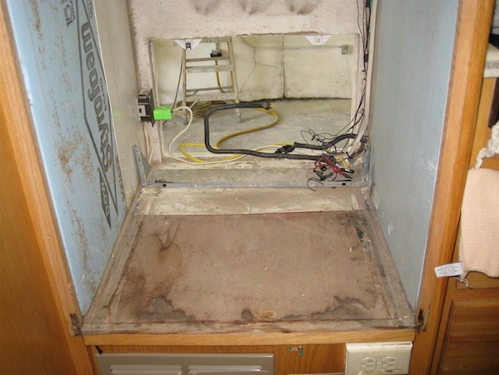
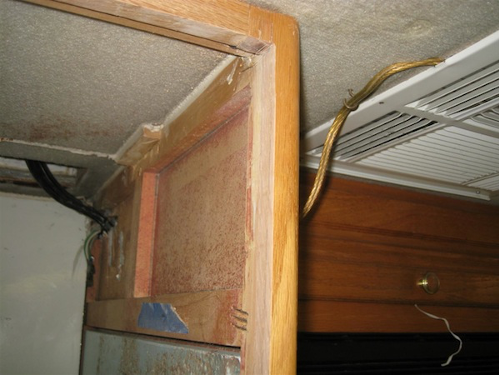
The right side of the cabinet had to have the 3/4″ edge routed off from top to bottom to give us our needed 2′ wide opening. There is plenty of room inside the cabinet. Just our cabinet front was too narrow. A narrow slot in the cabinet just above the hinge bracket had to be cut out as this is the tallest part of the fridge and would not fit in the 60″ tall opening. We cleaned up, put in some extra solid Styrofoam and sealed and painted the inside the cabinet.
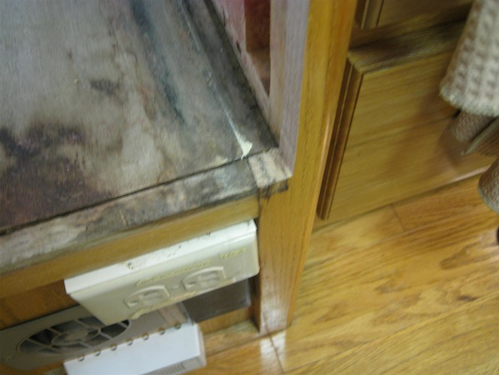
We ran a new #12 Romex cable to a new inverter outlet behind the fridge as our original only had an outlet that was not on the inverter. Another end of the cable has a 15-amp male plug that plugs into a new inverter bedroom outlet in a cabinet. Plug allows easy measurement of fridge electric usage with a Kill-o-watt meter. The plug also allows future flexibility to power the fridge on a small inverter if desired. Our main inverter is a true-sine wave which may be desirable for running fridge fans and compressor.
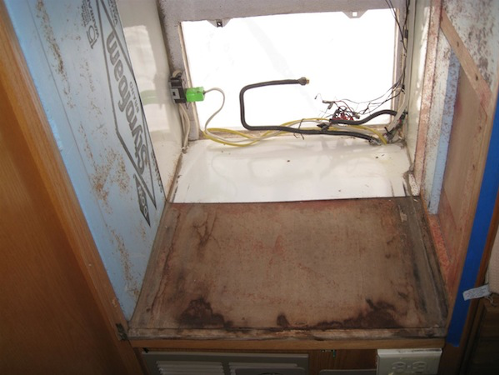
We bolted 1/4″ thick aluminum ‘runners’ under the left and right side that stuck out about 4″ to the rear of the fridge. We later bolted rear of runners down to the floor from behind the fridge to keep the fridge from moving while driving. We put a piece of 2′ square weld steel plate on the cabinet floor for reinforcement. Steel and aluminum are standard Lowe’s metal parts.
We tried several things to seal the edges of the fridge to the cabinet to keep the weather out but ended up with strips of electrical tape along sides and top. The bottom is more open so we used packing foam blocks cut to fit. We made a removable metal bracket that sticks out between doors and put in a pin to keep doors from opening while driving.
We use a Chaney wireless thermometer to monitor inside temps and to give us an alarm if too low or too high.
We left the outside side and roof vents in place to remove heat and have access to the rear of the fridge.
We also were not ‘sure’ about how electric would work out and spending less than $350 on the Whirlpool was no risk if we changed our minds, so outside vents were left.
But we think we will NEVER go back to gas. More space, more safety, more cooling for a lot less money.
A switch could be put in place to temporarily disable freezer auto defrost heating element during dry camping nights to minimize electric draw. We ran a small fused wire from the rear compressor inside of the motorhome to power a small neon lamp to let us know when the compressor was running.
We consider the fridge to be very quiet. We never hear it running. And Cindy just mentioned, “we don’t defrost anymore”.
Many Foretravels have wider refrigerators that are larger than 10 cu ft, so that should be a consideration to those who would not want to have a smaller capacity fridge.
One of our group recently bought a larger electric fridge from Lowe’s that would not fit through their side window and they did not want to remove a windshield. So Lowe’s took it back and they purchased our smaller fridge model and then covered up about 10″ of open space that was leftover next to the new fridge. They said they were happy with an inexpensive electric even though it was smaller.
Finding larger electric fridges will be problematic as they are heavier, harder to fit, and probably will have the bottom condenser fan. So some more pre-planning will have to be done to find a larger RV compatible electric fridge. After seeing the Whirlpool at Lowe’s, we have been playing with the electric fridge idea for about a year, wondering what we would do if our 15-year-old propane broke. In the end, we decided to make the switch even though our propane fridge was still working, and we don’t worry about fires anymore.
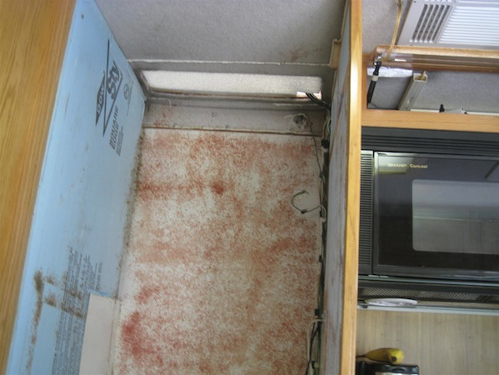
We think you can’t have enough of a good thing, so overbuilding is usually a good choice. The floor under the fridge is really not that strong and over 15 years of moisture from the original fridge, the bottom is not strong when the coach was new.
The bottom of the propane fridge and bottom of the electric fridge are differently built so the floor has to carry the weight in different places. I don’t remember how the propane was built, but the electric fridge carries 100% of the weight on two 2-inch runners that are located under the left and right fridge walls
Rather than analyze the condition of the floor, I figured some reinforcement was in order. And when I saw a perfect size piece of metal that goes completely side to side, we figured it was cheap insurance.
We figured we really did not know what problems we would find with the switch. But if the electric fridge broke or there were some other insurmountable problems, we figured it was worth the risk to give it a try. And if it turned out to be a bad choice, we would be out $350 and then buy a new propane fridge.
The compressor is rubber-mounted, but can only move very little. And our Foretravels are known for a smooth ride. If we leave papers on the table, they are usually still there when we get to our destination. We run the fridge on our inverter while driving so the compressor is working all the time. No problem with five months of use.
Update: We just saw a friend’s 2-door propane fridge and was surprised at the loss of interior space from very thick freezer walls, Freon compressor in the lower part of the freezer & the space the ice maker takes up. And they reminded us that they have to defrost every couple of months.
We have had our Whirlpool electric SELF DEFROSTING fridge for over 15 months and it is still one of the best mods we have made. And our Blue Bell stays hard and we make ice in 8 hours and have not defrosted in 15 months.
Measure the 2-door fridge useable inside space compared to the Whirlpool inside usable space to determine how much space will be lost by switching to electric.
Whirlpool freezer: 13.5″ deep x 19.5″ wide x 15.5″ high = 4080.38 cu in = 2.36 cu ft
Whirlpool refrigerator: 17″ deep x 20.5″ wide x 35″ high = 12197.5 cu in = 7.06 cu ft
Fridge + freezer = 9.42 cu ft
The Whirlpool replaced a 7.3 measured cu ft propane fridge, so we gained 29% more capacity.
So maybe with all the unusable space inside the 2-door fridge and the 29% increase of the smaller electric, maybe the interior space will not be that much less.
A Dometic 1492 measured 11.4 cf or so. Or 2 cf more than the Whirlpool.
One of the issues with larger electric refrigerators is that most have a bottom fan-cooled condenser coil that is open to the room. There are not many electric refrigerators, like the Whirlpool that still have the open condenser coils mounted on the back of the fridge.
Update: Electric frost-free refrigerators have an evaporator coil, located behind a panel inside the rear of the freezer. A fan moves air over the cold coil into the freezer which then flows into the refrigerator. The coils slowly frost up from moisture in the air.
All frost-free refrigerators have a timer that periodically turns off the compressor, and turns on an electric heater that is wrapped around the evaporator coil, to melt any accumulated frost and ice. Melted water drains out of the freezer into a pan that sits on top of the compressor. A running compressor is supposed to create enough heat to evaporate water in the pan.
Timers only run when the thermostat calls for cold, and after a pre-set number of running hours, the timer starts the defrost heater cycle.
We have had our Whirlpool fridge for 18 months and have not had any battery problems on the few times we dry camped 1 or 2 nights during the 18 months. We will be going back to Quartzsite again in January where we dry camp for 10 days in a row with the Lemon Rally, but this is our first time since we changed from propane to an electric refrigerator.
We normally run our generator daily during our stay, but we always want to be sure we can get through about 10 hours of quiet time without deep discharging our batteries.
Since we seem to have no control when the defrost heater cycle will start, I decided to see if we can prevent heater running during quiet hours.
I looked at the fridge’s wiring diagram, made a few assumptions on how things work and put a switch on some wires to prevent the heater from turning on.
We plan to turn on our new manual bypass switch before we turn off our generator at about 10 pm and then turn the bypass switch back to normal when we start our generator in the morning.
We run our generator when we are hunkered down inside during the evening to charge batteries and also keep them from discharging while we watch TV, run computers and have lights/heaters on. And then run the generator for about an hour in the morning to help recover any overnight battery use, while we do our morning stuff.
In bypass mode, the fridge timer still runs as normal, but the electricity to the heater switch is bypassed, so if the timer decides to close the heater switch, no electricity will flow to the heater. We don’t know if too much ice will build up if we bypass too many defrost cycles. Time will tell. The electric refrigerator saga continues.
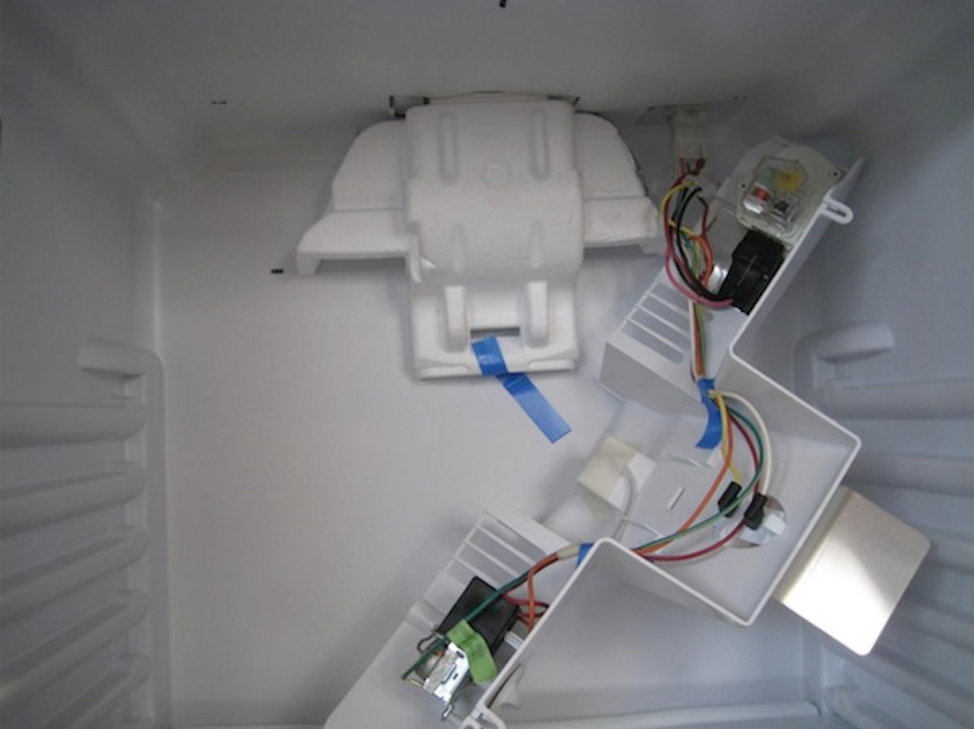
Wiring Timer: Timer has 4 wires. The black wire is wall-plug hot which the timer normally connects to the orange thermostat wire and then the compressor. During the defrost cycle, the timer disconnects from the orange thermostat wire and connects to the pink heater wire. I only have the wiring diagram to make assumptions on how things probably work.
I unplugged the black wire from the timer and ran it to the center pole of a new manual double-throw switch. I ran a new wire from the switch’s normal pole to the timer where I removed the black wire. I ran a new wire from the switch’s bypass pole to the orange wire.
Manual switch in normal position, nothing is changed. Changing manual switch bypass position disconnects power to the timer, so if timer starts the heater cycle, there is no electricity to the heater, and the compressor will continue to run if thermostat calls for cold. In the bypass position, when the timer is not in defrost mode, there will be no change.
Electric usage on our Whirlpool refrigerator
Measured electric usage over several months of use is about 50 watts per hour or 4/10s amp of 120-volts or 4 amps of 12-volts.
I checked out our manual defrost heater bypass and here are the results:
1) Zero watts with compressor & defrost heater off
2) About 125 watts with the normal compressor running
3) About 335 watts when defrost heater is on (compressor is off)
4) When defrost heater is on, moving my manual switch to bypass turns off heater & turns on compressor, and moving the switch back to normal position, the compressor turns off and the heater turns back on.
We are ready for Quartzsite.
Update: We finished 11 days of dry camping with our Lemon rally friends in the Quartzsite desert. This is our first extended boondocking experience since installing our Whirlpool electric refrigerator one year ago.
Everything worked great and our two 8D Gel house batteries held up just fine. We did not turn our inverter off at night but did turn almost everything off except our refrigerator. Batteries were never lower than 12.4 volts (75% full) at 7 am each morning.
We ran our generator each evening from about 5 to 9 pm, and again in the morning from about 7 to 9 am. We turned on computers and DVRs at about 7 am, which were partly powered by our solar panels.
We added a switch in our fridge to keep the defrost heater off at night, but we never had to use it, so I may remove the switch.
FYI, we ran our generator 77 hours for the 11 days, about 7 hours each day. Even without campground costs, we spent about $10 /day for electric (no) hookups.