by Barry and Cindy 1997 U270 36′
I made this to allow us to get us off the road in case of an air dryer failure.
The diameter of the 90-degree steel air dryer fitting is:
3/4″ MJIC male-flare x 1/2″ male-pipe.
Part # 2501-12-08, $4.82 each.
by Barry and Cindy 1997 U270 36′
I decided I would go through my air system and replace or repair any questionable components, and in the process familiarize myself with the procedure required to use the Emergency Dryer Bypass (hereafter referred to as the EDB). Those of you who have never had a dryer go bad may assume that using the EDB is pretty simple – you just remove the airlines from the dryer and connect them. Well, after simulating a “dryer failure” in my driveway (with safety stands in place) and attempting to use my EDB, I can tell you that it may not be quite that easy. In fact, for me, it was VERY difficult!
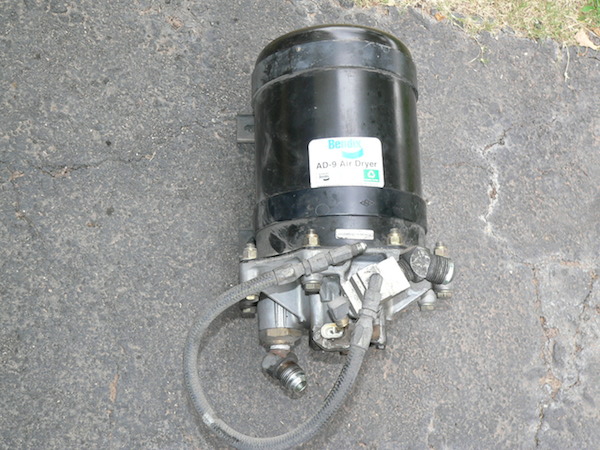
Your first problem will be accessed. I know different model coaches have the dryer mounted in different places – yours may be easier to reach than mine. Dryer failure usually means no air pressure, which means no lifting the coach to install safety stands. My AD-9 air dryer is mounted high up in the driver side rear corner of the engine compartment, hidden behind one of the hydraulic tanks. Reaching in through my engine cover, I can only touch it with one hand. Crawling under the coach is the only realistic way to work on it, but with the coach sitting down on the mechanical stops, you will have very little room to maneuver.
Your second problem is tools, or rather lack of them. I carry a pretty good selection of tools in my coach, but I only had one wrench that was big enough to remove the big air line connections: a 12″ (300mm) Cresent wrench. An adjustable wrench is not ideal when faced with VERY tight connections, but it will work. Personally, I plan to buy a large open-end wrench set (covering 1″ to 2″) so in the future, I will be better prepared. (6 Piece Jumbo Angle Wrench Set) A 2′ “cheater pipe” would also be very helpful!
You will need some way to plug the small “control” air line that runs from the D-2 air governor to the air dryer. It will probably be either a 1/4″ or a 3/16″ flare connection – I would carry both size plugs (or a selection of sizes) just to be safe. See the photo of the required flare plug (below).
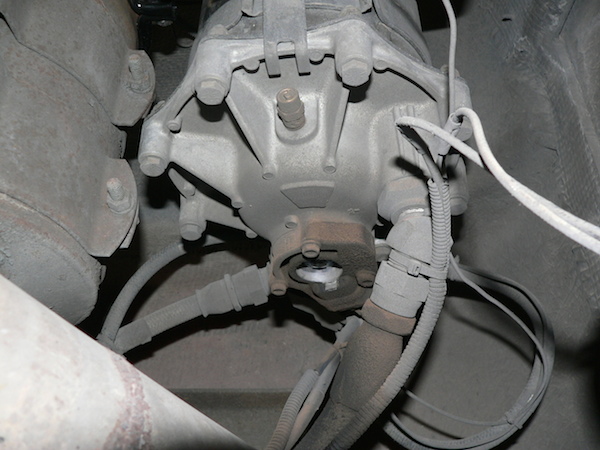
On to the demo! The photos below will show the following:
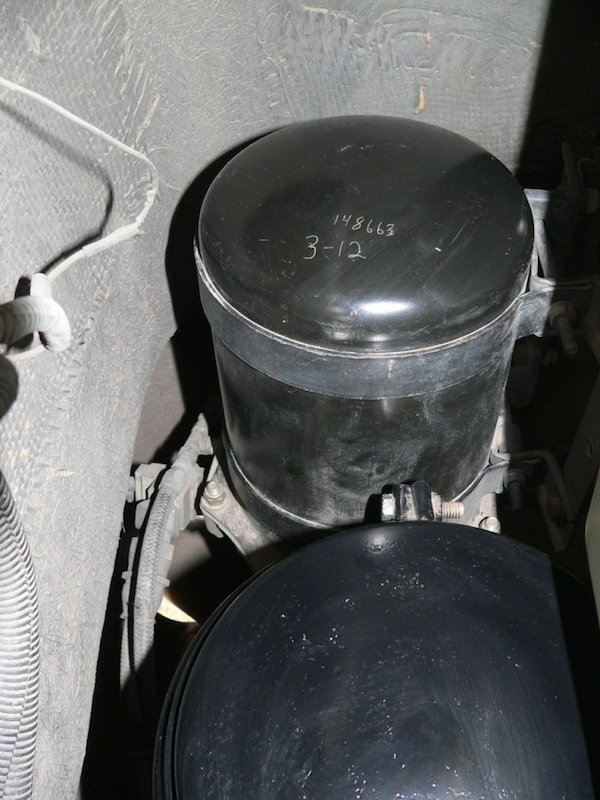
1. AD-9 air dryer viewed from the engine hatch. The small braided “control” hose just visible to the left of the dryer is the one you need to remove and plug.
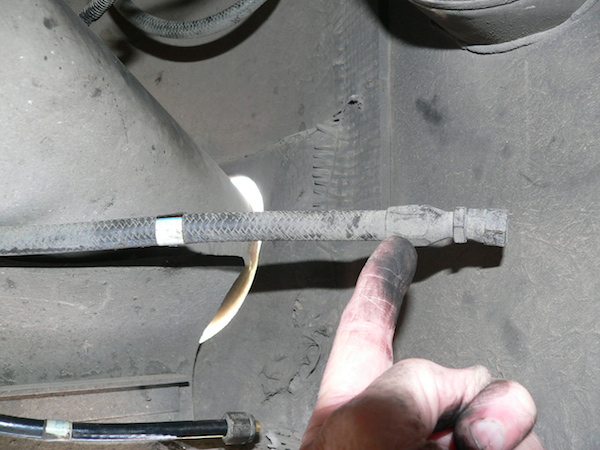
2. Close up of small braided “control” hose. The flare plug goes here.
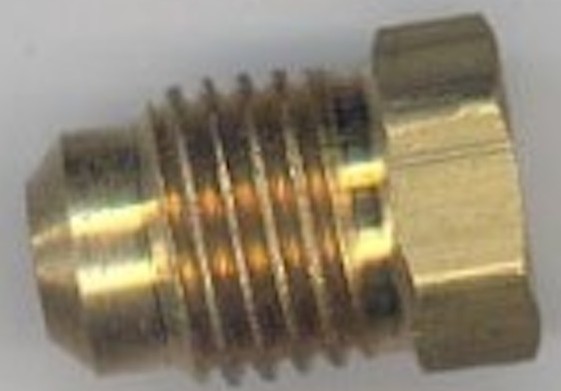
3. Photo of type of flare plug that is required.
4. AD-9 air dryer viewed from under the coach. The 2 big braided hoses (one in the foreground, one in the background) are the ones to remove and connect together.
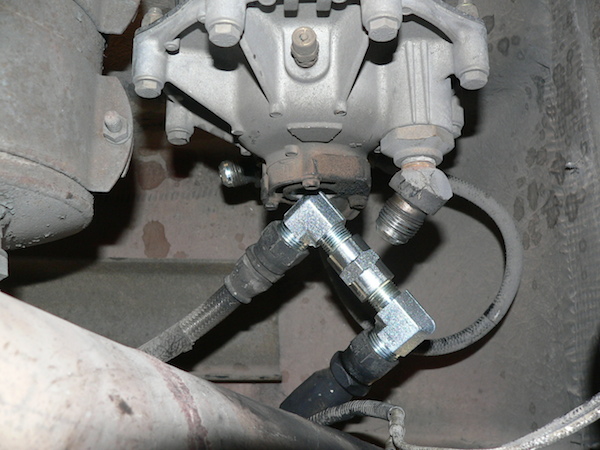
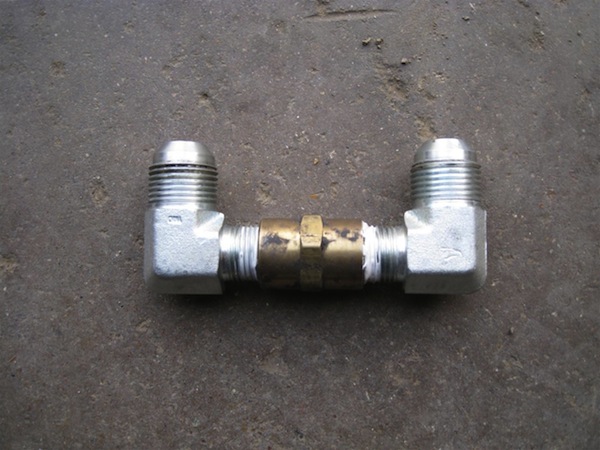
5. Big hoses detached from the dryer and connected with EDB.
6. A better view of the “control” hose connection. There is a “T” double flare connection at the base of the dryer (below the white label). Control hose connects to the “T”.
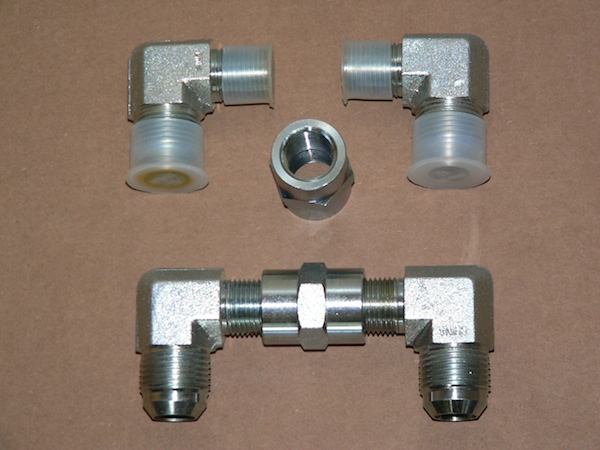
I also stopped at a hydraulic store (lots of those around here in the heart of the oilfield) and bought the parts to make the emergency dryer bypass. I actually got sufficient parts to make 2 of them – if I ever come across another Foretravel stalled on the highway with air dryer woes, I’ll have an extra one to loan him! The part numbers and descriptions are shown below. Total for all 6 pieces was $30, so it only costs about $15 to buy yourself a great deal of “peace of mind”. Cheap insurance!
There has been some discussion recently about the “shape” of the EDB. Some say a simple 1-piece double union connector would work. In my case, it would not. There is no way I could bend the big air hoses enough to make a straight connection. Only a “U” shaped bypass would work for me.
You will need some way to plug the small “control” air line that runs from the D-2 air governor to the air dryer. It will probably be either a 1/4″ or a 3/16″ flare connection – I would carry both size plugs (or a selection of sizes) just to be safe.

Part #2501-12-08 3/4 M-JIC / 1/2 M-NPT / 90 DEG $5.30EA
Part #5000-08-08 1/2 F-NPT / 1/2 F-NPT / COLLAR $2.96EA
Chuck 1993 U280 SE 40′
D2 Governor has 3 unloader ports.
1 for air dryer
1 for compressor intake valves unloader
1 not used (at least the way mine is plumbed)
Stopping the control signal air leaking to the air dryer (after “control” flexible tubing has been removed) is necessary in order for the governor piston to fully complete its travel. That will allow the control signal outlet pressure to build and send the high-pressure control signal to the engine compressor intake valves unloader. That unloads the compressor allowing bypass flow until the governor low press setpoint (wet tank pressure) is reached and the cycle starts over again. Neal Pillsbury 1998 U270, WTFE, 36′