Flush and Fill Generator
Drain old coolant, remove the thermostat, flush the entire cooling system, install a thermostat, and fill with recommended clean coolant. Perform these procedures as follows:
1. Pressure test entire cooling system and pressure cap if not previously done.
2. Slowly open the engine cooling system filler cap or radiator cap to relieve pressure and allow coolant to drain faster.
3. Open engine block drain valve or plug. Drain all coolant from the engine block.
4. Open the radiator drain valve. Drain all coolant from the radiator.
5. Remove thermostat at this time, if not previously done. Install cover (without thermostat) and tighten cap screws to specification.
6. Test thermostat opening temperature.
7. Close all drain valves after the coolant has drained.
CAUTION: Do not run engines longer than 5 minutes (at low idle) with water as a coolant. Doing so may cause the engine to overheat which may cause burns when water is draining.
8. Fill the cooling system with clean water. Run the engine about 5 minutes at low idle to stir up possible rust or sediment.
9. Stop engine, pull off lower radiator hose and remove the radiator cap to immediately drain the water from the system before rust and sediment settle.
10. After draining water, close drain valves. Install radiator cap, radiator hose, and clamp. Fill the cooling system with clean water and a heavy-duty cooling system cleaner such as FLEETGUARD RESTORE or RESTORE PLUS. Follow the manufacturer’s directions on the label.
11. After cleaning the cooling system, drain cleaner and fill with water to flush the system. Run the engine for about 5 minutes, remove the radiator cap and pull off lower radiator hose, immediately draining out flushing water.
IMPORTANT:
Air must be expelled from the cooling system when the system is refilled. Loosen temperature sending unit fitting at the rear of the cylinder head to allow air to escape when filling system. Retighten fitting when all the air has been expelled.
12. Close all drain valves on the engine and radiator. Install lower radiator hose and tighten clamp.
13. Install thermostat and cover using a new gasket. Tighten cap screws to specification.
14. Add coolant to the radiator until the coolant touches the bottom of the filler neck.
15. Run the engine until it reaches operating temperature. This mixes the solution uniformly and circulates it through the entire system.
16. After running the engine, check the coolant level and entire cooling system for leaks.
TESTING THERMOSTAT OPENING TEMPERATURE
1. Remove thermostat.
2. Visually inspect the thermostat for corrosion or damage.
CAUTION: DO NOT allow thermostat or thermometer to rest against the side or bottom of the container when heating water. Either may rupture if overheated.
3. Suspend thermostat and a thermometer in a container of water.
4. Stir the water as it heats. Observe the opening action of the thermostat and compare temperatures.
NOTE: Due to varying tolerances of different suppliers, initial opening and full open temperatures may vary slightly from specified temperatures.
5. Remove the thermostat and observe its closing action as it cools. In ambient air, the thermostat should close completely. Closing action should be smooth and slow.
6. Replace thermostat if the opening temperature is not within specification.
Adding a Generator Coolant Temperature Gauge
We have a PowerTech 8kw Isuzu.
Foretravel generators will shut down if oil pressure drops or coolant temp rises, so no gauges are installed by Foretravel but I wanted to monitor our generator temperature:
We used the same VDO temp sender Foretravel used on our engine and threaded it into our generator thermostat housing so it could drive our dash gauge correctly.
Ran a wire from gen temp sender to motorhome dash.
Installed a double-pole double-throw switch on dash.
Center switch terminals are connected to dash Cummins engine coolant dash gauge’s power and sender terminals.
Top switch terminals are connected to original gauge cables, so when a new switch is down, the dash gauge displays original engine coolant temperature when the ignition is on.
Bottom switch terminals are connected to 12 battery (not ignition) and new generator temperature sender, so when the switch is up it displays generator coolant temperature, even if the ignition is off. by Barry Levitt 1997 U270 36′ 4/4/08
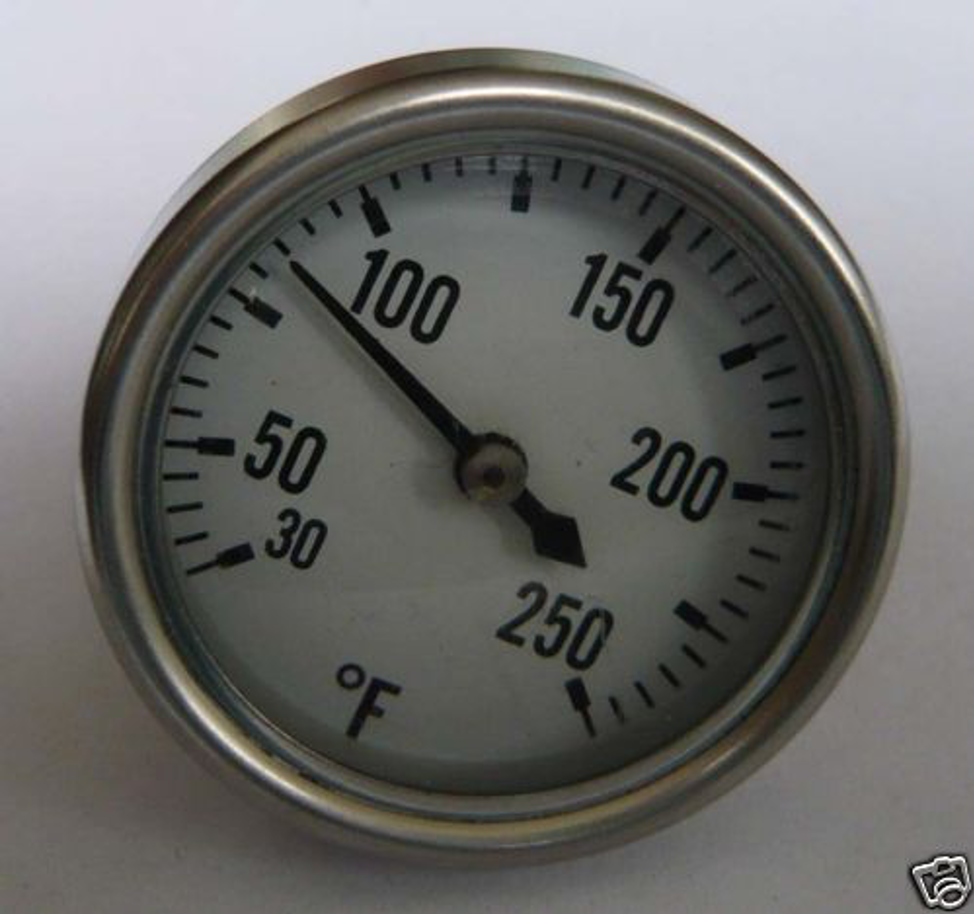
Here is an easy temperature gauge installation for the 10Kw generator (and others) in a U300. I ordered it off eBay.
and then with the tools in one of the photos, installed it.
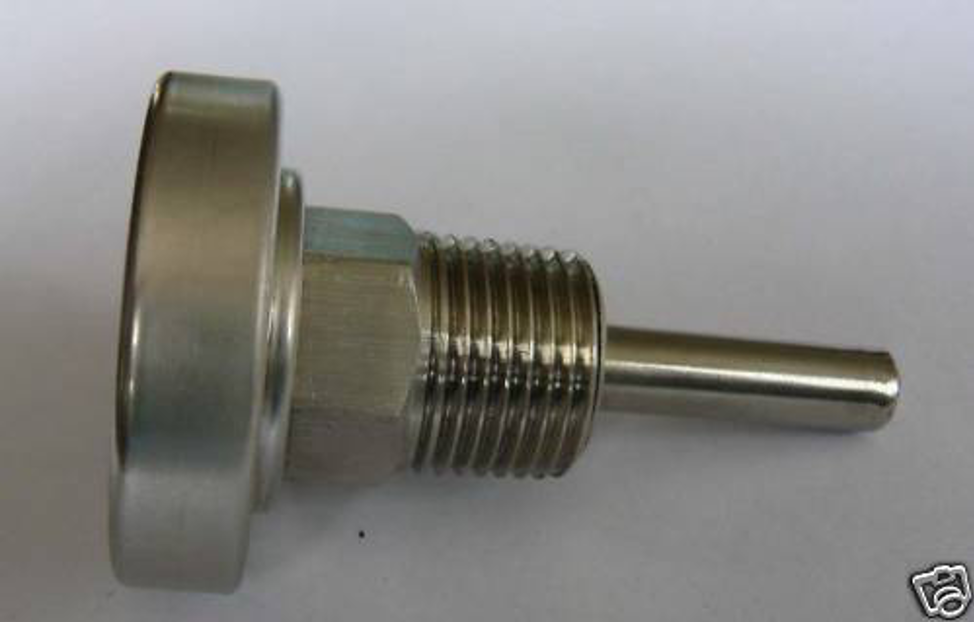
The gauge is really nice stainless steel with dead-on accuracy as compared with our indoor digital thermometer. The pipe threads are the same size as the threads in the thermostat housing on the generator so you only have to release pressure if the generator is warm, turn a 1/2″ extension (1 foot long) backward, use the large adjustable wrench and unscrew the plug. If the gauge is ready to go with your favorite sealant on the threads, it will thread in with only a tablespoon or so loss of coolant. I used a 17mm/ 11/16″ open end to tighten it until in the proper position.
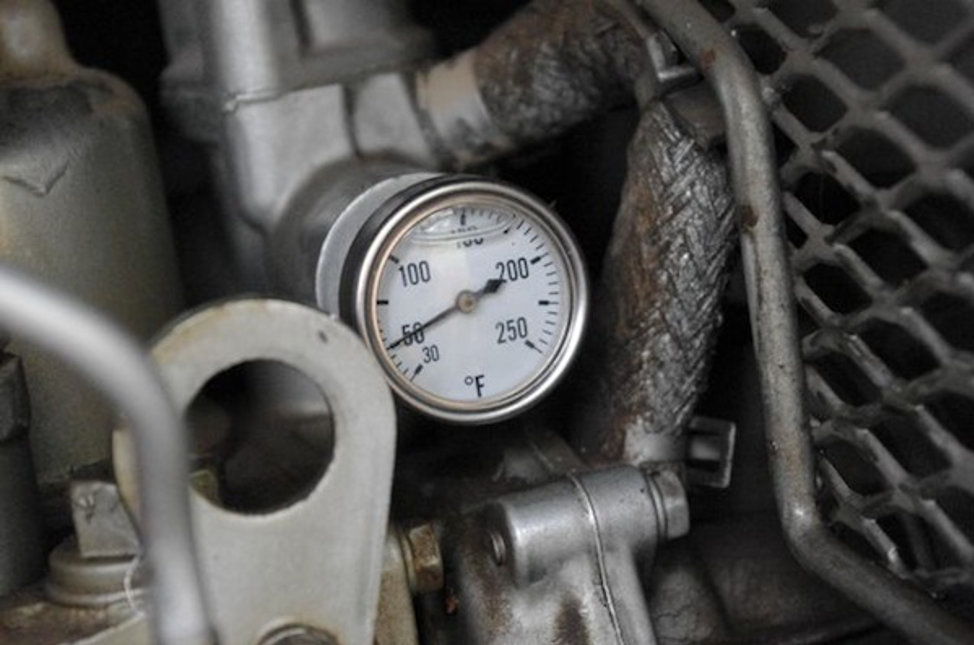
Temp Gauge Installed
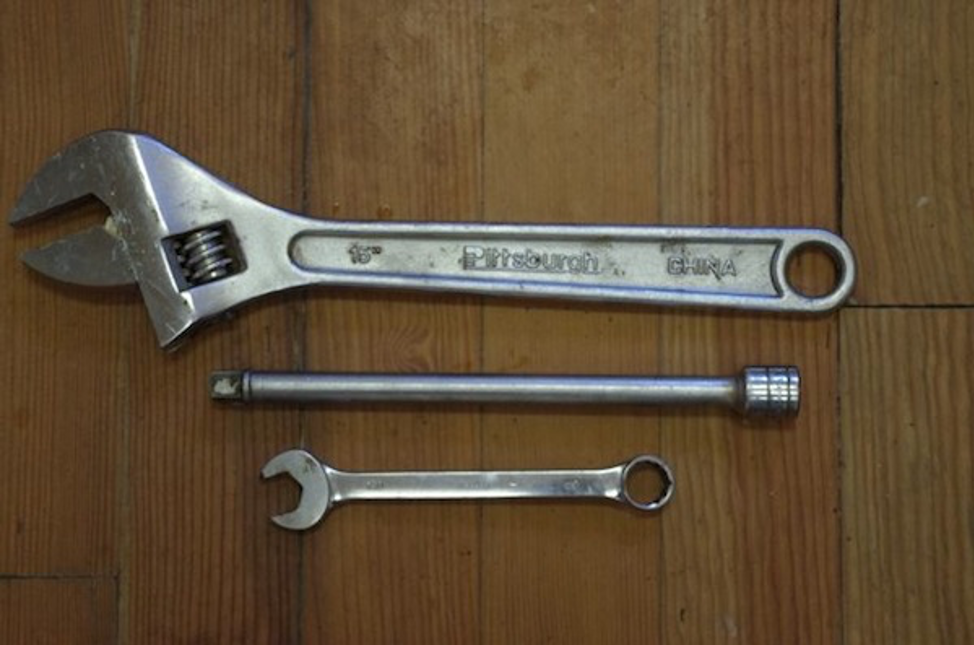
Tools for Temp Gauge Installation.jpg
A sensor with a wire to an instrument panel gauge would be even better but this is a big improvement from OEM.
This will indicate the engine temperature but is not a substitute for checking the coolant level. Pierce Stewart 1993 U300 36′