by Mark and Tanya 1999 U270 Special 40′
I wanted to let everyone know about the Genset radiator mod I did with my son today. Just in case anyone else is having the same problem.
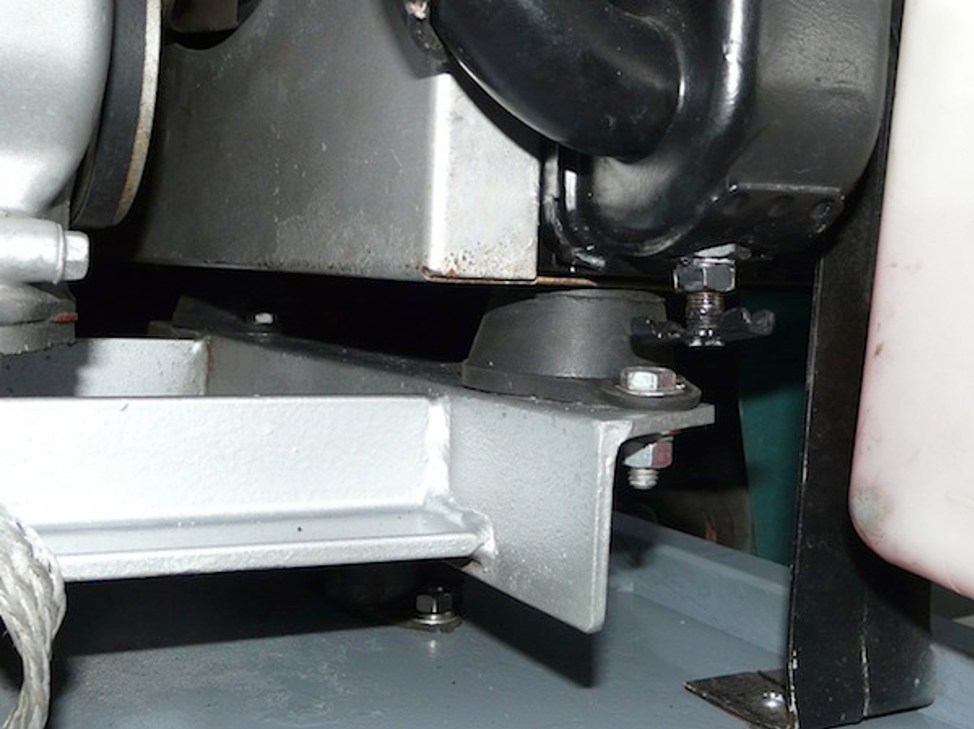
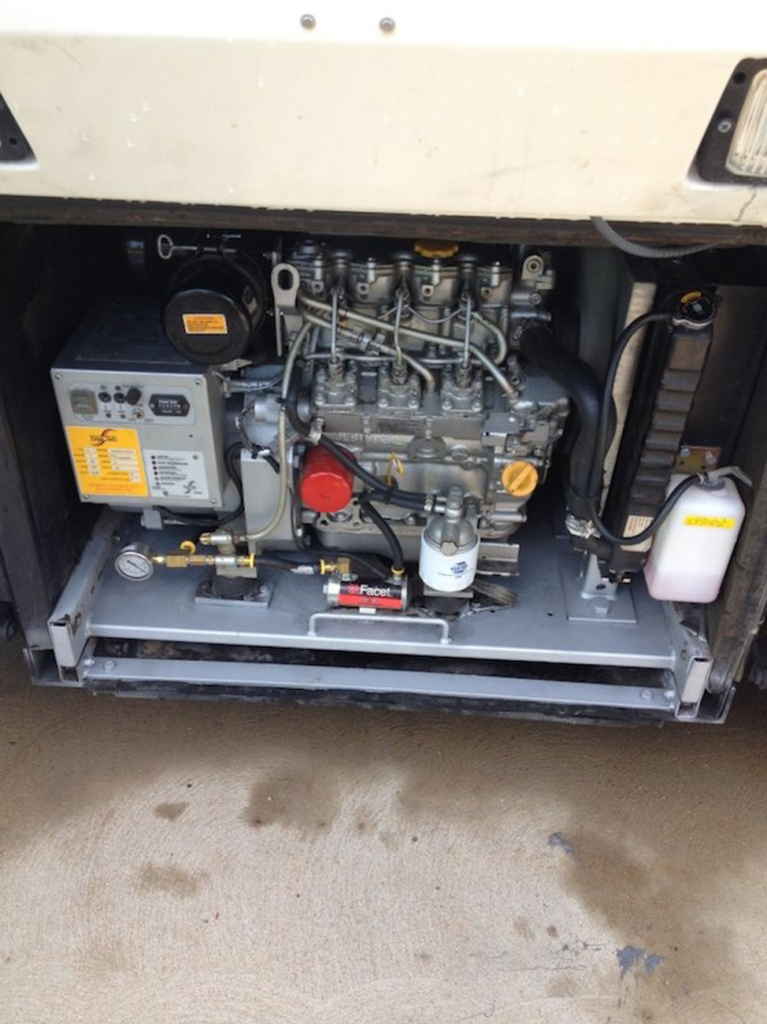
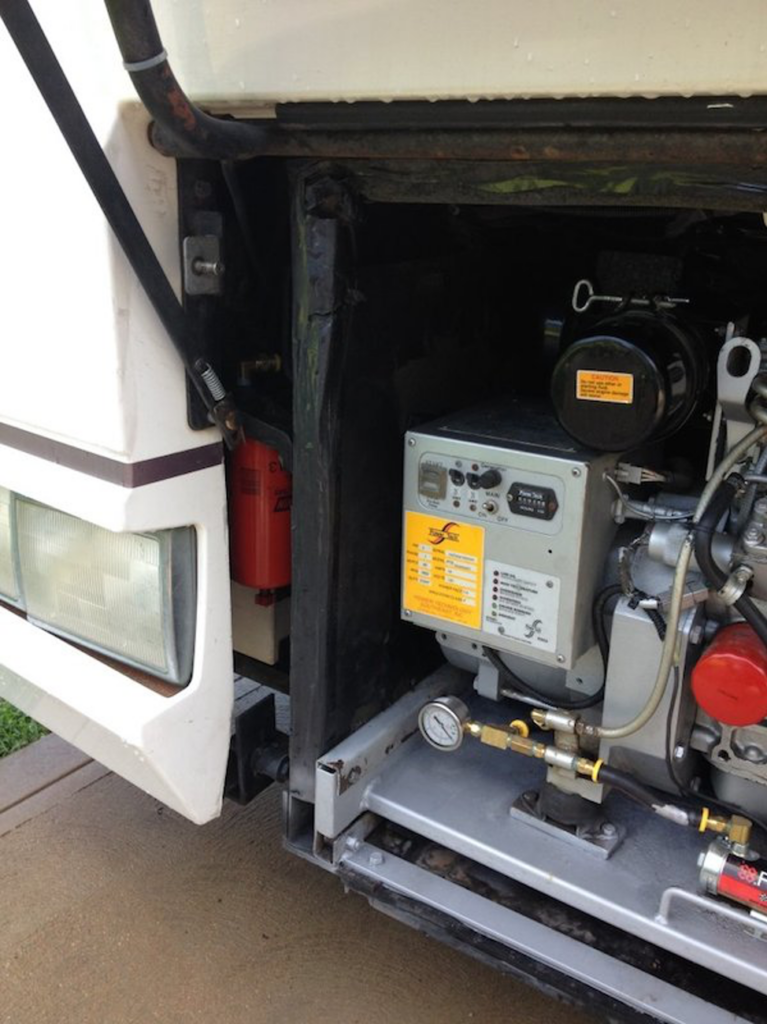
It started with the original owner within the first year of service. During the ten years he owned it he had the radiator replaced because of leaks four times. He also had it repaired numerous times. Since I bought the coach in May 2010 I have had the radiator repaired twice and replaced twice. The problem is that the radiator is mounted to the engine and that causes terrible vibration from the three-cylinder Isuzu. It wears out the radiator mounts and causes leaks in the radiator. Normally the leaks occur at the lower radiator neck. After much discussion with Gary Omel, My brother and Powertech themselves, we decided the only fix was to separate the radiator from the engine. Today we accomplished just that.
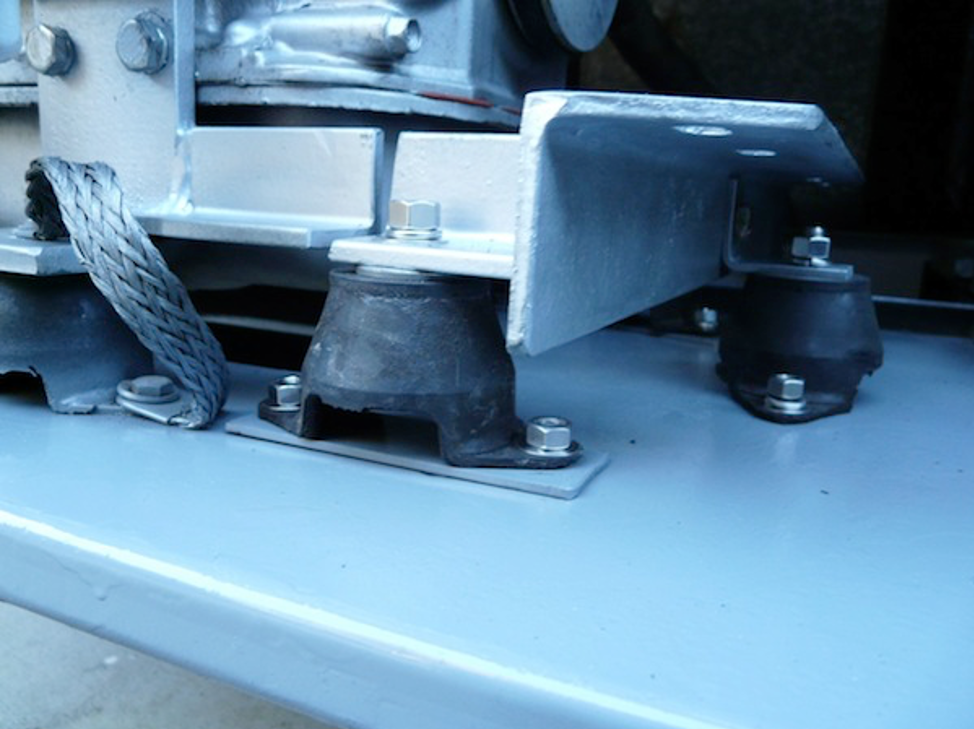
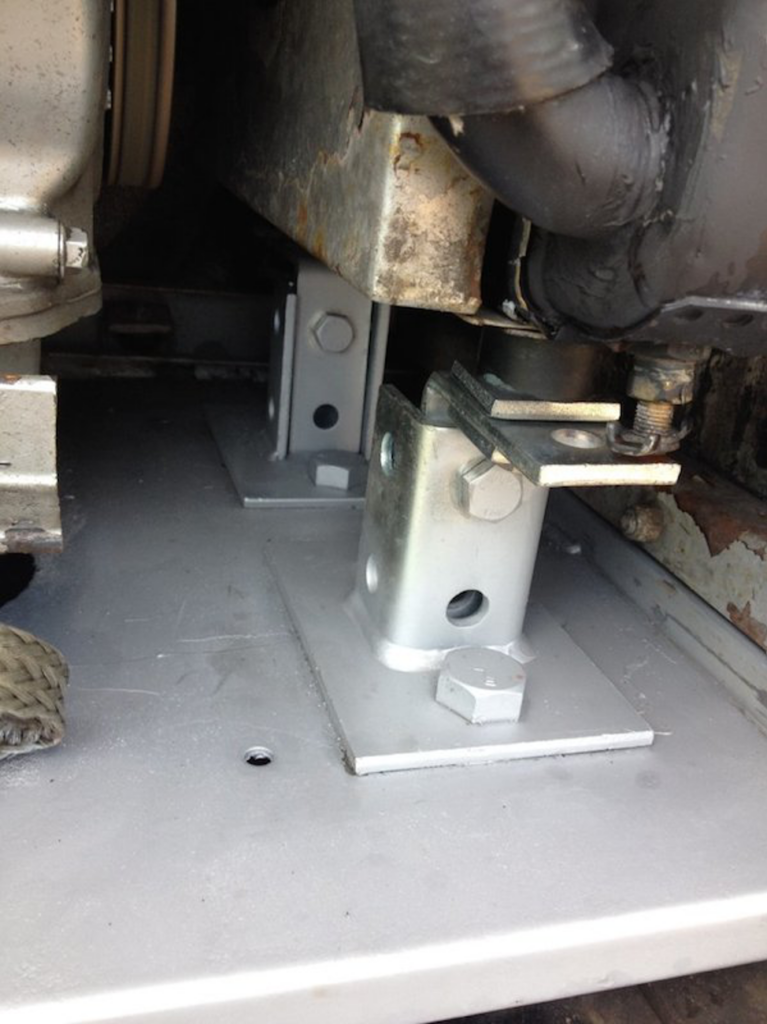
Here is how we did it. First I ordered two brand new radiator mounts from Item No: KR-60-1 [Flat-Head Neoprene Compression Mount]. I had previously replaced the generator mounts and still had the old ones. I used the old mounts to support the radiator support bracket.
My radiator has two mounts under the radiator. I used the old engine mounts (three of them) under the metal radiator mount for supports. I suppose you could use other materials for that but it is what I had on hand. It worked well for me and adds some additional isolation.
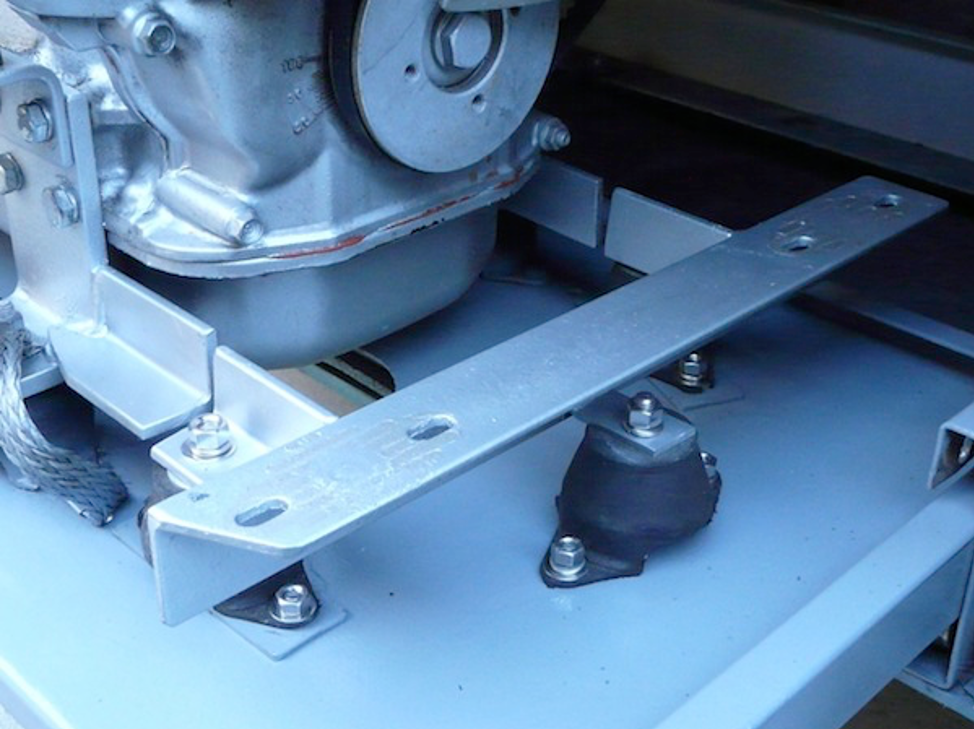
The upper part of the radiator is attached with a couple of rubber mounts. I took them off at first because I didn’t want any connections between the engine and the radiator. It worked fine with no rubbing of the fan against the shroud. However, I decided to put them back on for an added insurance against any contact with the shroud. It doesn’t seem to transfer any additional vibration to the radiator. The main vibration came from the steel mount attached to the engine. I put red lock tight on the studs I installed in the new mounts so they would not come loose. They are automotive studs I bought at ace hardware.


New Radiator Mounts
New radiator mounts installed prior to completing the rest of the modifications.
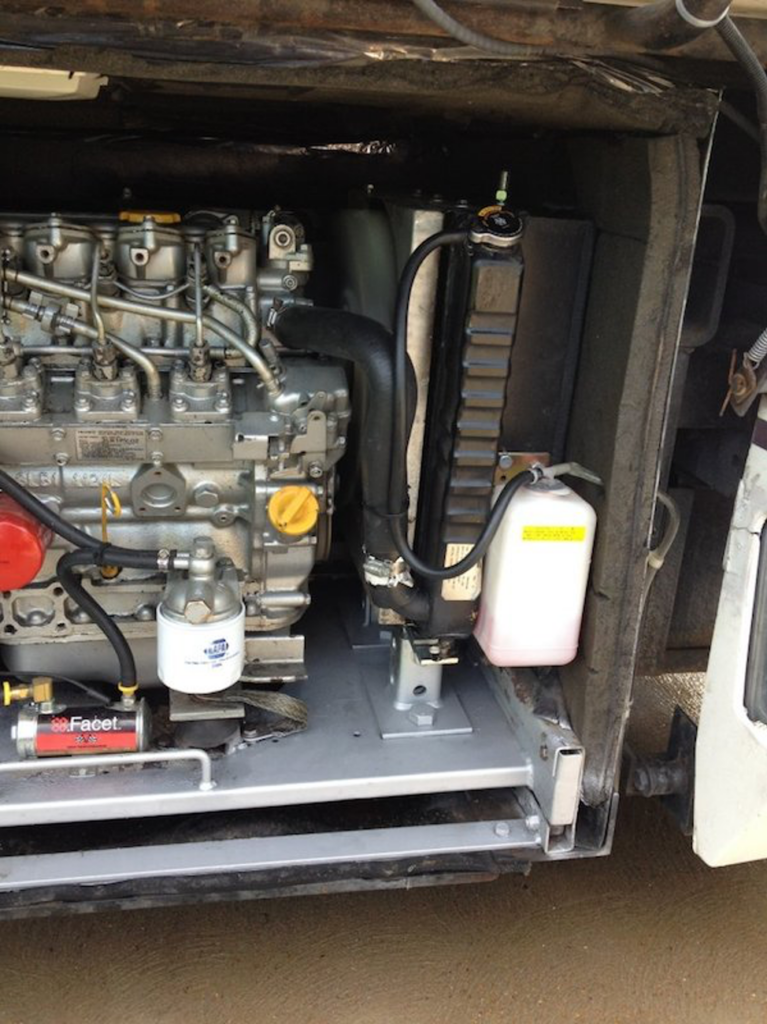
I used the old mounts to support the radiator support bracket. I mounted and marked all the mounts before cutting it loose from the engine so the radiator would be in the same position when it was separated from the engine. I bought some steel from Lowes to make the upper radiator supports and the strap that is bolted across the top of the radiator. I removed the entire front mount from the engine prior to cutting. After cleaning it all and painting it reassembly was easy.

The two on the left are the new ones and the one on the right is the old one as you can tell it is shot.

Bracket Remounted
New Mounts installed
Finished Project
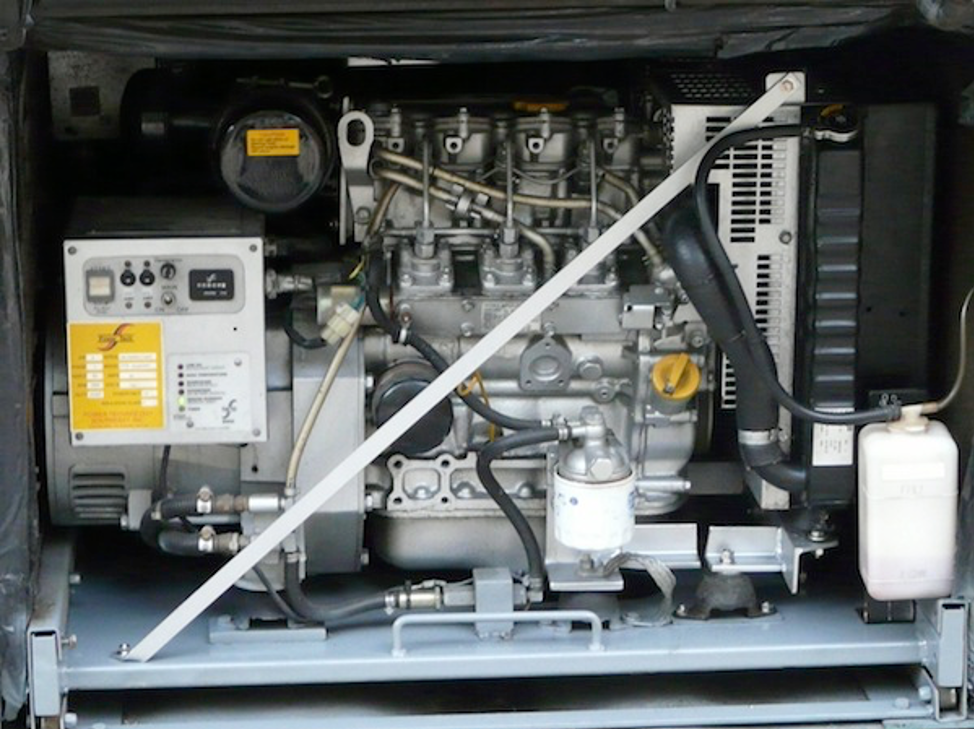
Now that the radiator is separated from the engine the Genset runs soooo smoothly with almost no vibration being felt by the radiator. I believe with this mod I should not have any more issues with the radiator again. Thank God. The problems we had this past summer in Texas were terrible and really messed up our travel plans. Anyhow, I hope this helps someone out there.
Mark, You and your son did an excellent mod. I’m sure that the problem is now solved. You might consider one more step. Look into adding a rubber cushion at the base of the brace (or at the top), to allow the radiator to float more freely. This is a mod that every early U270 owner should consider. Gary O 2000 U320 4210
I guess they must have separated them on anything newer than 99 as mine has the radiator in the side compartment under the driver. John Haygarth 2000 U295 36′
Early Foretravel U270 models efficiently used a 3 cylinder 8kw generators which have room for the radiator in the generator compartment with an engine belt-driven fan. Other models used 10kw generators that did not have room for a belt-driven fan and radiator, so the radiator had to be remotely mounted taking up an available compartment and requiring a separate 120-volt blower. Barry and Cindy 1997 U270 36′
I would like to give a huge thanks to MAZ (Mark) for the wonderfully detailed post he has here.
Since I don’t think there is any way I would have had the cojones to chop off the engine frame supports for the radiator if he hadn’t done it first.
I had some unistrut parts lying around so my installation is a little bit different but with the same ideas that Mark had.
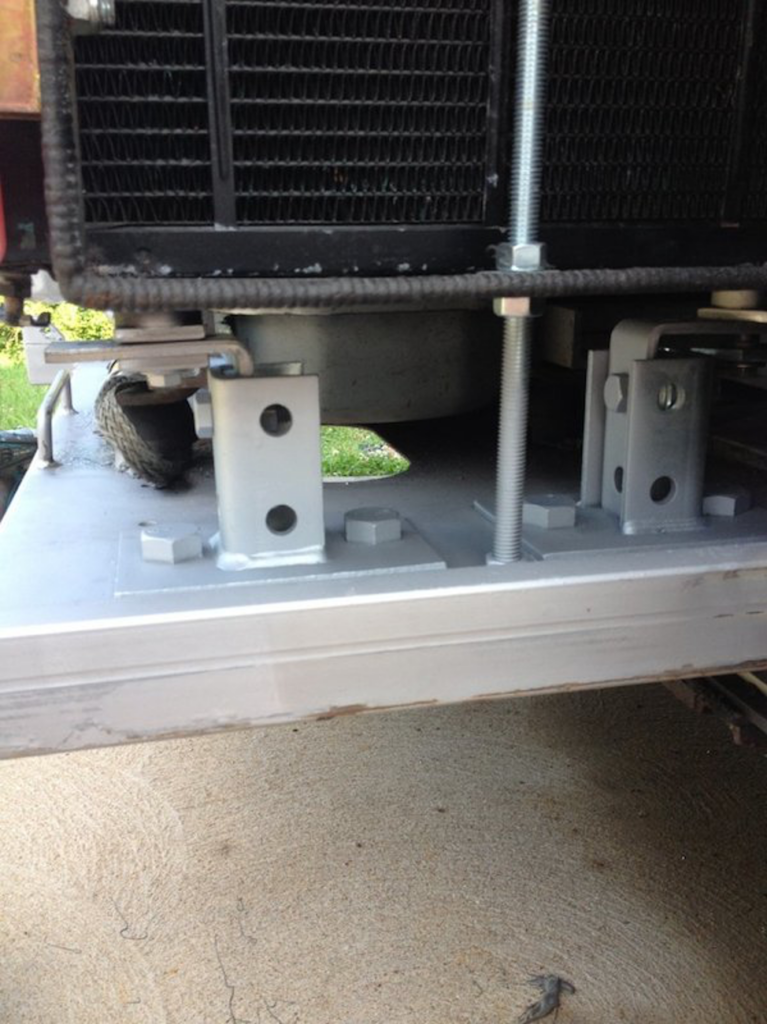
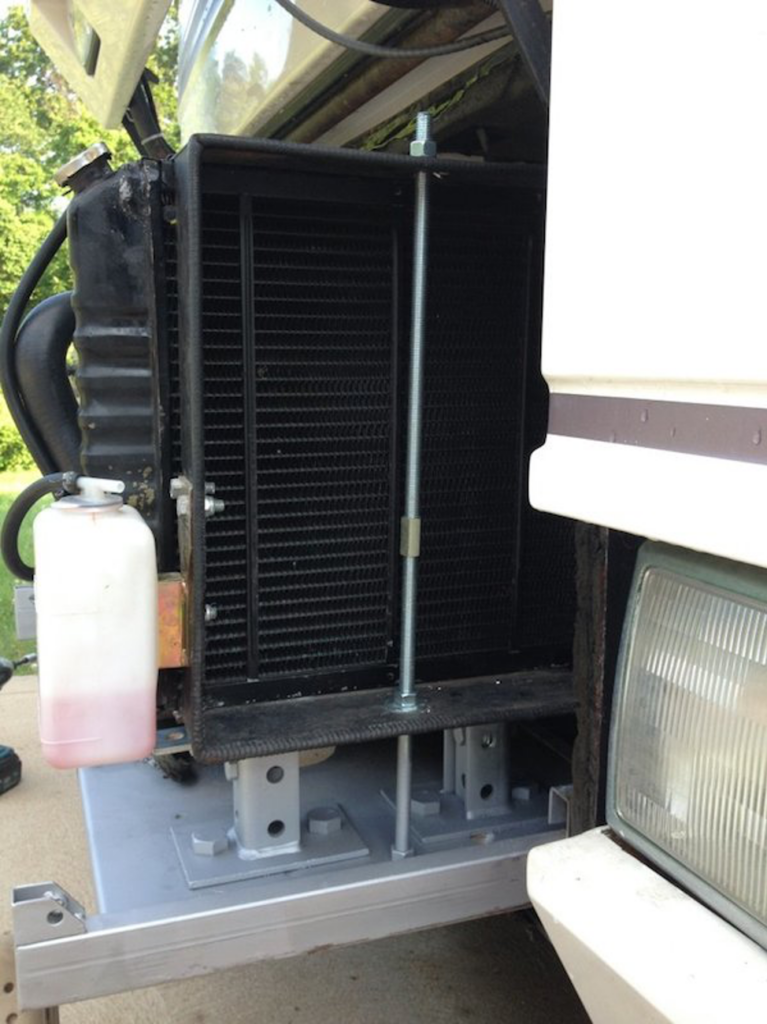
Rather than reusing the chopped off radiator frame which had some really mangled radiator mounting holes that someone before me must have tried to enlarge and/or move, I scrapped it. I used 2 unistrut base mounts with 290 bracket elbows attached to it. These are extremely common building materials if you are an electrician, plumber, or HVAC tradesman and are available at Home Depot or supply house.
Morris Products 17450 Post Base Single Channel, 2 Hole, Standard, 3-1/2″
Amazon.com: Genuine Unistrut P1325-EG 4 Hole 90 Degree Angle Connector for All
Depending on where you drill your base holes you will need to make adjustments with unistrut square washers to get the fan shroud centered on the fan. Rather than trying to reuse the 16-year-old hardened rubber radiator isolators, I modified a couple of soft neoprene expansion plugs from the hardware store for vibration absorption and the radiator sits directly on top of them with a screw coming up from the bottom of the 90 brackets.
On the radiator air intake side, I used 2 pieces of all thread with a coupling between them to make the essential supportive 3rd leg and the coupling allows me to take everything apart quickly if needed.
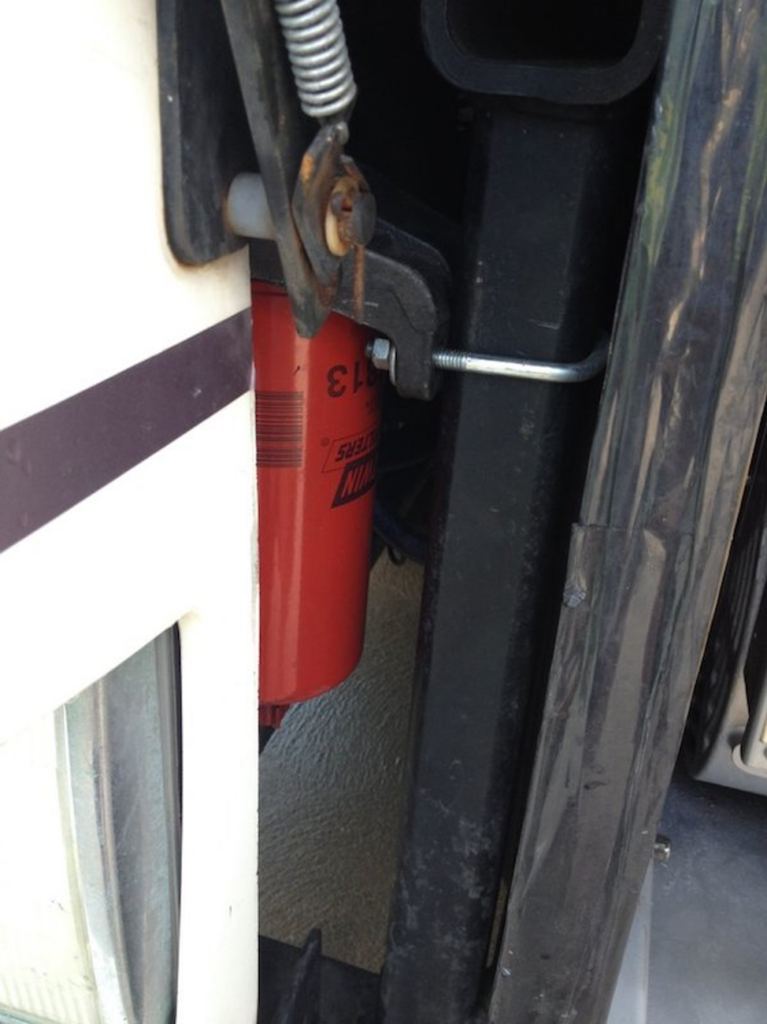
I replaced my Cummins primary fuel filtration set up and had the old filter base leftover so I decided to use it as a primary fuel filter on the generator since my FT only had the on-engine filter when I bought it. It mounted perfectly to the 2×2 steel frame member right next to the generator with a u-bolt similar to this one (this is not the right size so don’t use this part). This primary fuel filter can be seen as the red Baldwin filter on the outside left of the generator enclosure.
Amazon.com : Sq U-Bolt 1/2×3-1/16×3-13/16 (Threaddia.Count: 1/2-13
I wanted to add that at 1100 hours on the generator, the valves were all much tighter than the 0.020 specs called for in the manual. This is quite easy to do on the Isuzu generators and is supposed to be done every 1000 hours. Maybe your results will be different but based on how out of spec mine were, I’ll probably be checking every 500 hours. Robert 1998 34′ U270 C8.3