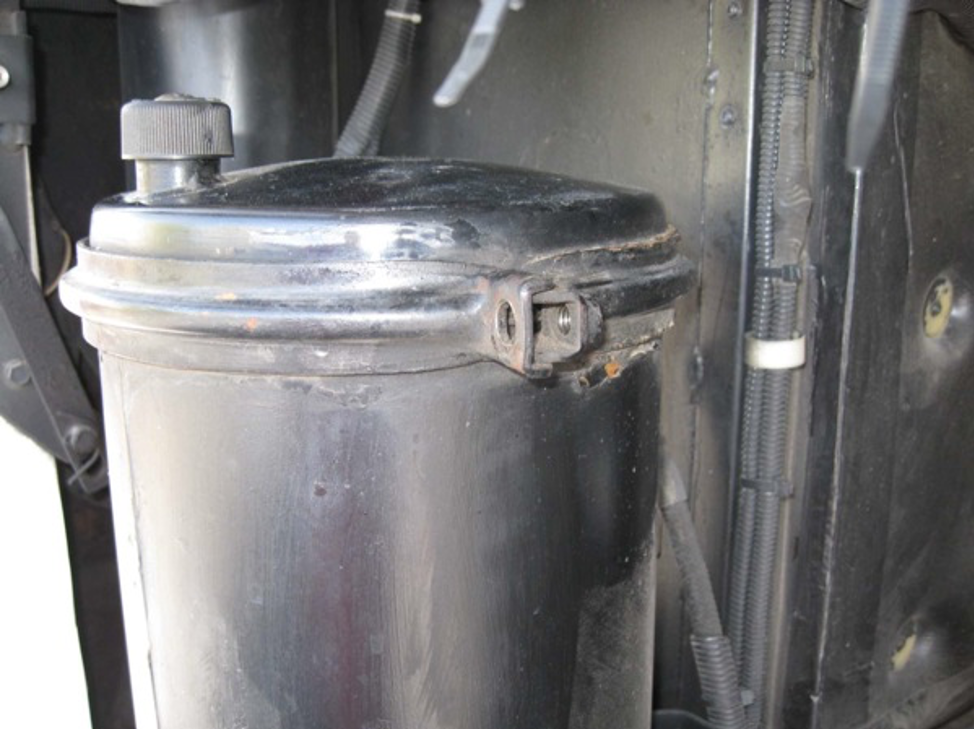
As stated it may be the hydraulic filters, if they are “wire mesh” on the outside then it is probably the hyd filters. The large canister houses them. They are 4-6 inches long and about 3-4 inches in diameter. It’s a mess to replace them, but my best advice is to put on double “diamond grip” latex gloves and have a trash bag handy for the filters, reach in up to your elbow and pluck out the filters. Make sure that you get the old gaskets off the filter support rod and then just drop in the new filters, add a little oil and you should be good to go. Greg 1995 280 SE
The hydraulic pump for your cooling fan takes 30+ HP at high engine speed/high fan speed.
Filter elements degrade with age as well as use.
They are not expensive, nor is it a difficult job.
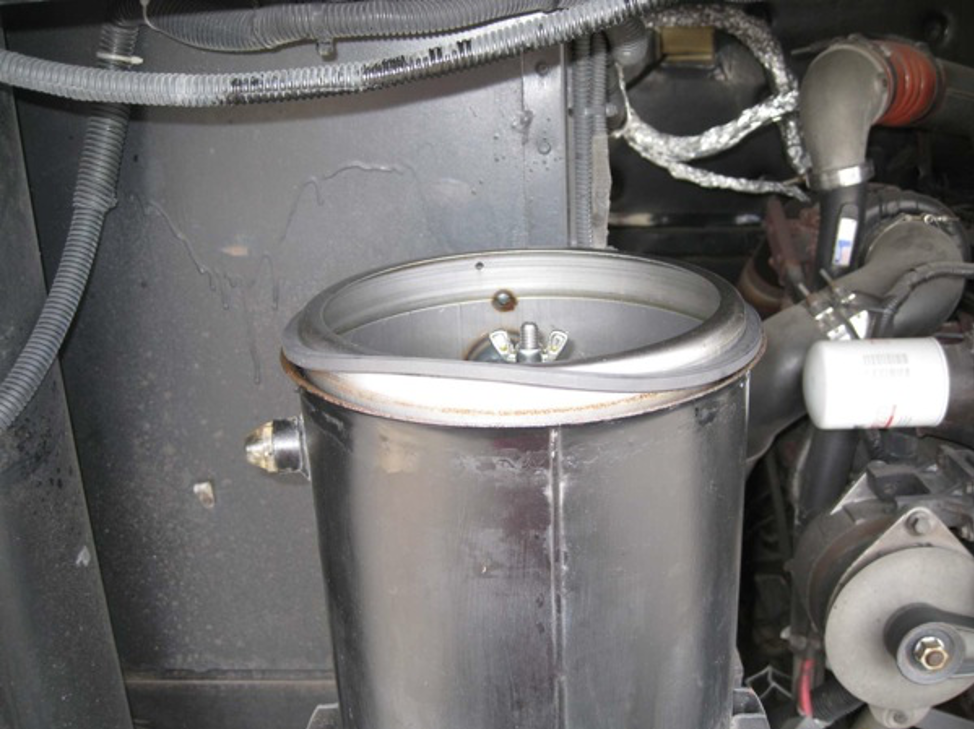
- Remove the reservoir canister lid.
- Siphon out the oil so you don’t mix unfiltered oil “clean/filtered” oil.
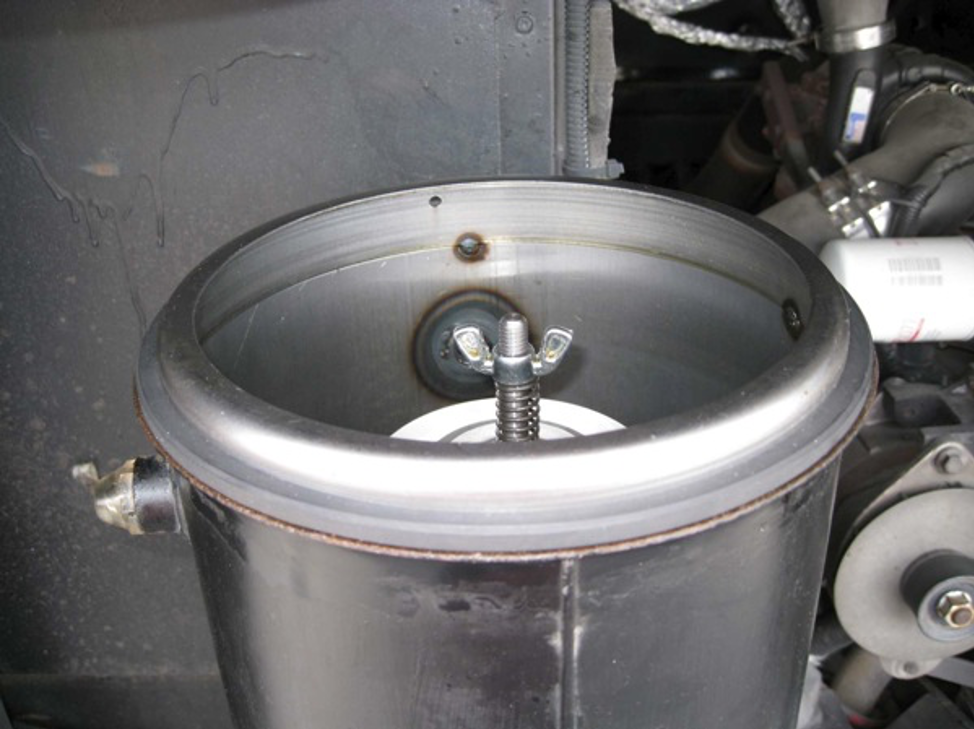
- Remove the wing nut holding the washer and filters in place.
- Install new filter(s), the washer and wing nut
- Fill with the proper oil and replace the lid.
It is better to siphon off the old oil in the hydraulic reservoir before replacing the filter element(s). That way, dirty fluid and dirt in the bottom of the reservoir do not go to the middle (filtered fluid area). It also makes filter replacement a LOT less messy.
Be sure to use the correct fluid. Ours uses Delo 400 15-40 per the label on the reservoir.
By Brett Wolfe 1993 U240 5/10

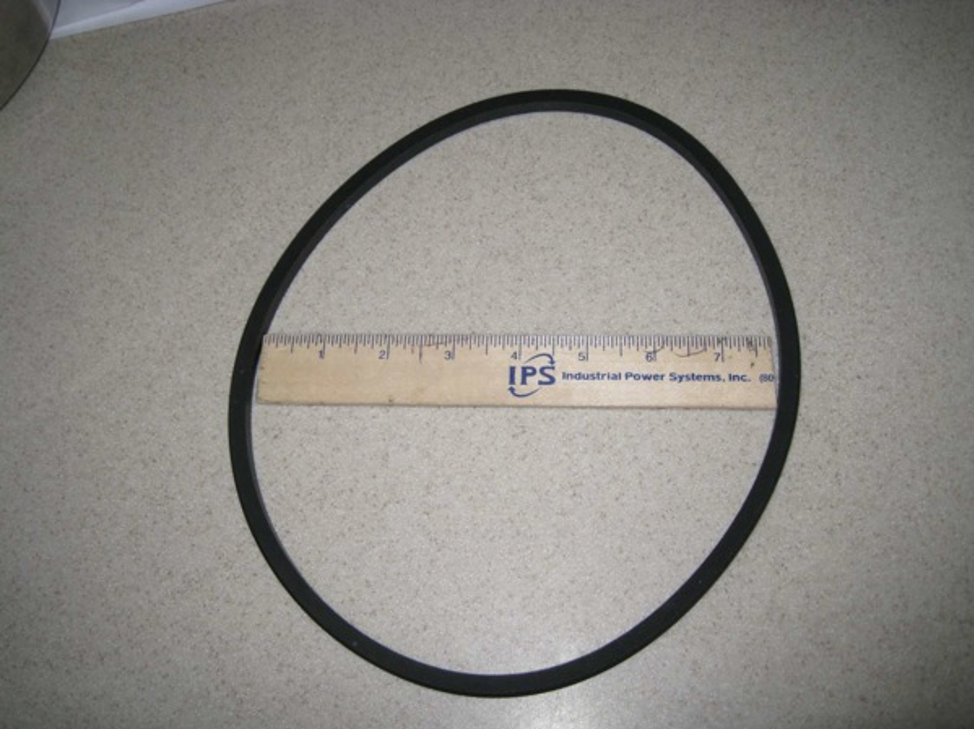
Nelson 84101B Hydraulic Filters
Photos and Description below by Barry and Cindy 1997 U270 5/15/10
We did the hydraulic filter/oil change today. It took a couple of hours, including time to buff off light rust and repaint. I went well with no surprises and no mess.
As with previous oil changes, we buy inexpensive new empty Lowe’s 5-gallon plastic containers with very tight-fitting lids.
Used oil in a sealed container is just dropped off for recycling without waiting for empty containers back.
Poured in 4 gallons of Delo 400 15w40 regular engine oil, which 3-gallon boxes were on sale at Costco.
Will top off oil though dipstick hole in a few days, with probably another quart or two after oil cools.
It was nice to have a new gasket. The old gasket looks ok, but the rubber is many years old.
You can easily do the job yourself.
New rubber gasket (Double Bevel O-Ring seal – Cummins # 999-55A) showing its size
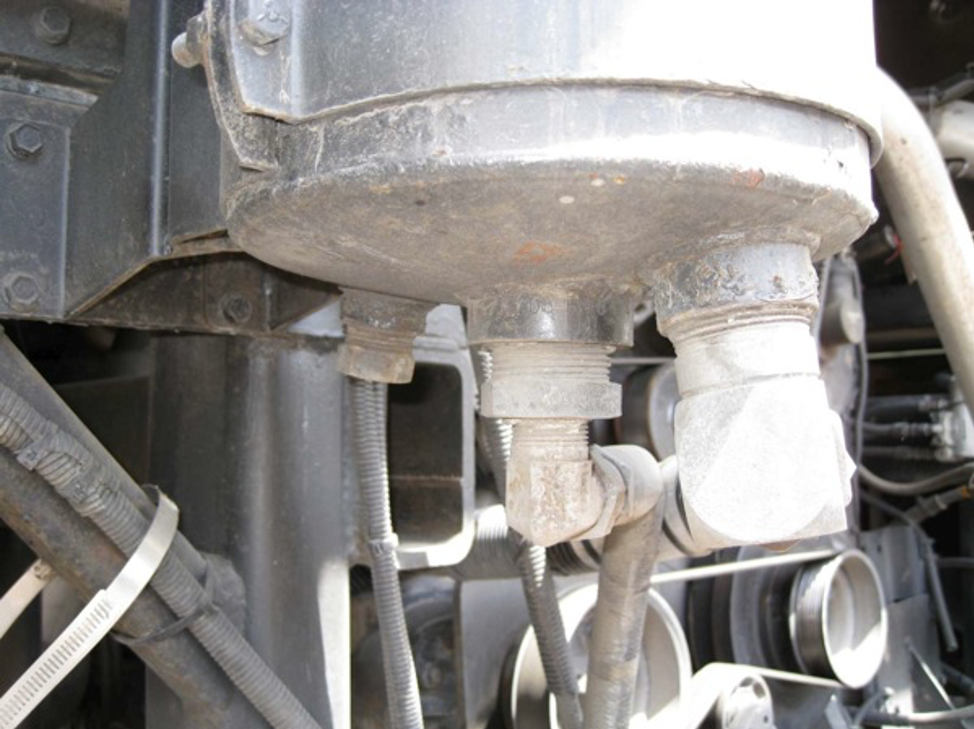
Outside bottom of the hydraulic tank showing where the drain plug is located. The cover must come off to replace filters and it is easy to pump out oil from the tank without removing the drain plug. Drain plug does not need to be touched.
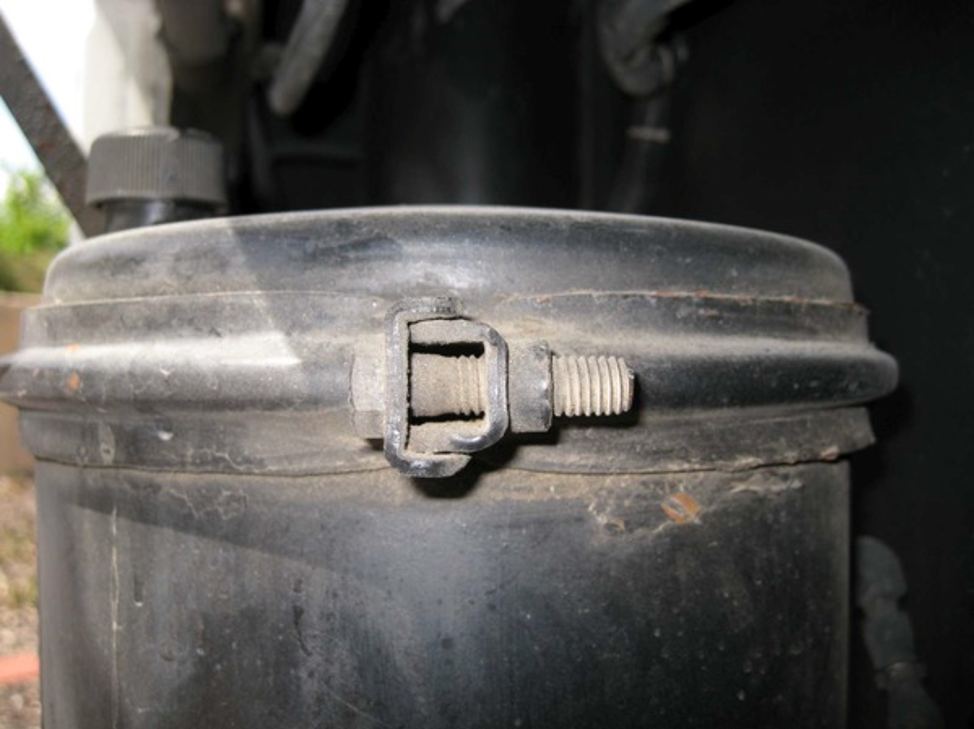
Cover clamp showing right side’s bolt. Before removing the cover. Note how to rear clamp fits inside the front clamp, which is reverse of the left side. Remove bolt to remove cover clamps
Cover clamp showing left side’s bolt. Before removing the cover. Note how the front clamp fits inside the rear clamp. Remove bolt to remove cover clamps.
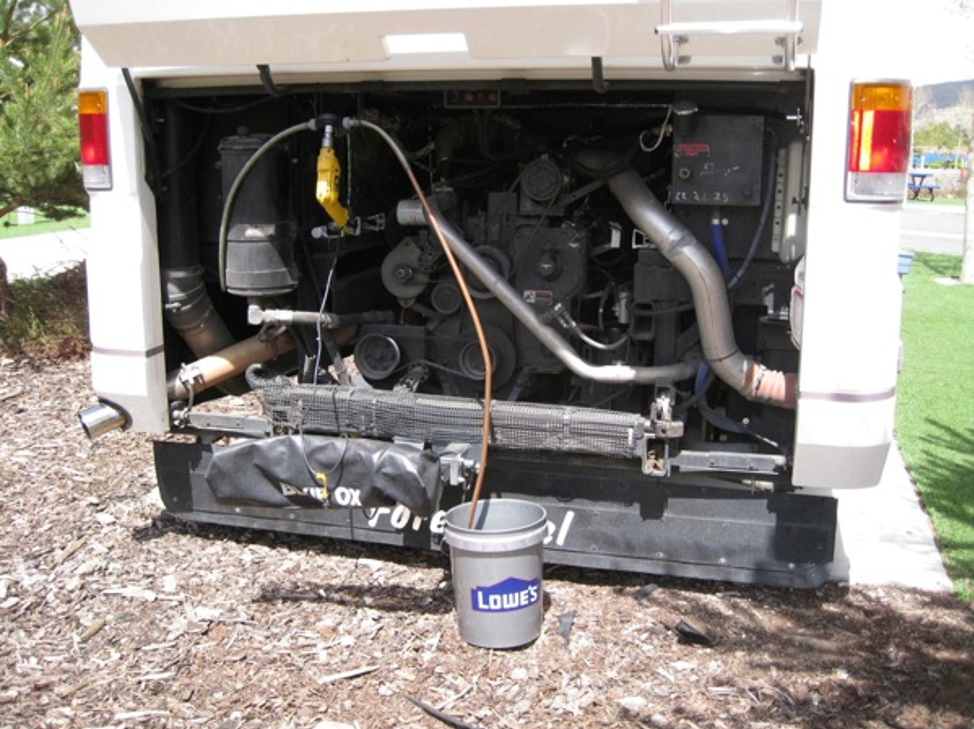
Setup to pump out tank oil when the cover is later removed.
Using an inexpensive disposable drill pump, suck out oil with a cutoff garden hose placed inside the tank. Another cutoff garden hose is used to flow oil into an inexpensive disposable 5-gallon bucket that can be securely covered for disposal
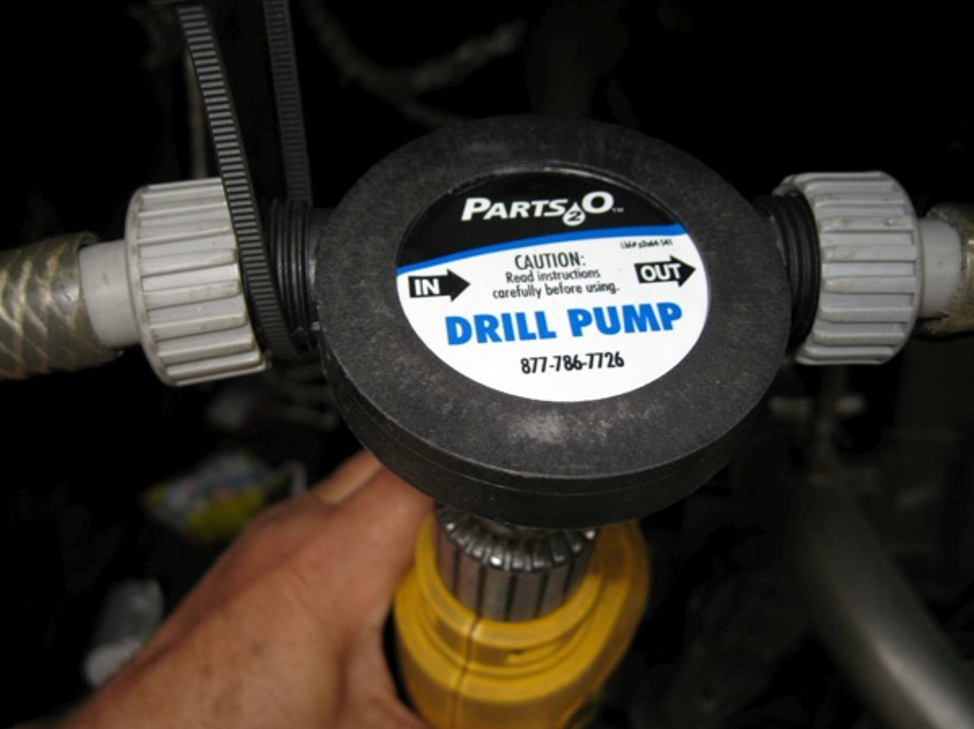
Inexpensive drill pump from Lowe’s or Home Depot with male hose threads on both sides makes it easy work to suck out all oil in the tank. This type of pump also works great to suck out the bottom of the fuel tank to check for water in the fuel tank. Not worth cleaning pump after using, as its seals will not hold up after pumping petroleum products and it will continue to smell. We just threw away the drill pump with the rags and empty oil gallon containers.
Already have a new pump from Lowe’s for $6.94.
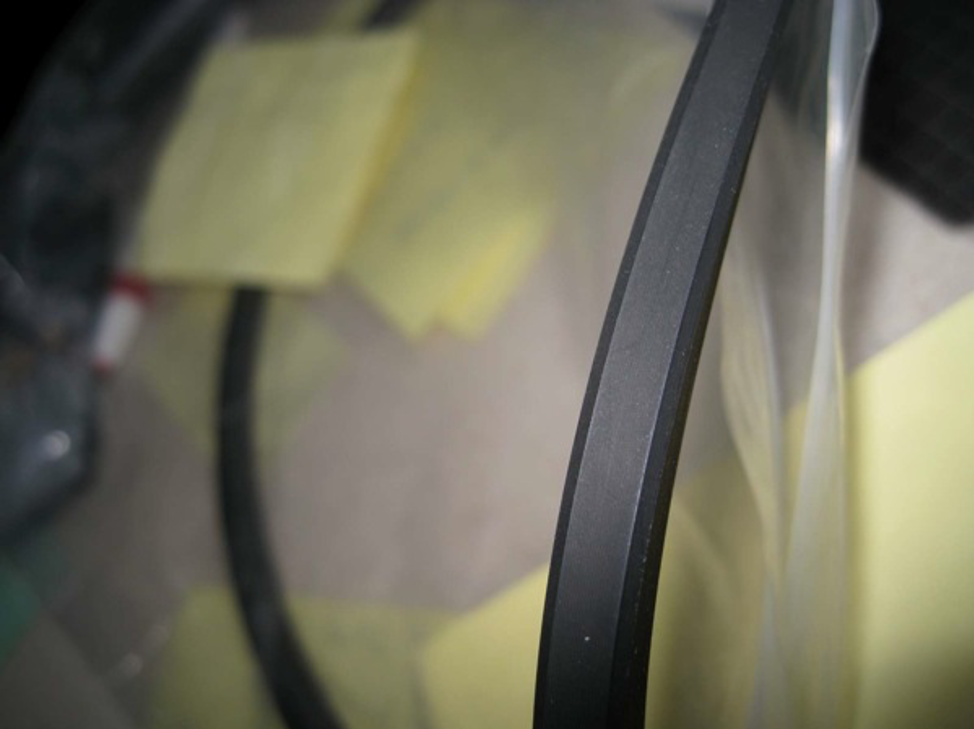
Close-up of gasket showing chamfered top and bottom outer corners
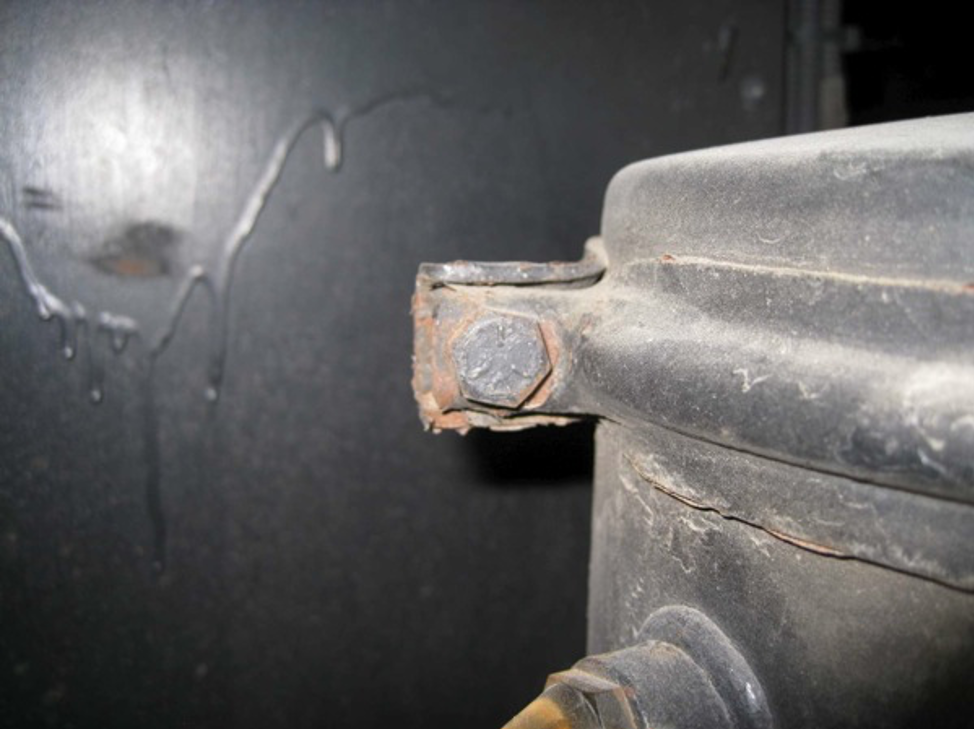
With both bolts removed, cover clamps can be removed with a small amount of force from a flat screwdriver. Rust and dirt may be between clamps and tanks, but will not fall into the tank while the cover is in place.
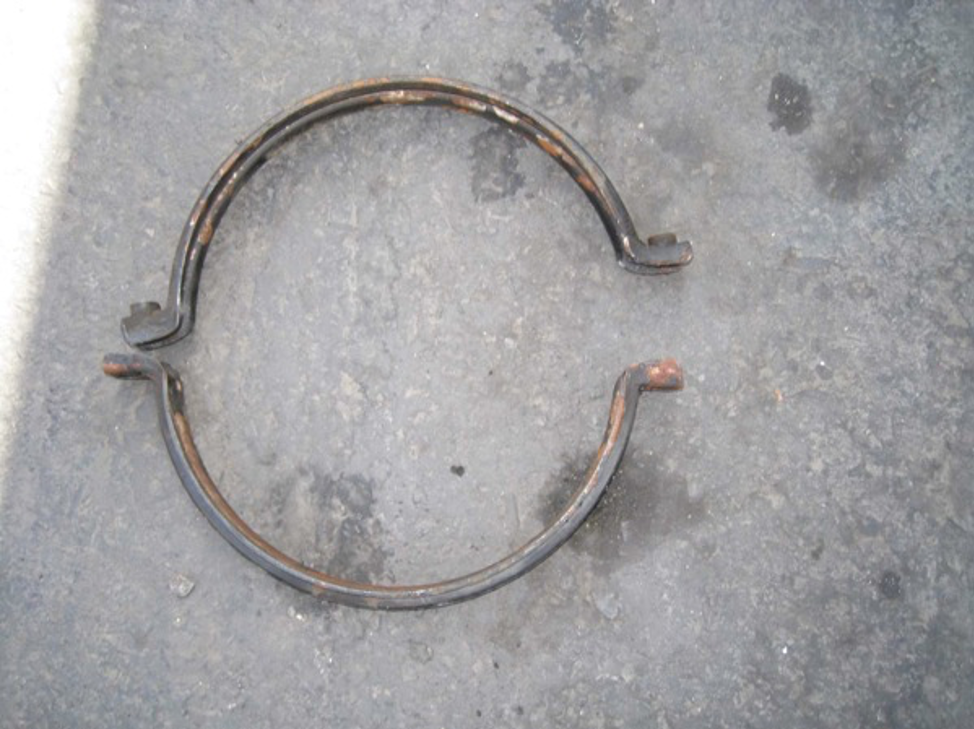
(Clamp Assembly (2pc+Bolts) – Cummins # Q-53087) The inside of clamps should be sanded to remove any corrosion. A good cover to tank seal is important to prevent oil leaks after clamps are tightened. Good time to clean up outside of clamps so inside and outside of clamps can be painted. Note that the rear clamp has captive nuts, while the front clamp has bolt holes.
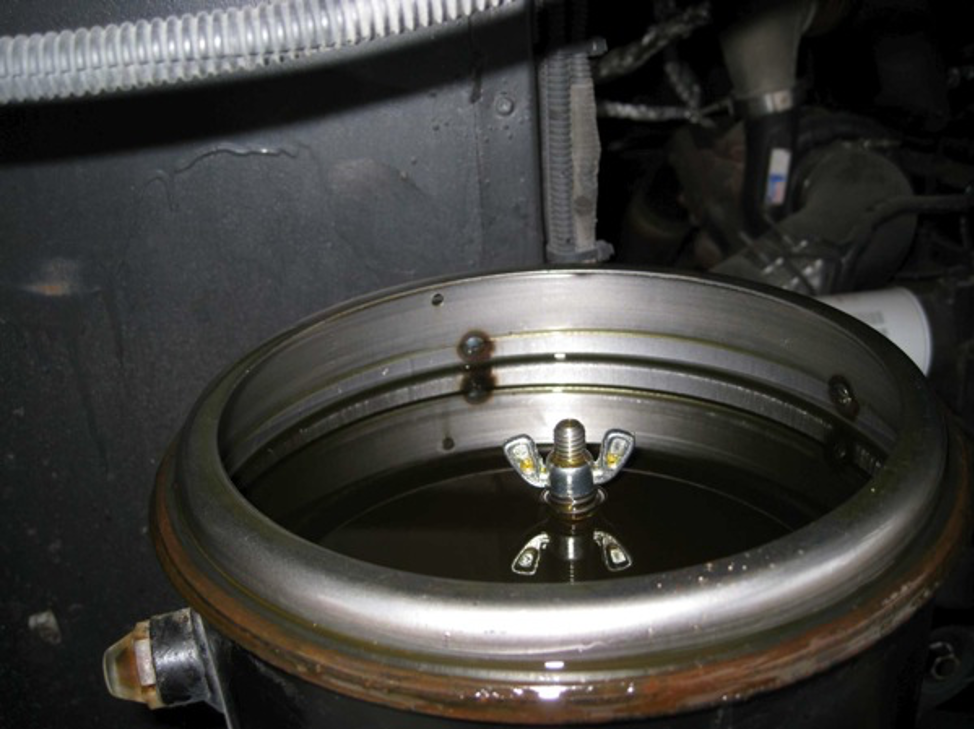
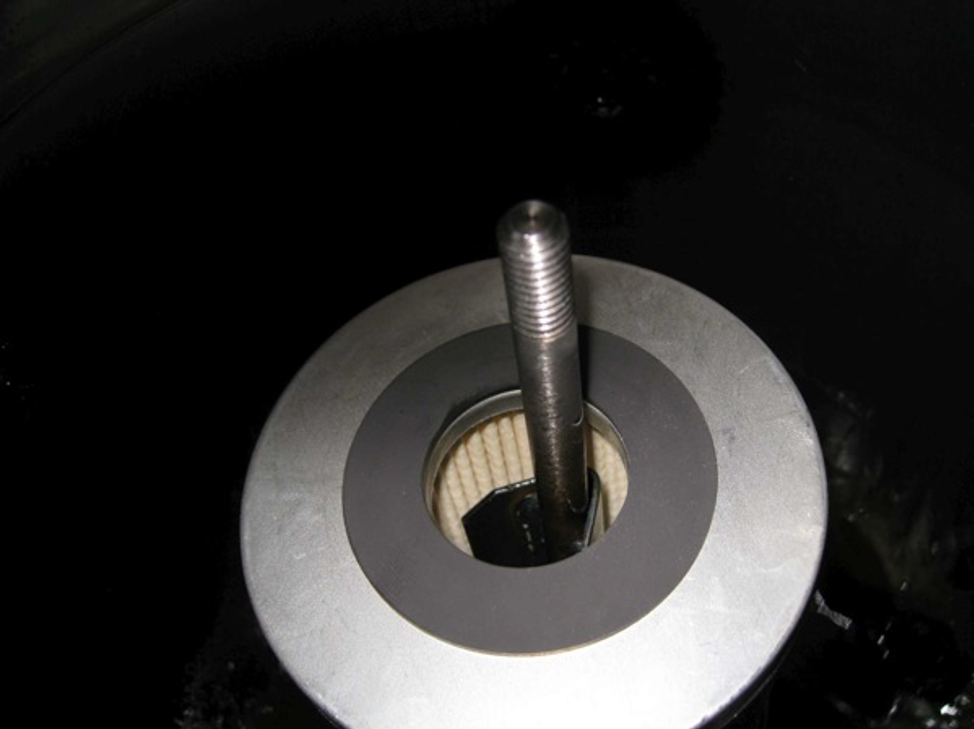
Uncovered tank full of oil with old filters held down in place with spring & wing nut
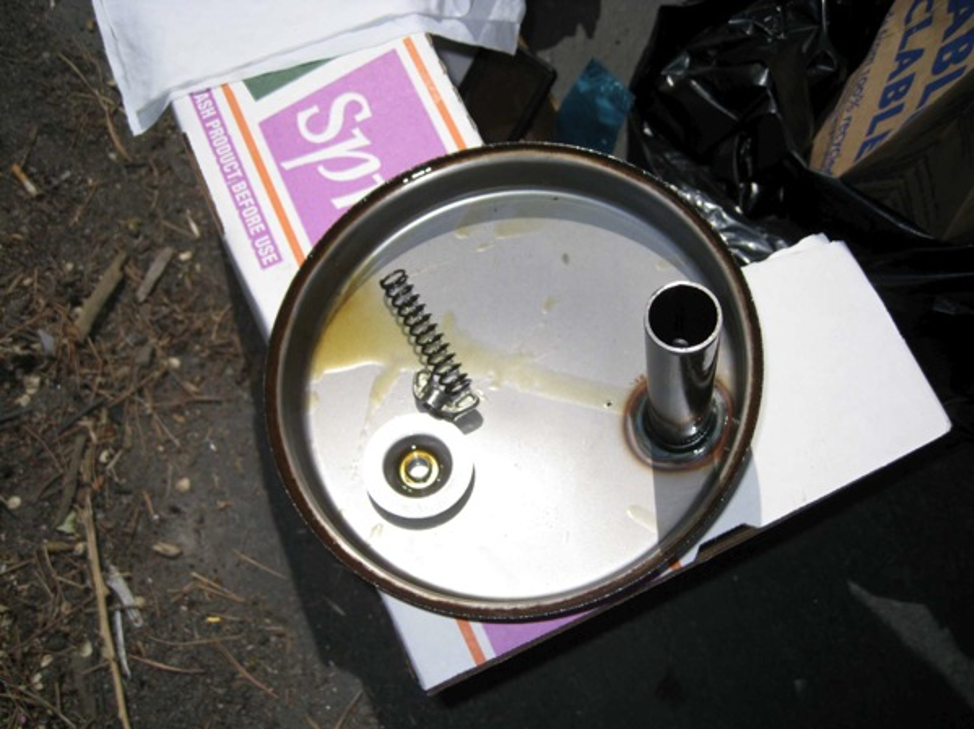
Upside down ( Cover Assembly – Cummins # Q-80132) shows a dipstick tube. Edges of cover should be sanded to remove any rust as the inner edge seals to the rubber gasket. Laying in the cover are three loose pieces:
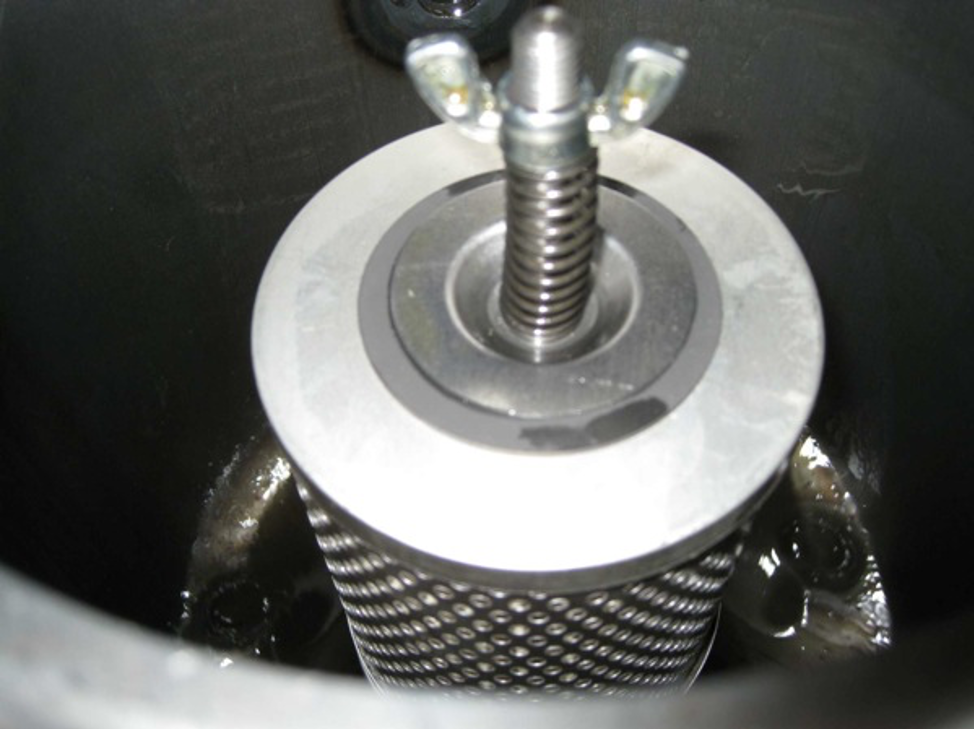
1) concave filter cap that sits on top of filters and forces the top filter to be centered,
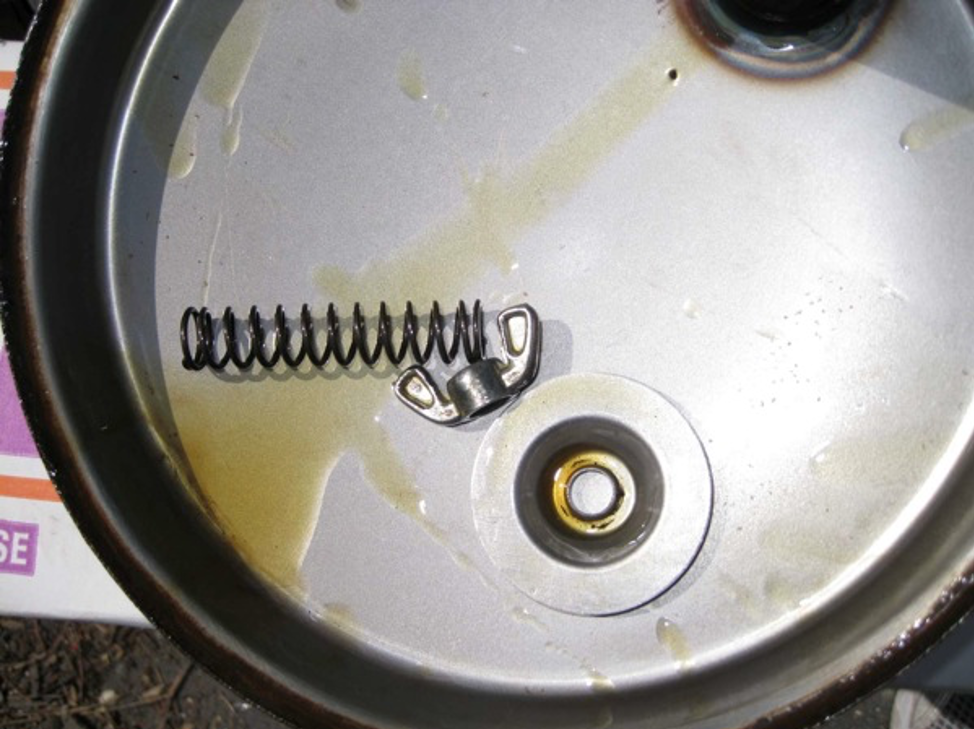
2) spring that compresses down on cap and keeps wing nut from loosening,
3) wing nut which forces spring pressure down to keep filters in close contact with each other.
Spring and wing nut hold-down small diameter filter cap, which holds the three stacked filters tightly in place. Very important to hold down spring with another hand when removing wing nut to keep spring and wing nut from flying out or falling into the bottom of the tank. Anything falling into the tank could accidentally slip into the large hose at bottom of the tank, potentially causing a major problem. Same caution when replacing spring and wing nut over new filters.
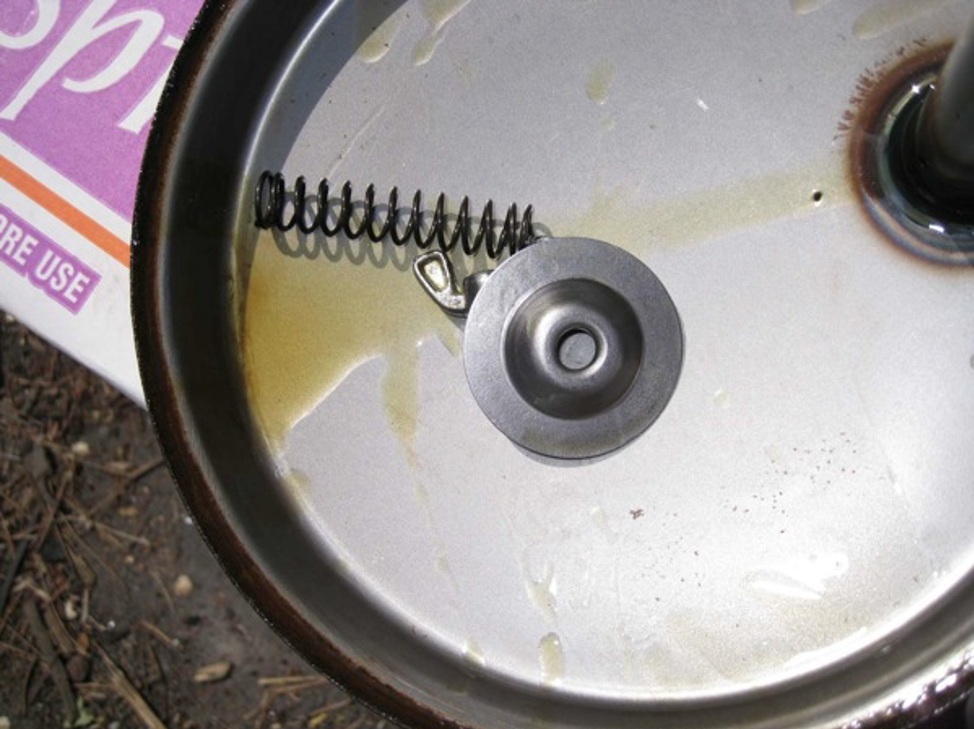
Upside concave filter cap which fits between top filter and spring
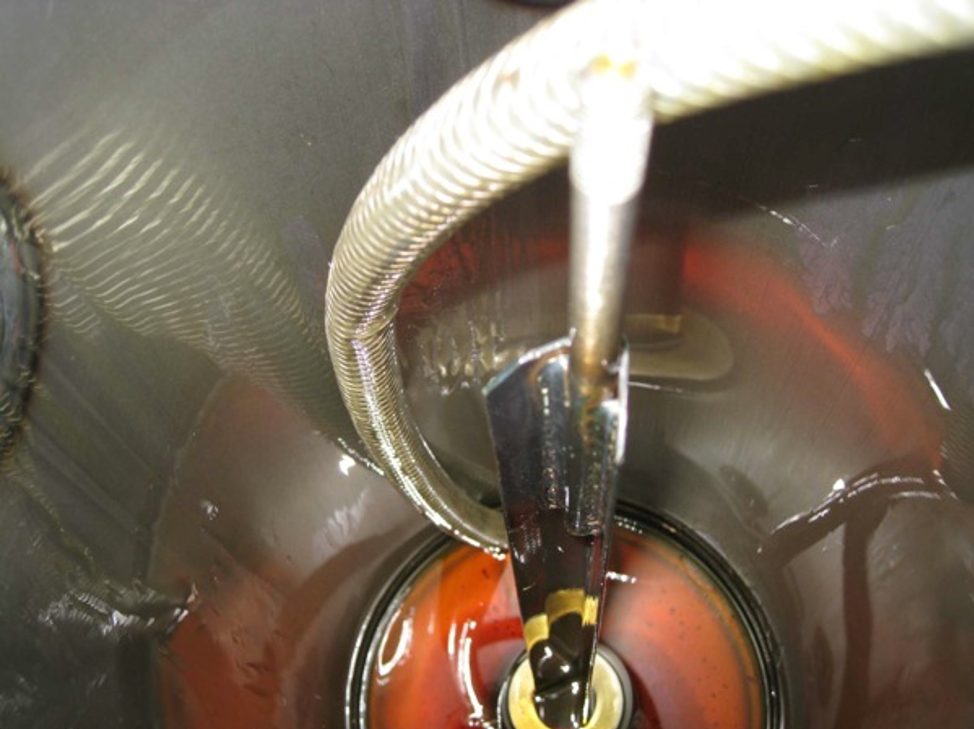
The center filter guidepost is not removable. Note the wide metal welded to the center post, which forces filter center hole to center on post. Bottom filter seals to a raised round flat platform. (drill pump suction hose is visible in the background)
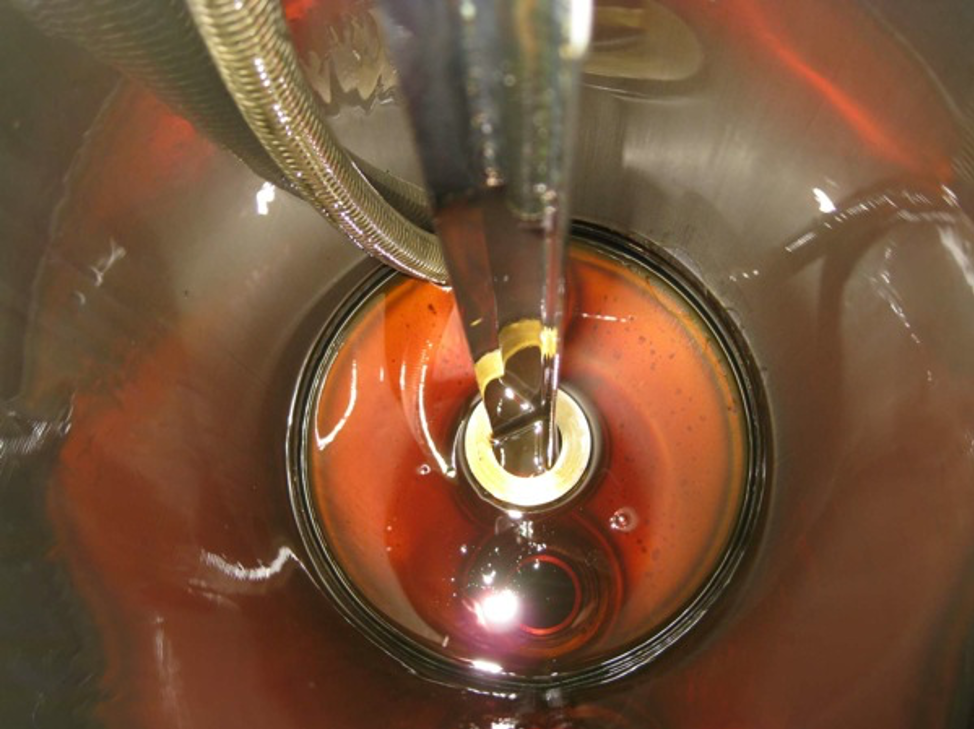
Empty tank with most of the oil pumped out. I stuck the hose down into the big bottom hose fitting to get a little more. There is still old oil in all the hoses to the radiator fans and the long run-up to the front power steering gear and the hydraulic pump. Center post is a wide-angle piece of metal used to center filters over raised round center filter platform. Drill pump suction hose shows in the rear.
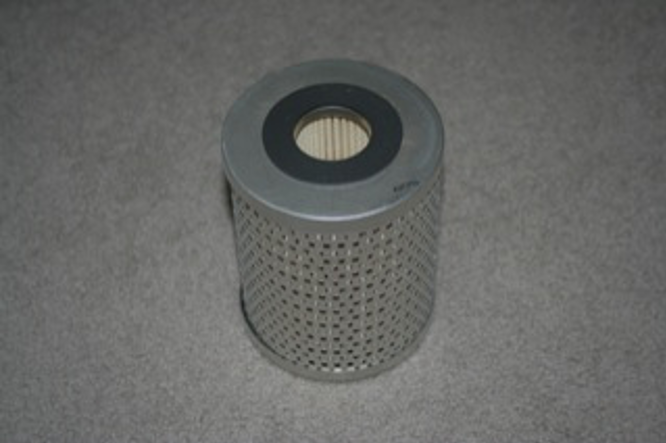
Nelson 84101B Filter

Last of three filters on the way to sitting on top of other filters. Each filter slips over the center post.
Top filter centered on guidepost, before cap, spring & wing nut. Note top threads limit how far down wing nut can be tightened.
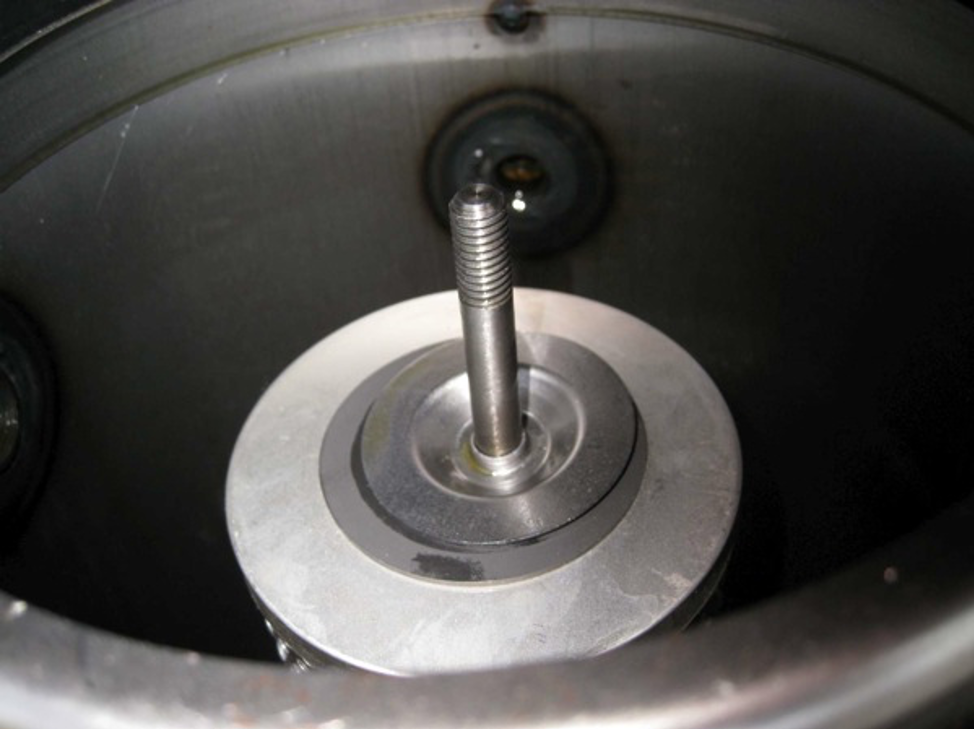
Concave cap partly in place. Note filter cap center that contacts the bottom of the spring.
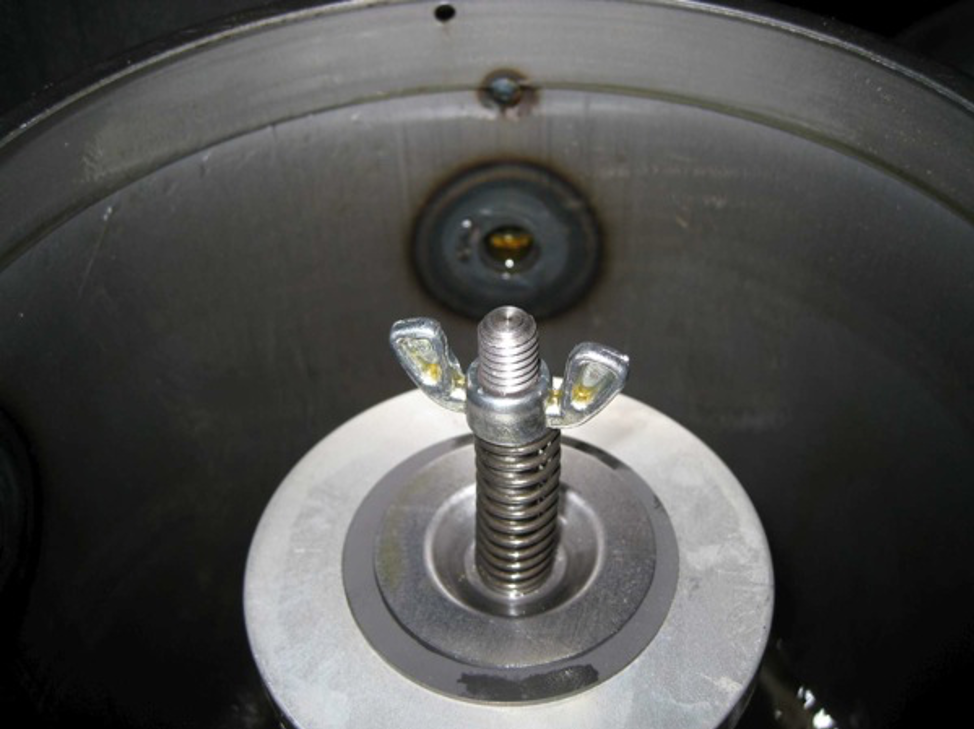
Complete filter installation. Three filters on filter guide post with centering cap in place. Spring and wing nut keep filters in place, sealed to each other forcing all fluid to go through filters.
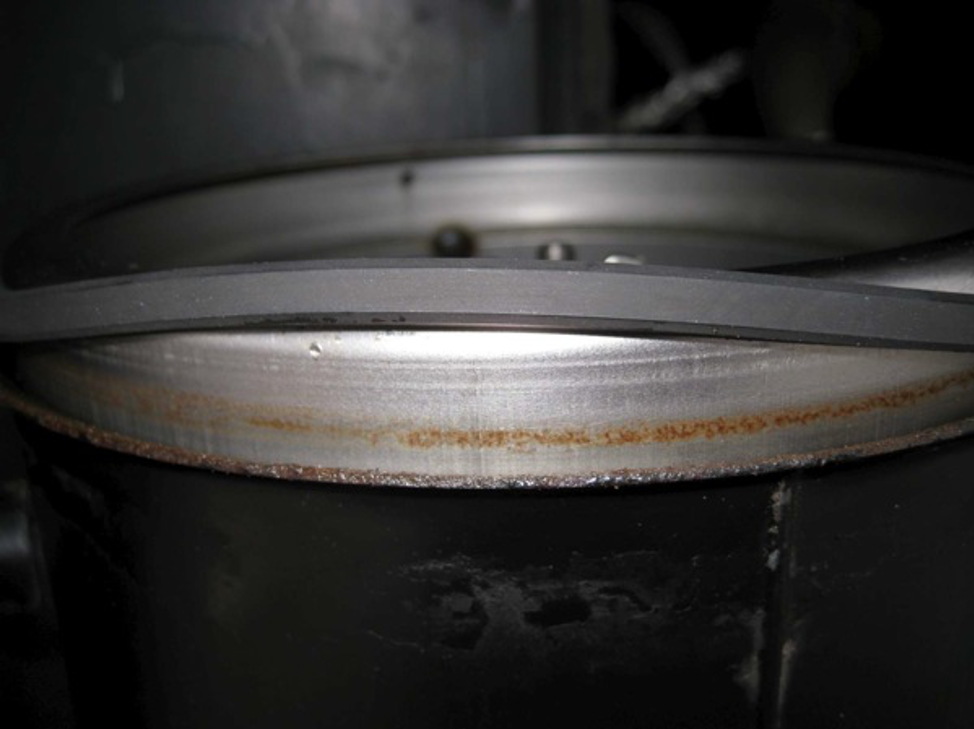
New gasket in place but not seated all the way down. When the cover is placed on the tank it seals against gasket forcing it down and toward the center of the tank. The gasket is needed to keep oil from leaking out between cover and tank. A new gasket is recommended with filter change.
New gasket in place. The forward-facing part of the gasket is not seated all the way down.
Tank with filters installed and gasket in place, ready for adding 4-1/2 gallons of 10w40 diesel engine oil.
Filters mounted in place looking down into tank before adding 10w40 oil
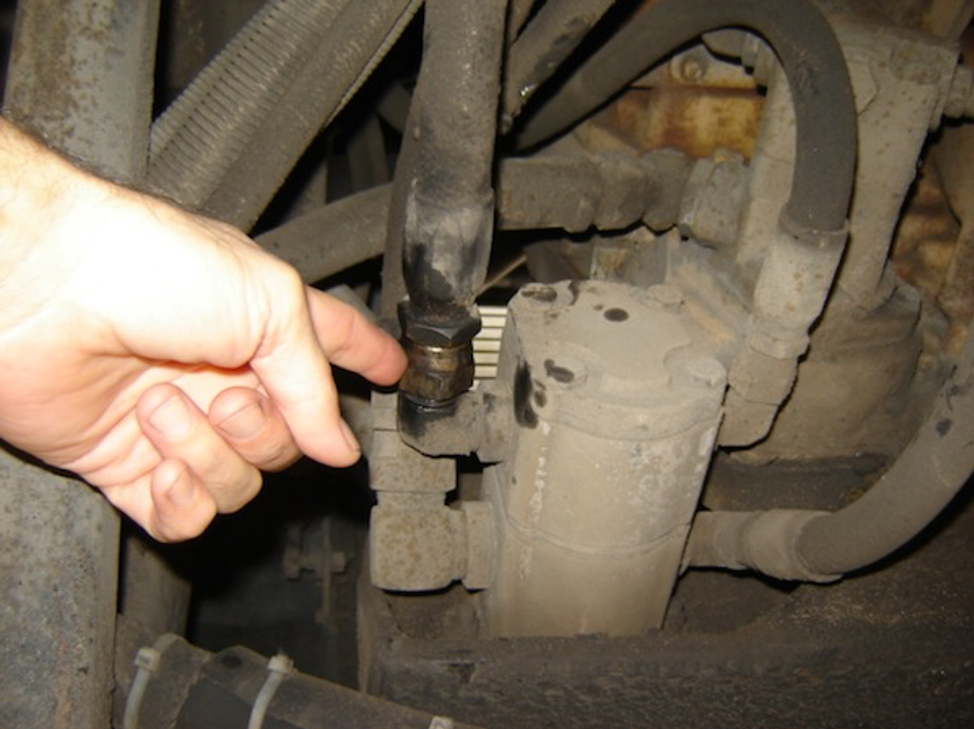
I drained the fluid from the rear port of the hydraulic pump and it would require a 1 ¼” open-end wrench but I used my large Crescent and just hit it with dead blow hammer to loosen and then also to tighten. I left the fill cap on and tight to hold the oil from coming out real fast. Not sure it mattered but the oil came out slow and very controlled into a 5-gallon bucket blocked up to within a few inches below the connection even after I took the fill cap off.
Took about 10 min to drain the 4 gals. Drained oil, removed filters, reinstall new filters, fill with oil before putting cover with new seal/gasket back on. It drained about 4 gallons and that is what I put back in (Delo 15W40 same as engine oil)
Filter part number is Nelson 84101B 3 filters required
New gasket Cummins# 999-55A
Total time of about 30 min.
Thanks to all who went before me and supplying P/N’s, tips, and advice.
Rick D. 1995 U-300SE 40′