by Dave and Nancy 1999 U270 36′
In our 1999 U270 36′ I recently replaced our 2-door Dometic fridge with the Whirlpool Model #: ET0MSRXTB that Barry and Cindy, Rudy, Merle (Steve), Gayland, and several other Forum folks have used. Whirlpool 9.6 Cu. Ft. Top Freezer Refrigerator (Color: Black) Item #: 267489 | Model #:ET0MSRXTB. What a difference in usable space!
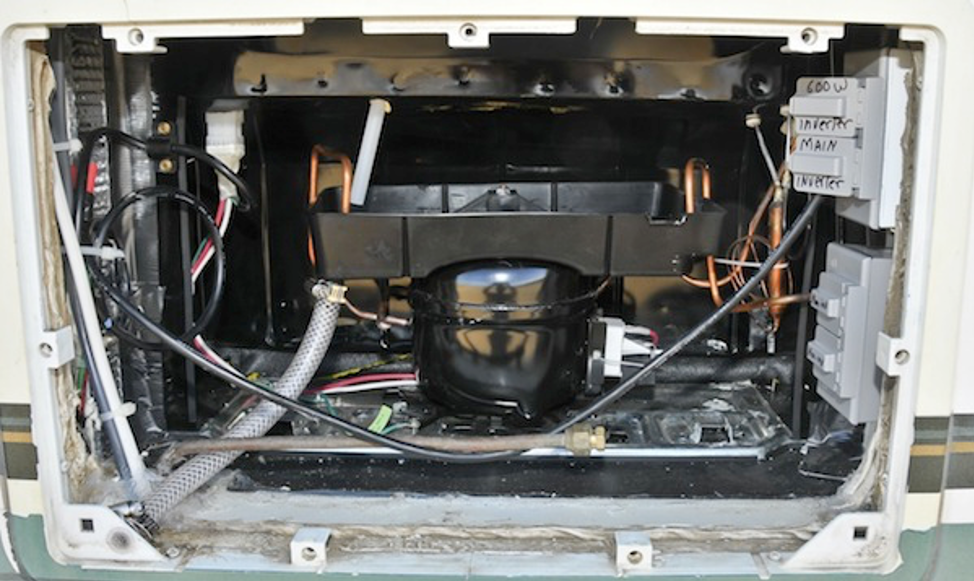
Very quiet after I rebuilt the fan motor. Rear bearing of the fan had no felt behind the end of the motor shaft, and the shaft was vibrating against the back of the bearing. Stuffed some small felt pieces in, added some thin oil, and now it’s very quiet. No problems boondocking with it (we’re now in Borrego Springs, Ca, boondocking in the desert. Our solar panels keep it and our ice maker happy and top off the batteries during the day, and low battery drain from just the fridge inverter during the night.
Only a few things to add to the other reports:
1) I made a 2′ x 2′ dolly that would fit over our small auto floor jack, and we used that to lower the old fridge to the floor after we pulled it out, and lifted the new fridge into “pushing position” on the dolly.
2) I put a 2′ x 2′ 16 ga steel plate (from ACE) on the floor of the cavity – glued down with construction adhesive, and slid the new fridge directly onto it without any additional angles attached to the bottom of the fridge. Attached the fridge to the plate with screws at the back and from underneath at the front.
3) Anchored the top of the fridge by bonding two 3″ x 1/8″ x 9″ pieces of aluminum to the top of the fridge with 3M VHB tape, and then screwed those aluminum pieces to a couple of 1/8″ x 6″ steel angles, which were then screwed to the inside of the roof vent opening (there’s a steel collar on the inside of the opening.) (Sorry no pictures of this part as it was dark when I finished and needed to get it buttoned up.)
4) Sealed top and bottom wind gaps with 2″ x 2″ foam strips, and the edges in back with spray foam and tape. Still need to do sealing trim strips like Steve (Merle Hench).
5) The fridge sides bulge out beyond the 24″ W dimension, so I had to cut out the opening more than originally planned, and reduce the amount of new insulation on the sides some. I had to remove about 1/2″ from the right side of the original opening. Used a good jigsaw to get close to the cut line, and a belt sander to clean it.
As others have reported, both the old fridge and the new one went out/in the door after I removed the screen door and the latch bolt. We got the new fridge from Lowes in Tucson, and they brought it in with no trouble.
Got a Xantrex PROwatt SW 600W true sine inverter just to handle the fridge, since we can then just turn off the main inverter with all its loads when we go out or go to bed. We can also plug the fridge into either inverter or non-inverter power in the back. It never hurts to have options…
I put a drain tube in the bottom of the defrost overflow in the back since water seemed to take a long time to evaporate (and more so in cold weather!) and I didn’t want it to be sloshing around and spilling when we are on the road.
Took another cut at a door lock for traveling, with three shelf pegs, a couple of neodymium disc magnets and a piece of hardwood.
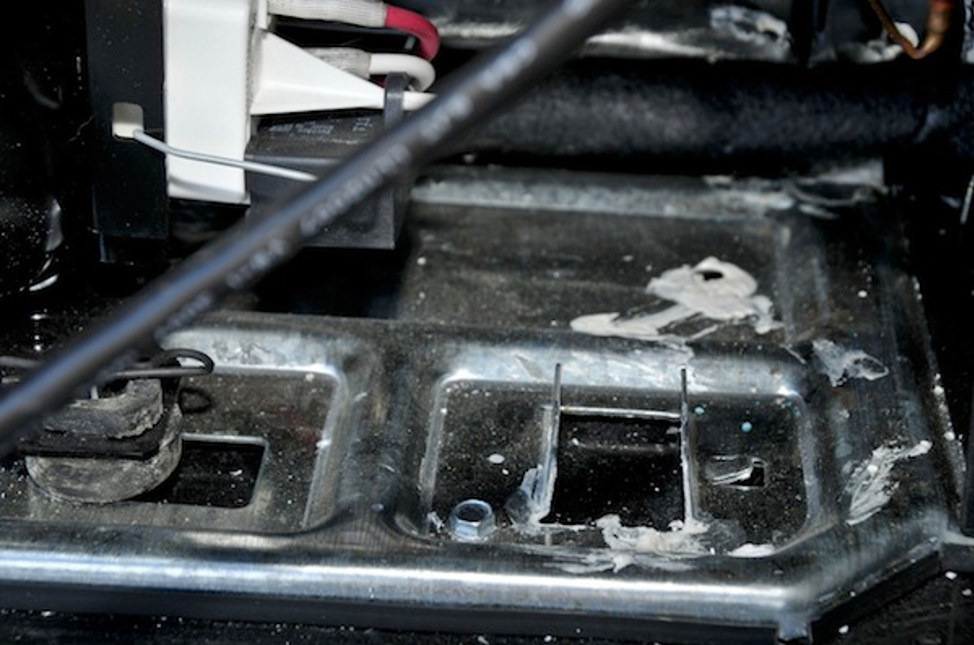
Rear mounting screw
Rear view
When I installed our residential fridge, I secured the top with 3M VHB tape (double-sided adhesive):
Used VHB to attach two 2″ x 1/4″ x 6″ (I think) pieces of the aluminum bar to the top, sticking out into the existing fridge cooling well (need to take the upper vent cover off). Then attached two alum angle pieces to the alum bars and screwed into the sides of the cooling well at the top. Easier to do than describe, and totally invisible! 3M VHB tape is extremely strong and will keep your fridge top as stable as the roof.