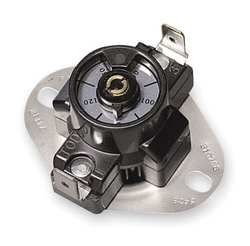
Beginning with Unit #5902 the thermostat for the Pro-Sine Compartment Vent Fan will be set to 100 degrees F.
This thermostat is an adjustable snap-disk type with a 20-degree range between cut-on and cut-off, and previously was set for 90 degrees F. This new adjustment will increase the cutoff temperature to 80 degrees F.
If you find that the fan runs too much check the Unit #, and see if this adjustment needs to make. This is a 110 VAC operated fan that is on the Inverter circuit.
If the adjustment needs to be made, Make sure all 110 VAC has been disconnected and that the Inverter is off before removing the cover of the 4X4 junction box. The adjustment is on the back of the snap-disk.
Units Affected: 2003 and later
The fan and thermostat are mounted to the ceiling of the consolidated components bay. To ensure proper air circulation and run time it may be necessary to upgrade this unit if the fan is running extended periods of time even in milder weather.
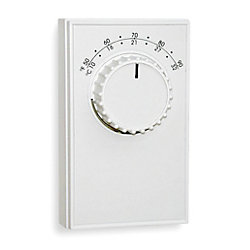
Note: It is normal for the fan to run when the temperature of the upper area of the compartment gets above 85-90F.
Service Instructions:
1. Disconnect shore power and turn the inverter off along with generator breakers
2. Locate cooling fan electronics bay and remove the cover at 4”x 4” junction box and disconnect black wires to thermostat.
3. Disconnect white and copper wires inside 4”x 4” junction box. Remove blue Romex clamps and pull from the box.
4. Remove 4”x 4” box
5. Remove knock out plugs of the new box.
6. Install a new junction box in the same location where 4×4 was removed.
7. Install blue Romex insulators and wires.
8. Connect the white neutral wire to one of the black wires from the motor with supplied Romex twist nuts.
9. Connect copper ground wires together with supplied twist nut and attach a copper jumper to the green ground screw on the thermostat (2E158).
10. Connect the black wire from romex to the common terminal on the thermostat (2E158) and the additional black wire from the motor to the normally open terminal of the thermostat (2E158).
11. Install a new thermostat (2E158) with provided screws into the junction box and install the cover plate.
12. Reinstall power and turn breakers on the generator back on.
13. Test unit, making sure the fan will come on and adjust temperature setting to 85 degrees.