by Steve Cook 2003 U320
Frost Frost and more Frost, it’s like a snow cone machine. I’ve seen lots of proposals on how to slow it down so here is mine. Inspired by the RV fridge fan that has been posted in various RV groups and sold on eBay for $14.99 +2.60 S+H (for reference that product is an HDD cooler, you can purchase them at Newegg for $4.99 + 2.99 S+H but you would have to supply the extra alligator clip)
What I did not like about that solution and the battery-operated solutions is that they took up space in the fridge and had to be moved from time to time to the next area that needs to be cleared.
So here is my over-engineered solution to the problem. The HDD cooler mentioned above has approx 19 cfm of airflow and a sound level of approx 28dBa, my system has 5 fans with a total of 20.5 cfm and a sound level of approx 24 dBa.
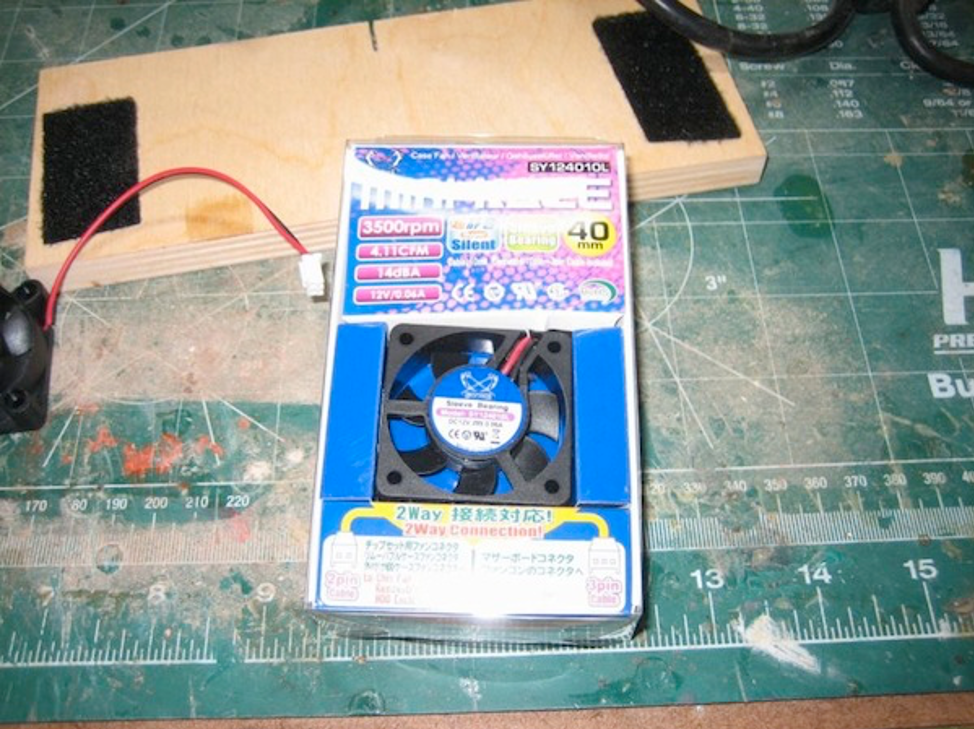
These are the fans that I used, they are 40mm by 10mm, low-speed fans. Typically used to cool chip-sets in computers. If you wanted to use a better fan there are some nice ones made by noise blocker, just they cost 3X as much and before I would spring for that I need to know this works!
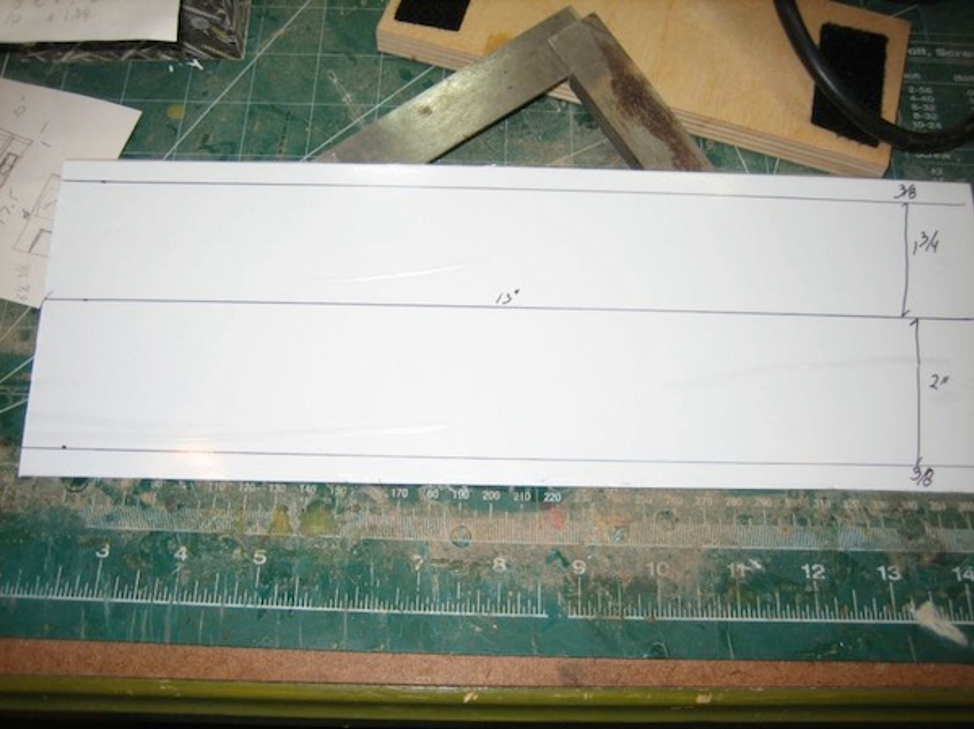
I used a sheet of 1mm aluminum plate with a white power coating so it would look clean when installed. Plus the white was the same price as natural finish. Make sure to layout exactly where you are going to cut holes, place bends, etc. 13″ wide by 4 1/2 wide (in the flat)
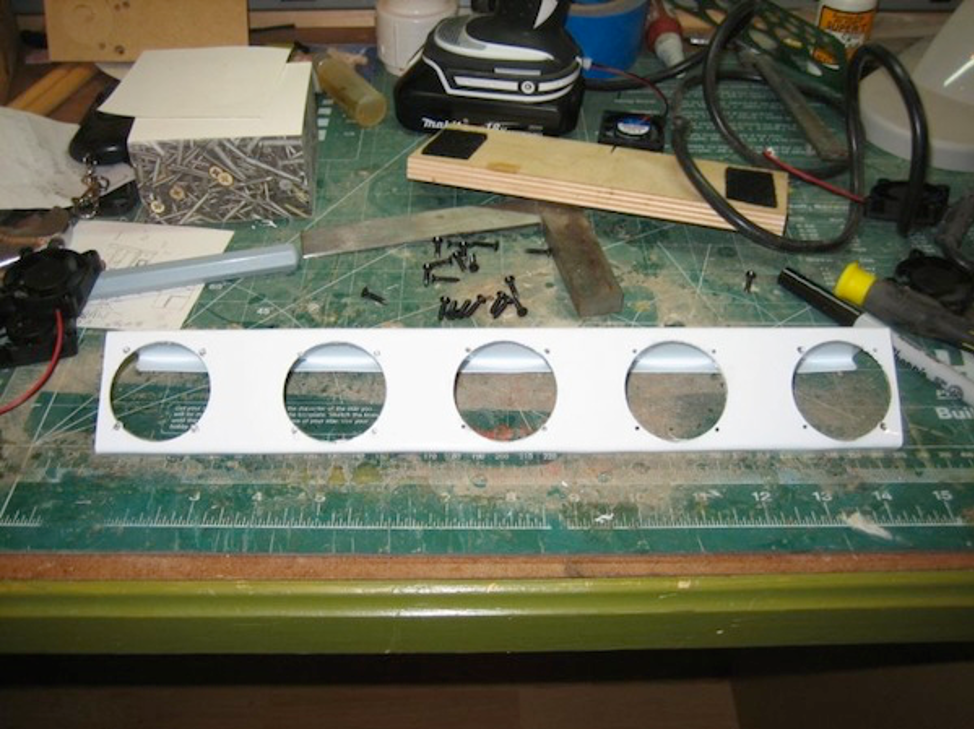
Here the plate has been cut out to hold the fans and the bends have been put in place. I used the old bench vise and woodblock method to make the bends. A bit caveman but effective.
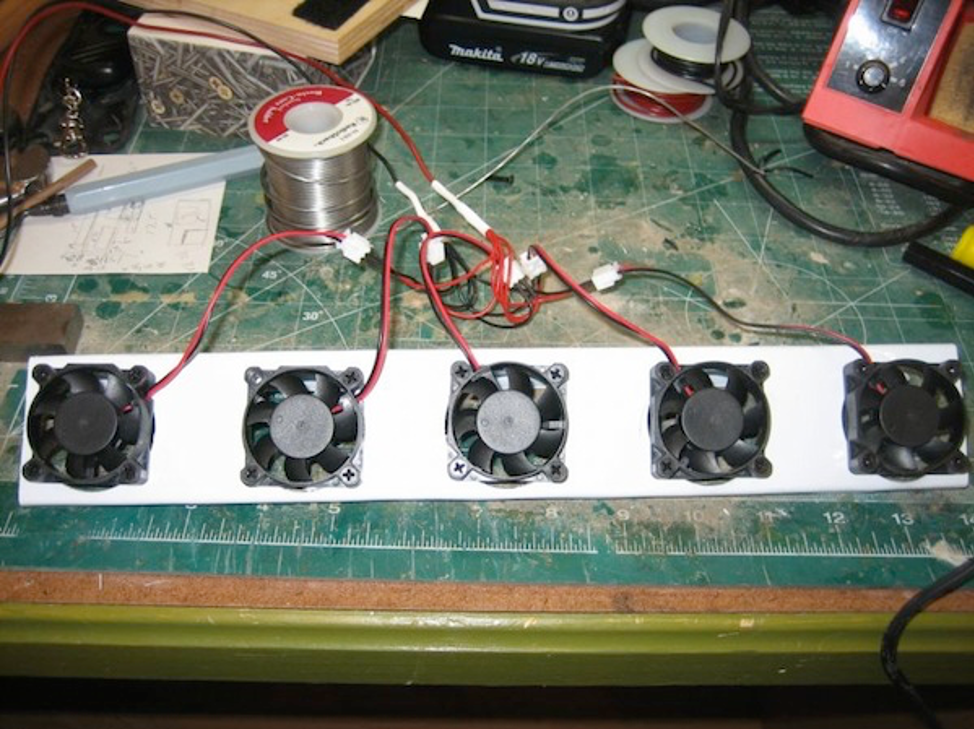
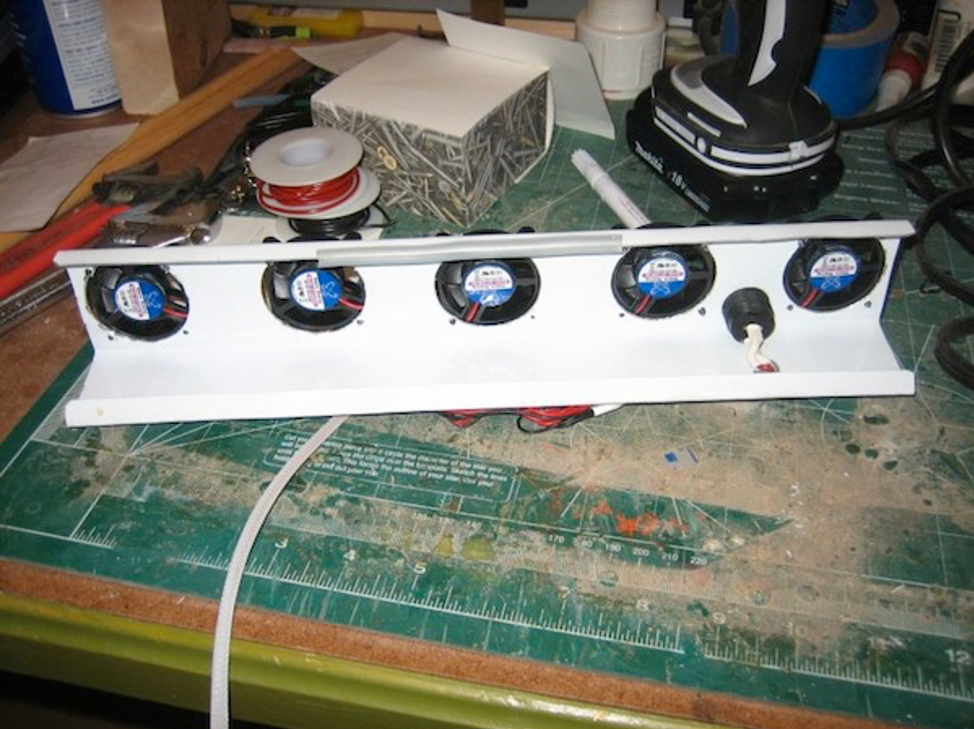
Here the fans have been mounted to the plate, starting to look like something. Each fan is wired to a header so it can be replaced or ‘turned off’ in the case of a fan failure.
I wired in a power switch so I can turn the fans on or off when needed. All the connections were soldered and covered with shrink tubing to keep them safe
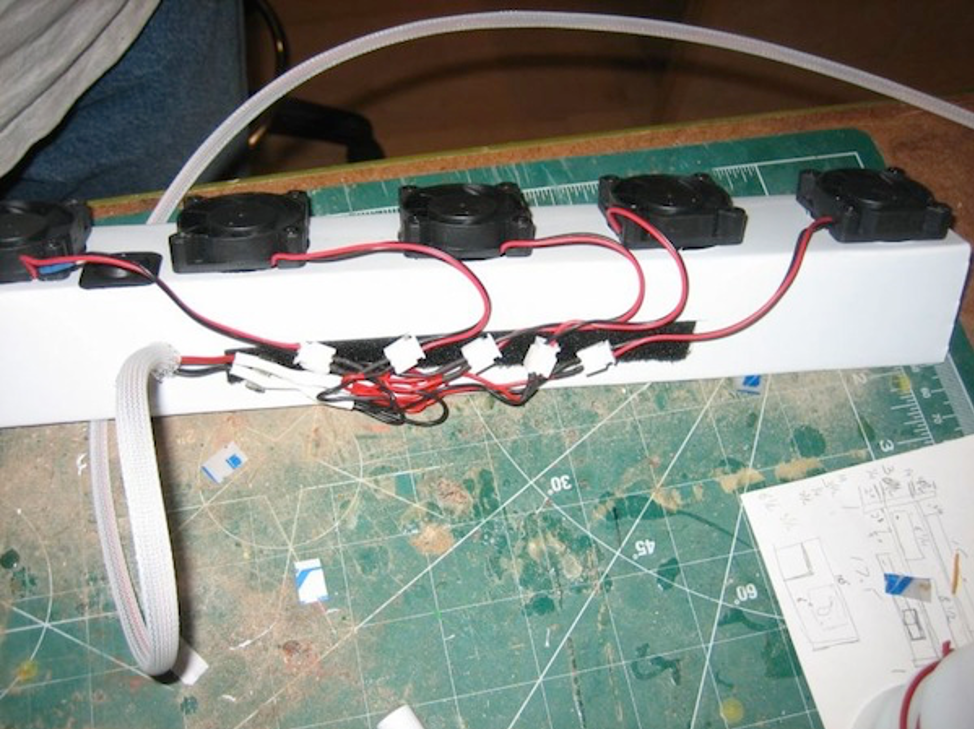
The wires are held behind the bracket with some high strength Velcro, keeps the wire in place and out of the fan blades.
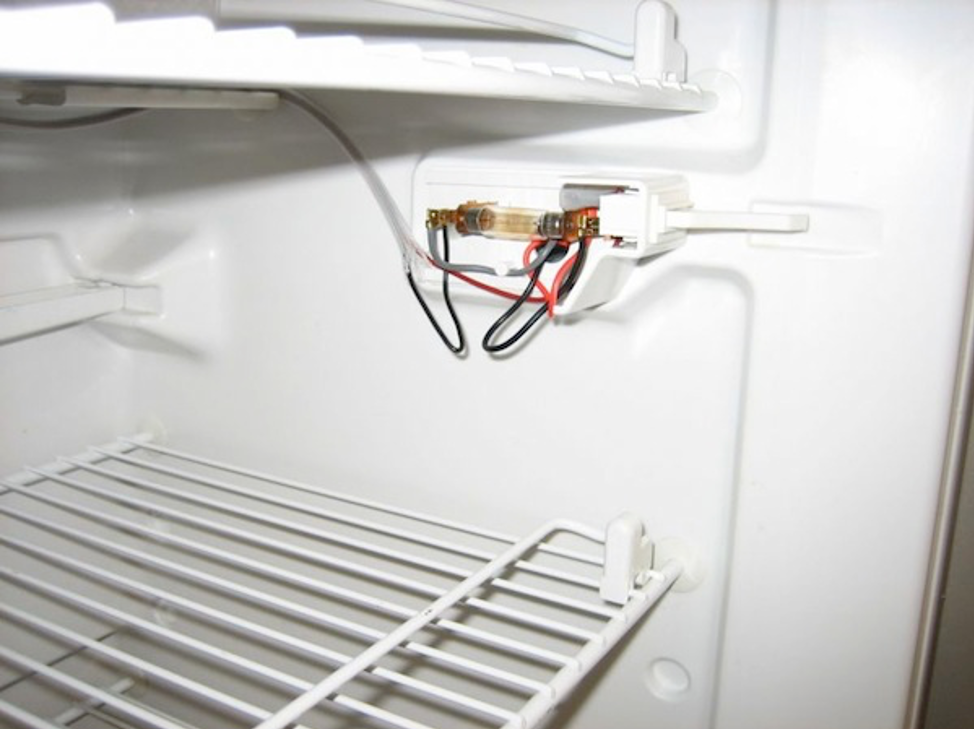
I wired the fans into the hot side of the door switch, ours also had the ground return in there so I used that in place of an alligator clip attached to the rear fridge cooling fins

The wiring inside the fridge was placed in an expandable nylon sleeve, keeps the wires in place and makes for a nice clean appearance.
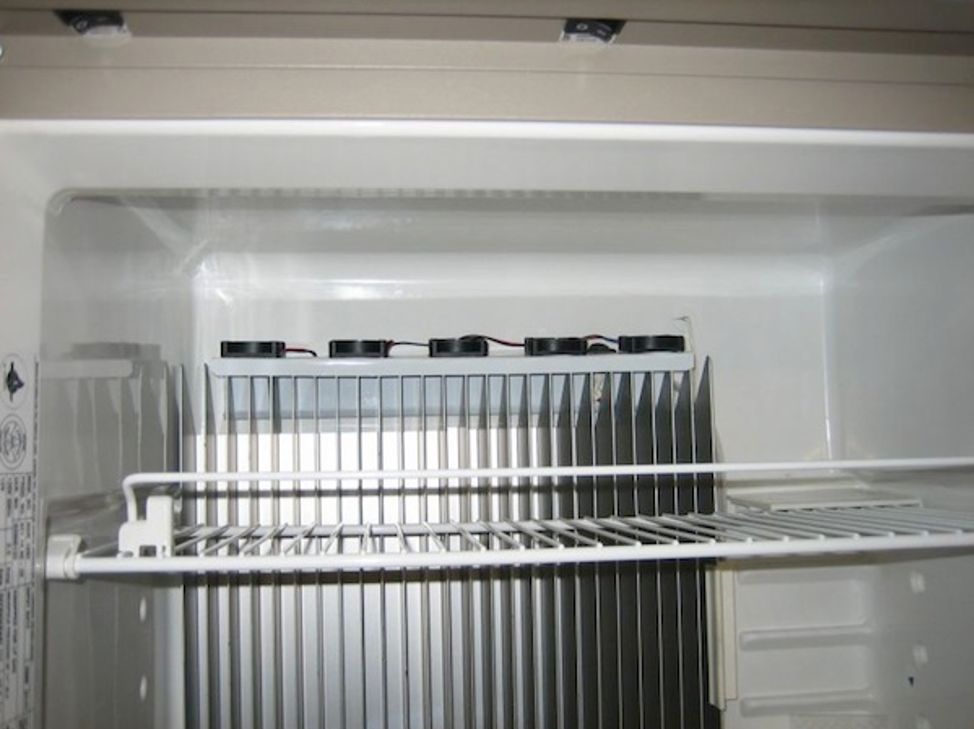
The fan bracket sits atop of the cooling fins which are at an angle to the back wall. The bracket was formed to sit in this space so it does not take up any extra space inside the fridge. The fans pull the hot air from the top and push it down through the fins. A very gentle breeze can be felt at the base of the fins, enough to move air but not so much as to dry out food. So there you have it, hope it works well, I have high hopes!