Replacing windshield washer fluid fitting on 1999 U320
Here are the steps I followed to remove the horizontal covered/padded dash and cut holes to access and replace the passenger-side, through-bulkhead windshield wiper nozzle:
Remove the inside windshield shades by lifting up when they are in the fully retracted position. Then remove three padded screw covers and three screws on each side and remove vertical trim pieces (2) at extreme sides of the windshield.
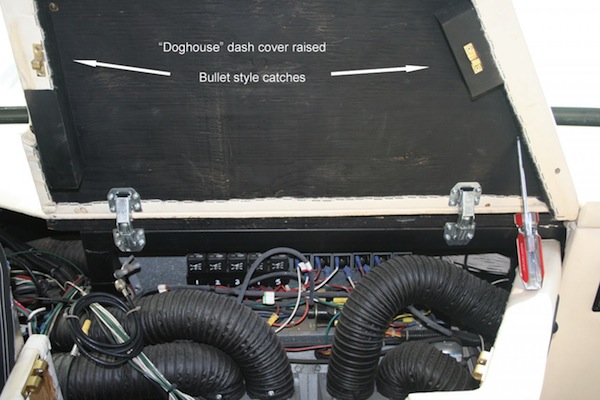
Remove the dash instrument panel cover by lifting up and removing 8 screws from the two hinges. Square drive ratchet helps here as space is a bit restricted. Then remove the “Doghouse” dash cover by lifting up and removing 8 screws from the hinges. Take care here as dropping a screw into the maze of wiring can be frustrating.
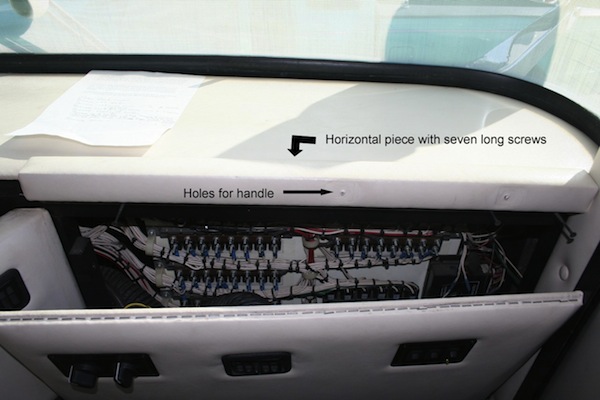
Remove the grab handle at the entry steps by removing the plastic covers (2) and removing two Phillips screws. Gently pull out the bottom of the vertical panel covering the automotive electrical panel at the entry steps, drop it down and rest it on the floor. Then remove (seven in my case) long screws and remove the horizontal trim piece.
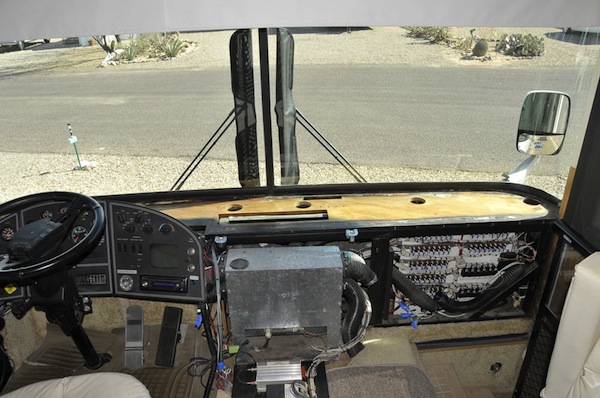
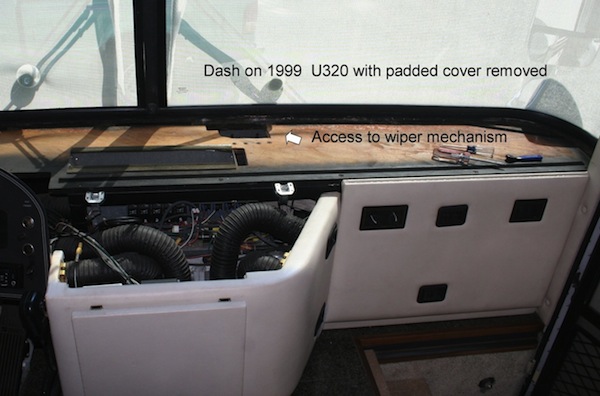
Finally, starting at the driver’s side, gently pull up and remove the 1/4″ vinyl-covered plywood dash cover. This reveals a piece of 1/2″ fiberglass-covered (top and bottom) plywood that extends the full width of the dash.
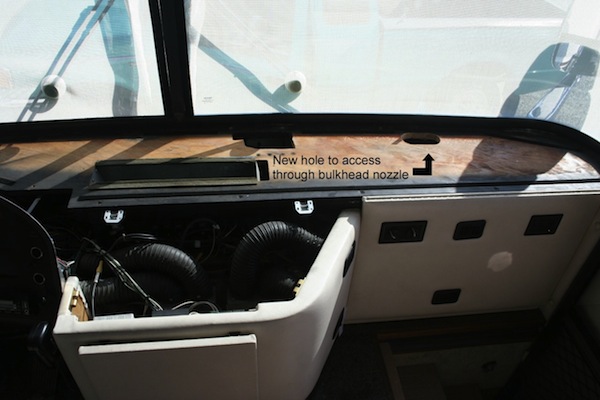
In my case, there was no hole in the 1/2″ plywood to access the nozzle. So I went outside and marked the position of the passenger side nozzle with a piece of tape on the windshield.
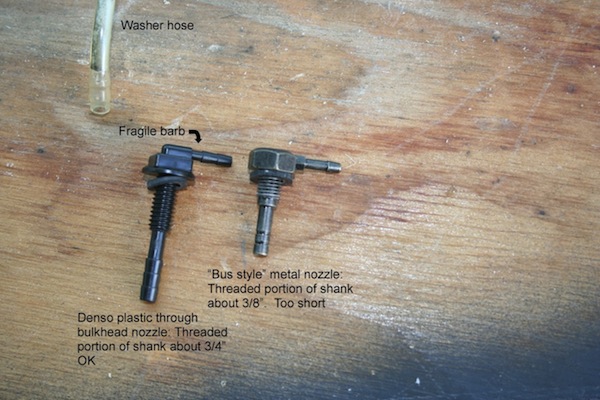
Then I cut two overlapping 2 1/4″ holes in the plywood about 1 1/2″ aft of the windshield. I slightly favored an inboard position in case I ever needed to work on the wiper itself. Once the holes were cut and trimmed a bit, it was easy to remove washer hose and the nozzle nut (9/16″) to replace the nozzle.
Be aware that the Denso nozzles are plastic and the barbed end is easily broken at the base of the nozzle. I prefer a metal nozzle, but so far, for the ones I have found at bus supply companies, the threaded ends are too short for the thickness of my front bulkhead.
Reassembly is simply the reverse of the removal process. by Bob McGee 1999 U320
The thin (1/4″) plywood dash cover piece that is covered in vinyl is only held down to the underlying 3/4″ plywood piece by velcro, and not attached to the windshield at all in our coach. In fact, the edge sits almost below the windshield gasket.
The only reason that you have to remove the grab bar-piece and the right vertical vinyl-covered piece, is that they may overlap the rear edge and side of the dash cover piece. Just try lifting the rear edge of the dash cover piece, and bent it gently in the center (need to lift the instrument cover) to clear the right side piece. If it is held down by one of the mentioned pieces, you’ll need to remove it.
Try removing the grab bar piece first, and then you may be able to work the right edge of the dash cover out.
The right side vertical piece you may have to remove is the small flat piece (about 2″ wide x 1/4″ thick x 38″ tall, and is screwed onto the front of the long corner piece on the front side of the door (you don’t need to remove that piece.) If you still have the pleated windshield screens, that piece is the one the right side half attaches to. Depending on the tightness of Foretravel’s carpentry, you might also have to remove the left side vertical trim piece, but that comes off with 3 screws under the vinyl-covered caps.
Now the underlying 3/4″ plywood piece visible in the photo may well be bonded to the front cap below the window gasket (I don’t remember), and it is attached to the steel tubing framework, but no reason you would ever have to remove that piece. here’s what our front dash looks like without all the upholstered pieces.