By Don and Tys 1999 U270 36′
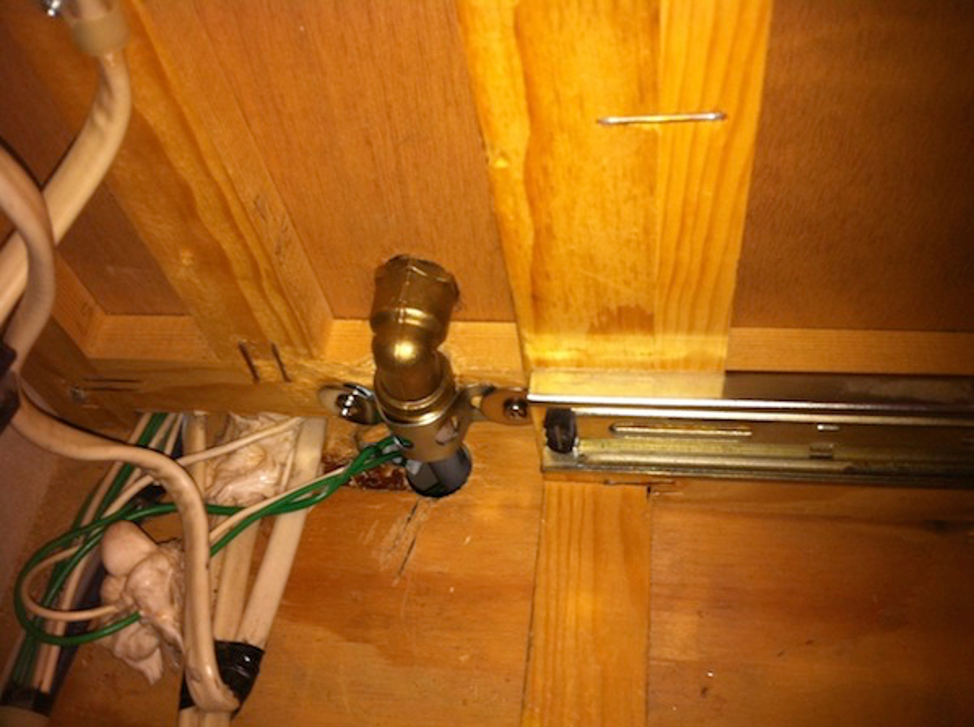
Using the manifold also saved me from having to add another hole through the bottom for washer over flow drain pan that I installed with the washing machine. That valve should normally be open to taking care of washing machine leaks (not that I am expecting that…) but closed when draining the lines or tank. There is a stainless steel screen in the sleeve to keep the critters out.
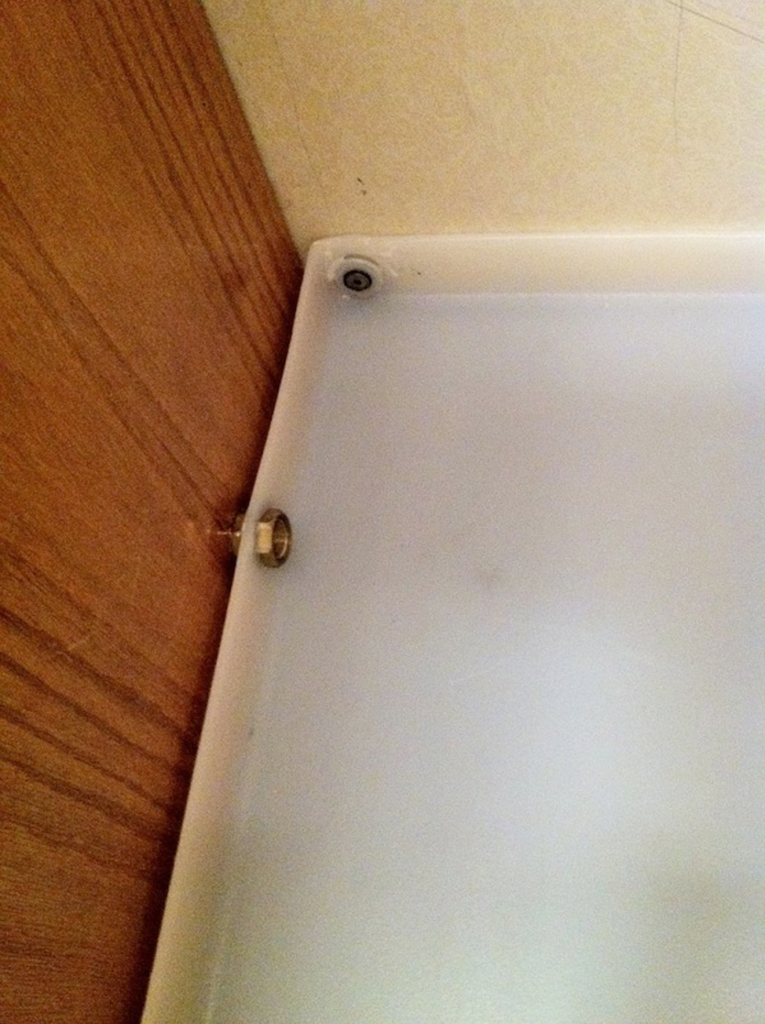
The drain pan is an accessory made by Splendide. Unfortunately for my application, the drain was in the wrong place so I had to plug it and make my own fitting.
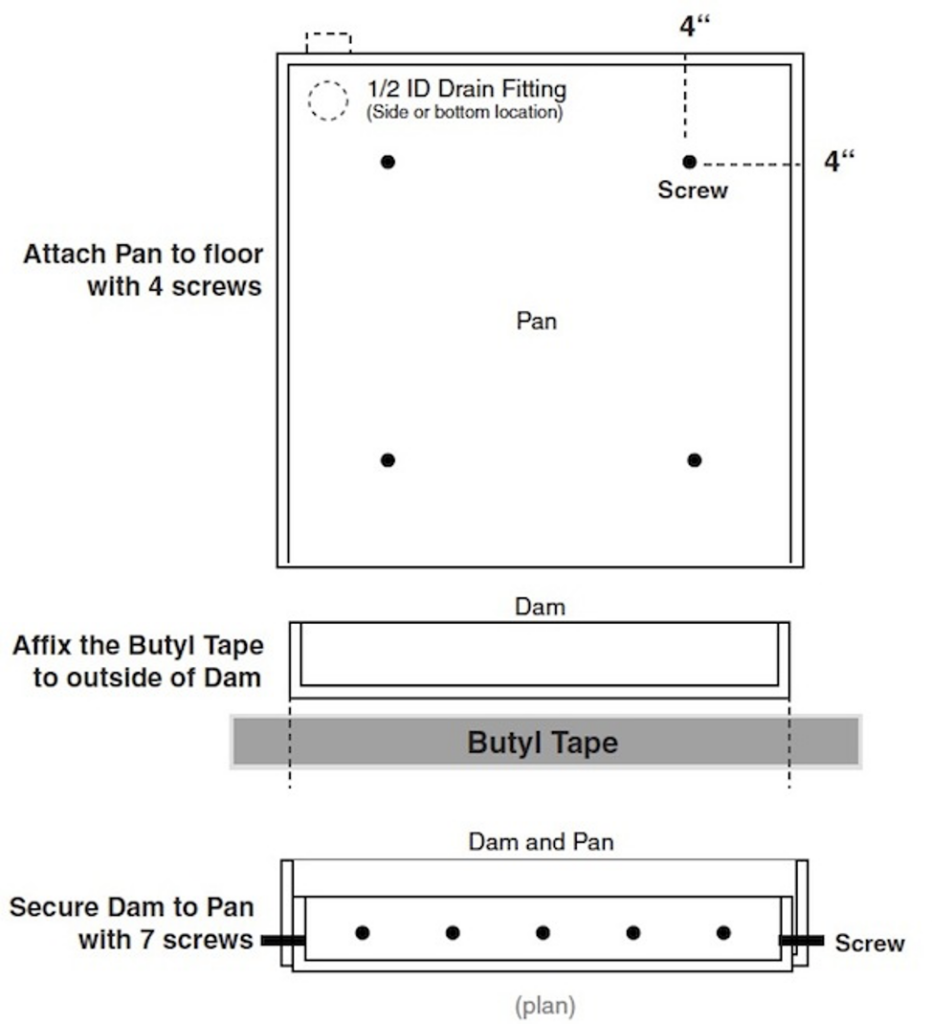
For added assurance against the possibility of water damage which could occur with any water-using the appliance, the Drain-a-wayTM pan has been designed exclusively for your Splendide or ARISTON washer.
Step 1: Place Pan on a solid level surface and align to opening. You may wish to mark the front edge to assure that the pan does not move during installation. You may trim the pan depth for shorter models. Assure the drain fitting center is open. Using the threaded fitting in the pan, install your drain routed to the outside of to a suitable drain.
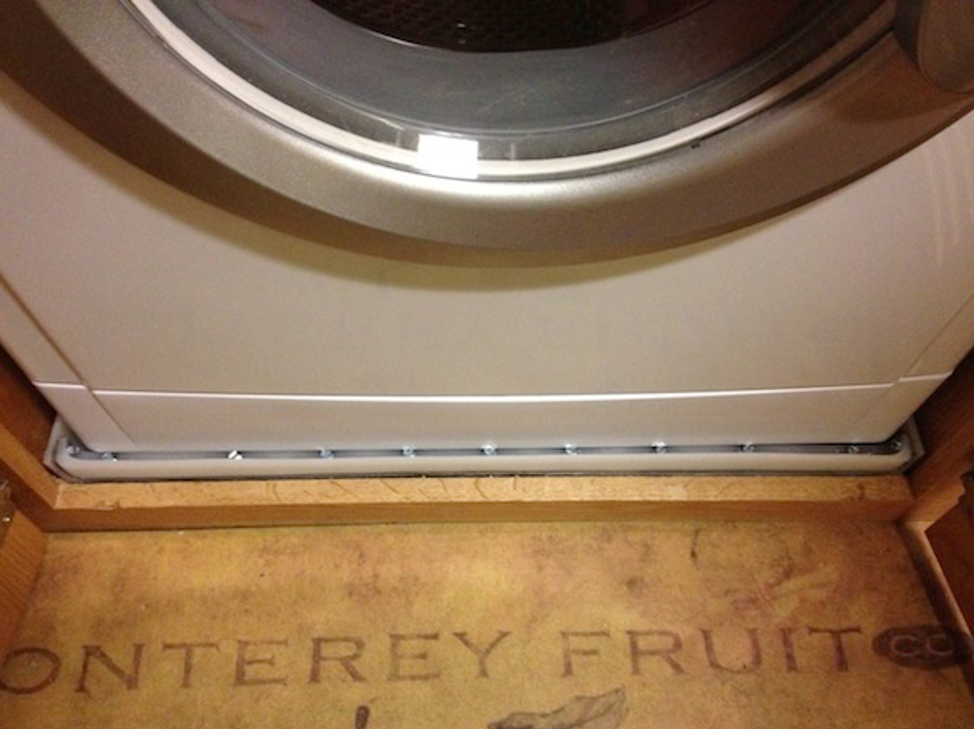
* Step 2: Attach pan to the floor with screws provided. The locations of these screws should not interfere with the washer feet when installing it into the pan (see right). When finished, place your washer near the pan, then slide it into the pan.
Step 3: Affix the strip of Butyl Tape (provided) to the underneath and outside-surfaces of the Dam, then place the Dam inside the pan as shown (see lower-right). Step 4: To secure the Dam to the pan, start from the center and with screws, work towards the sides to assure proper compression of the Butyl tape between the Dam and Pan.
*NOTE: Drain fitting accepts a 1/2 ID threaded fitting. To use, assure the fitting is open to drain. Install a threaded fitting with drain routed to the outside or to a suitable drain.