by Jerry Whiteaker 96 U270 36′
I had to replace the old TV as the sound quit. I was not sorry to see it go. I had a couple of goals in mind before I started. One was to get rid of the head knocker box above the steering wheel. The other was to make it look like Foretravel had done the job as much as possible. I had to solve several problems, the black paint on the ceiling carpet liner, which TV to buy, how to mount it, which finish using.
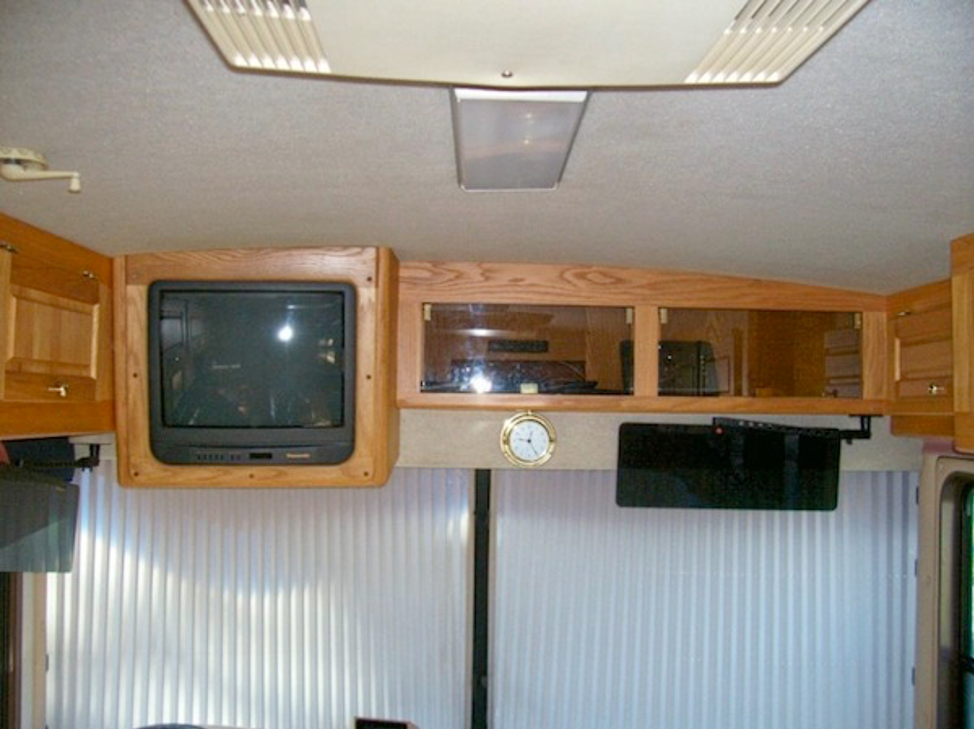
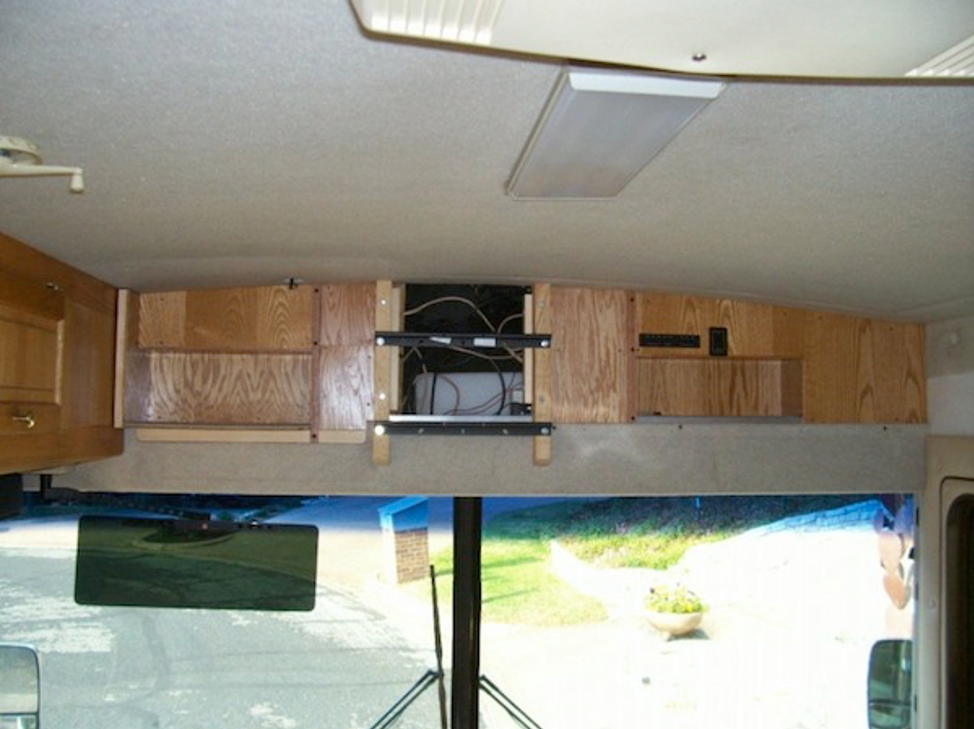
Removing the old box was not a problem as it is installed with screws. Same for the front cabinet above the windshield, although it is part of the cabinet above the door. After all the screws that attach it to the ceiling, front, and sides are removed, the whole thing can be moved a few inches left to clear the main door frame and worked down until the right side overhead cabinet is cleared. It is a tight fit.
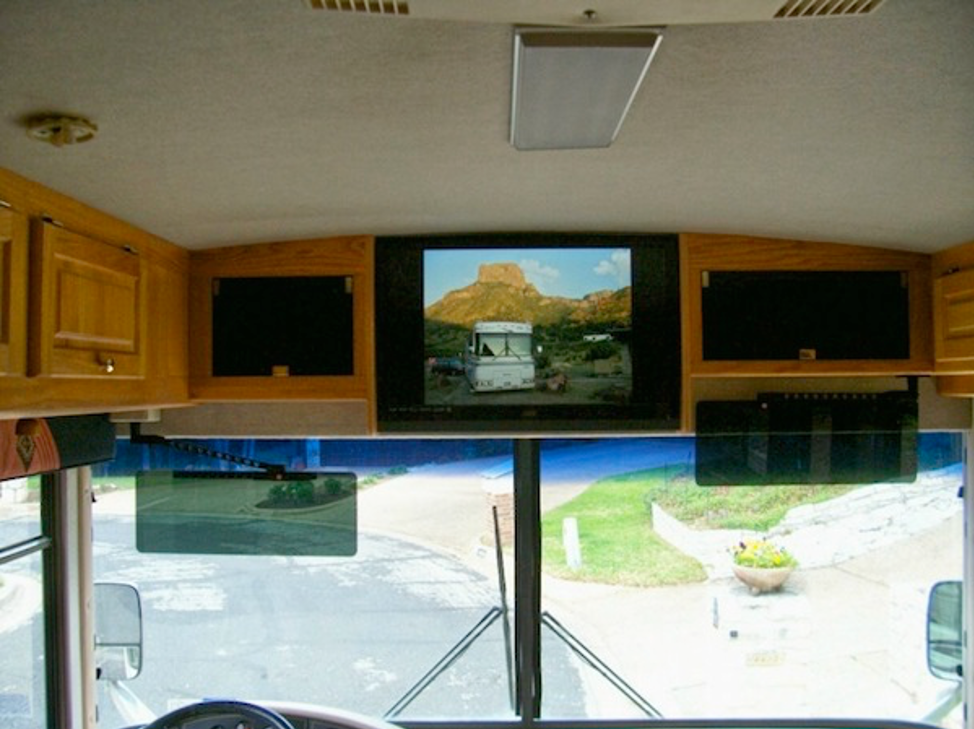
I decided to buy a TV that was no taller than the distance from the bottom of the carpeted plank behind the windshield to the ceiling. I also bought an LED model for low power consumption, weight, and thinness. Later found out that the super-thin LED models come with a con. The speakers are very small and the sound quality is a couple of notches above tin cans on a string. Expect to connect to other speakers, hi-fi, soundbar, etc for decent sound. I bought a Vizio E320 VP, a rather basic 32″ set with a good picture, 13.5 lbs, 50 watts (the old TV was 200 watts), a headphone jack, an optical audio output, but no other audio out. On sale at Dell for $330 plus tax. There is a USB port for a flash drive to look at pictures or whatever. I have purchased a Vizio VSB 200 soundbar as it is designed to work with their TV and remote, but haven’t mounted it yet. It will probably be attached under the shelf above the windshield. The connection is via the optical cable. I found a non-tilt and non-swivel wall mount (Barkan 30P) that will lock in place and allows easy removal of the TV for $20. I added some wood spacers behind the mount and can get my hand and arm behind the TV to connect and remove stuff. The TV power supply is a brick in the power cord and puts out 19 volt DC. If it had been 12 volts maybe the inverter could have been bypassed. I did find one small no-name TV that was like that.
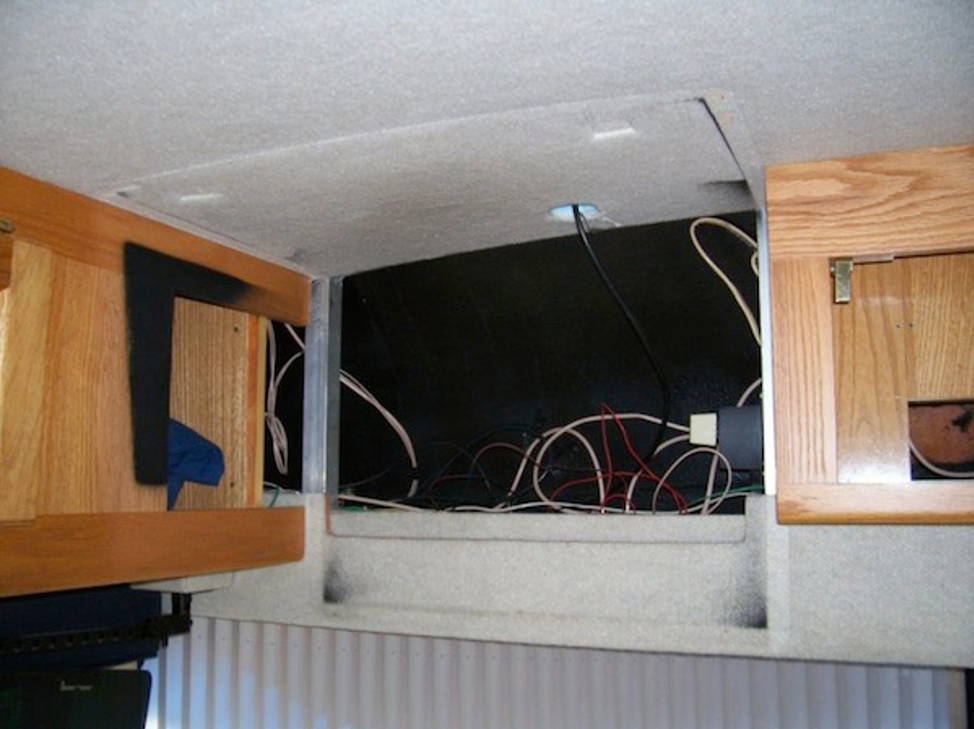
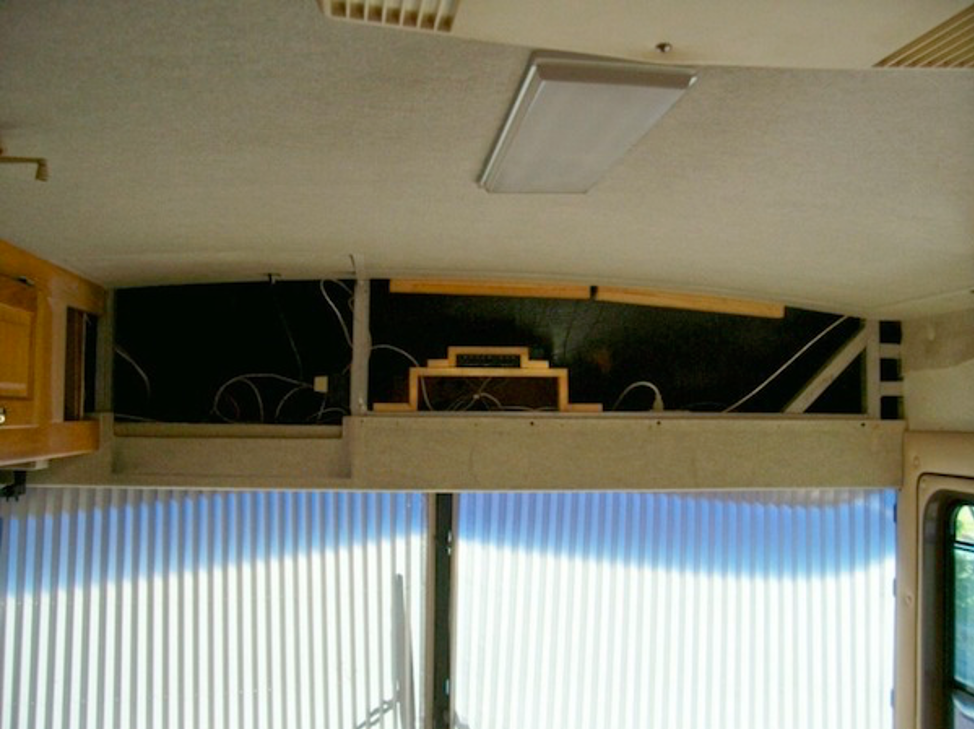
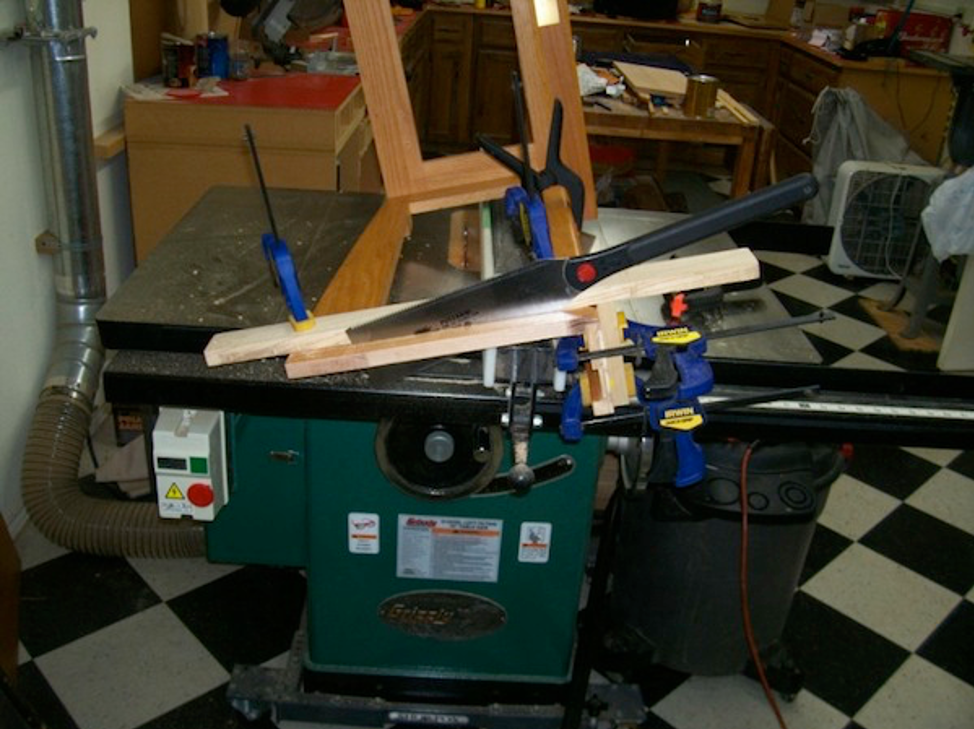
After removing the cabinets, I noticed the mostly unused space above the radio speaker shelf and the front cap. I decided to use that area to make the cabinet space larger for future equipment like a blu-ray player or satellite receiver. I sawed the front cabinet apart at the left side center post between the 2 plastic doors with the intention of using the middle cabinet part on the left side of the TV. Afterward found that if it was sawn down the middle of the post the TV would be exactly in the middle of the coach. I did this with a pull saw guided by scrap wood as there was no way I could run the bulky cabinet through my table saw. Also when I put the sawn-off cabinet next to the left side cabinets, it didn’t look right due to the shorter height. Made it taller to match the left cabinets and cover the cutout for the old TV. I had to find a new piece of plastic for the taller door opening. I did for $9 but it was a shade darker. Fortunately, there was enough plastic for the other door plus some leftover. While doing all this relocated the two 120v electrical outlets and added a 4 outlet box behind the TV. Relocated the antenna power supply, switch, and TV source selector box. Each cabinet now has a 120v outlet and a 1 3/4 hole for cables to the area behind the TV. I actually made a plywood cover for the opening behind the TV, then realized it would just be a pain to remove every time I needed to get in there, so trashed it. I did have to add a metal post to support the wall mount, it is just bolted in place to the metal frame already there.
I used oak and oak plywood, some of it salvaged from what was there before, or from new. I used Min-wax clear satin finish polyurethane for the finish. It is rather close to the original. Peter suggested Deft satin, but I had already started with the Min-wax. The paint came off with Motsenbocker’s #4 spray paint graffiti remover. The ceiling carpet is also known at boat hull liner carpet or just boat hull liner. I used an ice pick to somewhat lift out the carpet dents. The best way to compare the size of an old TV to a new one is to measure the height of the picture. If the height is the same the size of the news anchor will be the same. Taller height equals a bigger picture.
Doubt if this would have been possible without my small shop. I suppose we are living in the future. Back in the sixties, I read that in the future TVs would be a picture on the wall. There is still some work to be done on the flying car.

REAR 26″ TV
I bought a 26″ Vizio M261VP LED type to replace the old 13″ bedroom TV, uses about 30 watts, has internet apps which I may never need, and only 1.5″ thick. The cost was about the same as the 32″ one I installed in the front, due to the fact that it wasn’t on sale, and 1080p vs. 720i which doesn’t mean much in this small a size. I was also ready for the tinny speakers and added Logitech computer speakers feed by the earphone jack.
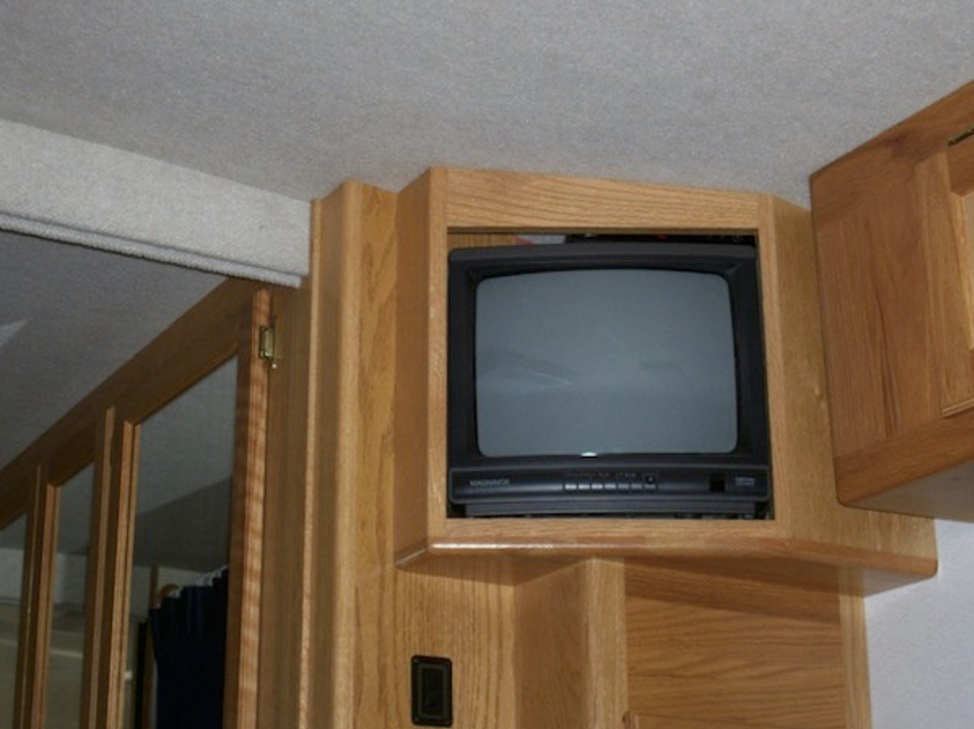
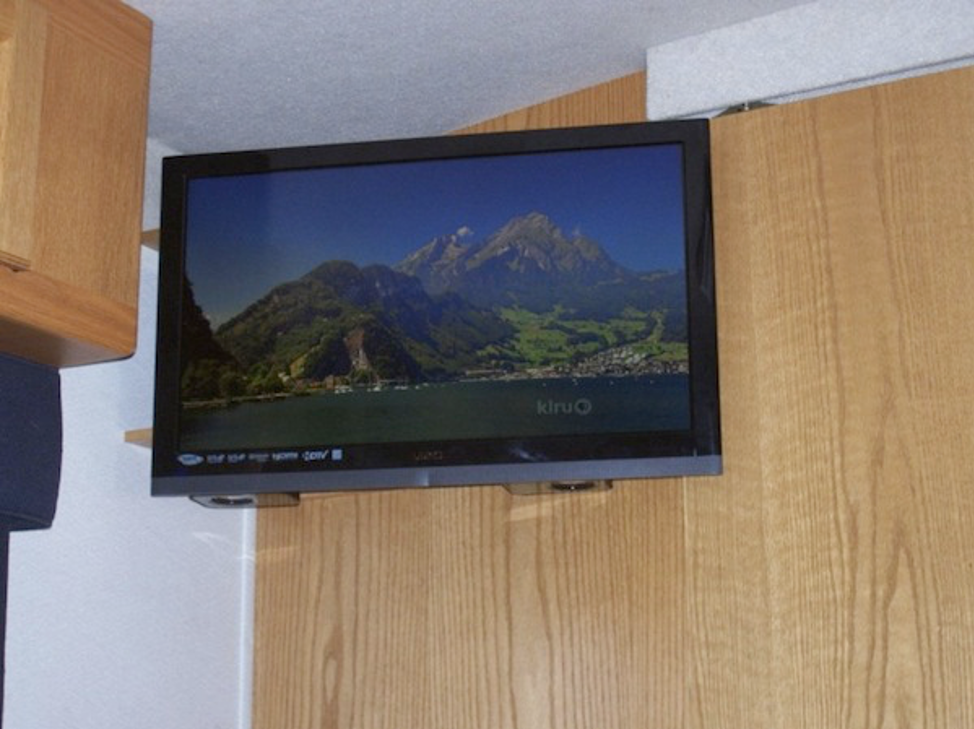
I decided to put it on the left side wall instead of the box the old TV was in. That will become another cabinet with the addition of a door and a little work inside, or I could install a radio or hi-fi set. Made a bracket of 1/4 and 1/2″ oak plywood for the wall mount and to hold the speakers.
I just fastened everything together with screws and fastened it to the wall with screws.
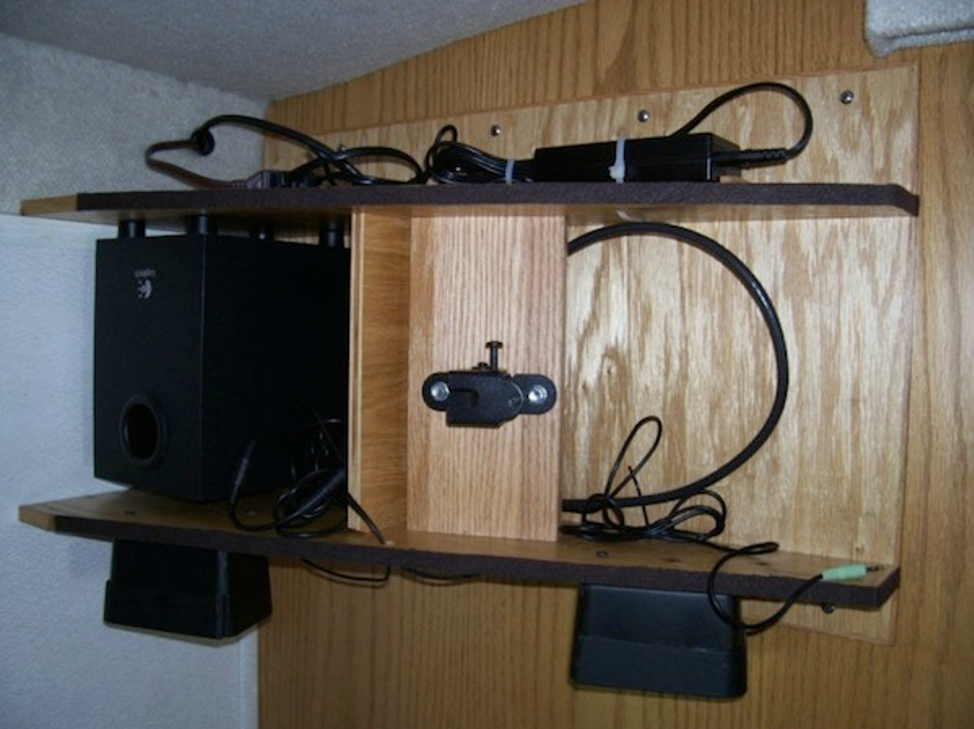
The wall does have some wood “studs” or bracing inside which I located with a stud finder for 6 of the 8 screws. The horizontal “shelf” pieces fit the back of the TV and the edges have felt so that the TV doesn’t move around. The bracket brings the TV out far enough that the sliding door can pass behind it. That also allows me to get my hand behind the TV to lock the mount and connect cables. The left edge of the TV is about 2″ from the wall, so I can reach the control buttons if I need to.
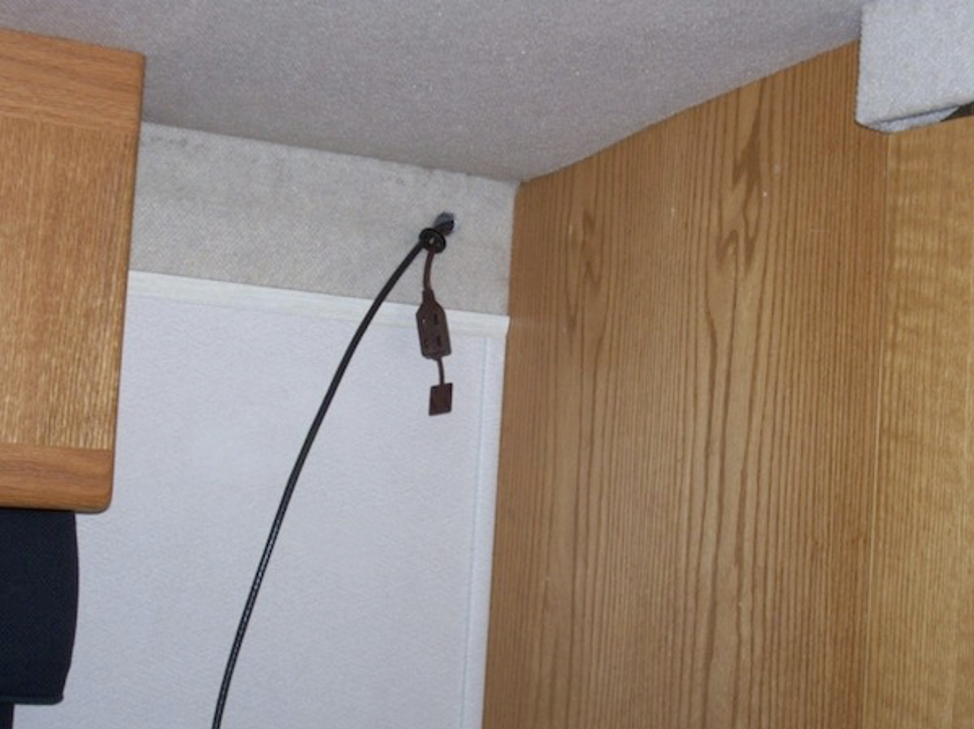
I drilled a 1″ diameter hole in the hollow wall-to-roof extrusion for the cable and electrical power. Electrical power is from a good 15′ extension cord connected at the microwave outlet. There was already a 1″ hole at that location. I had to cut the extension cord near the plug end and splice it back together after pulling the wire through the extrusion. The proper way to do this is to stagger the individual wire cuts about 2″ apart. This will maintain the polarity of the cord and make for a longer but less bulky splice. The holes have rubber grommets to protect the wire and must be installed before the splicing is done.
I did not tilt the screen down due to the possibility of reflections from the windows. From the left side of the bed, about 1″ of the screen is blocked by the corner of the upper left cabinet.